Transforming your front porch with decorative post wraps is an easy and affordable way to upgrade your home’s curb appeal. The right post wraps can take your porch from drab to fab, creating an inviting entryway that impresses guests and neighbors. But with so many materials and installation considerations, where do you start? This complete guide covers everything you need to know about selecting, measuring, and installing front porch post wraps.
We’ll go over the pros, cons, costs, and visual styles of common post wrap materials like vinyl, stone, wood, and aluminum. You’ll learn how to accurately measure your existing posts and choose a wrap style that enhances your home’s architecture. We’ve included step-by-step installation instructions for slipping on vinyl wraps, mortaring stone, and sealing wood boards. With the right information and preparation, you can install porch post wraps yourself in a weekend. Let’s get started transforming your home’s first impression!
Materials for Front Porch Post Wraps
When choosing materials for your porch post wraps, there are several options that each have their own advantages. The most popular materials are vinyl, stone, wood, and aluminum. Let’s look at the benefits and considerations of each type.
Vinyl Wraps
Vinyl is one of the most affordable and low-maintenance options for front porch post wraps. Vinyl wraps are molded plastic sleeves that slip over your existing wood posts to give them a fresh, customized look. Here are some of the pros and cons of vinyl wraps:
- Pros: Inexpensive, easy to install, available in many colors/shapes, durable
- Cons: Can look artificial, prone to mold if improperly sealed
Vinyl wraps are cost-effective, starting around $100 per post, and easy to install without special skills. You’ll have plenty of colors and designs to choose from like traditional flutes and rounds or more decorative twisted rope detailing. Just keep in mind that vinyl can look obviously artificial up close.
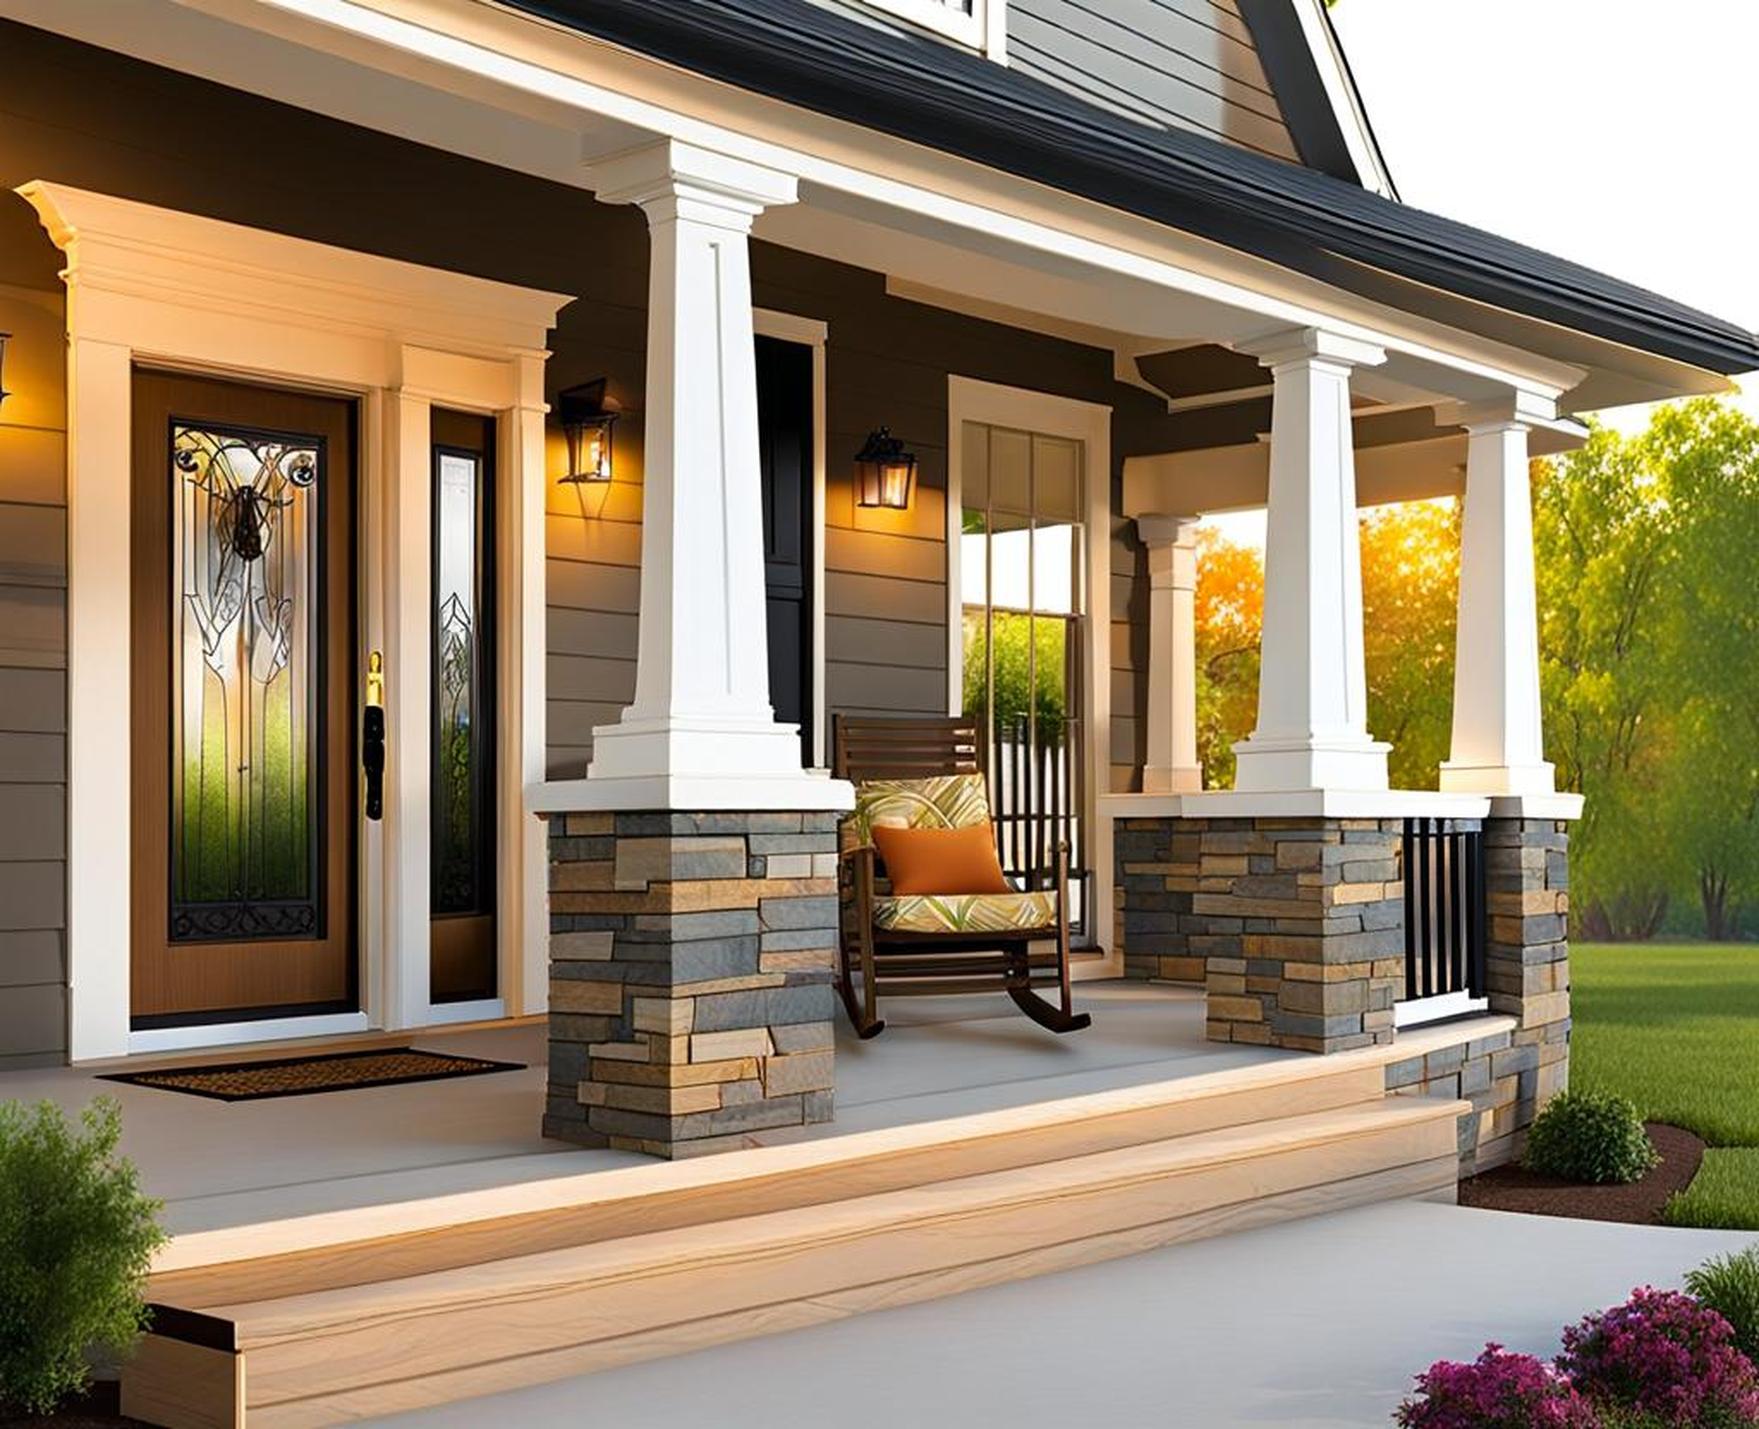
Stone Wraps
For a natural material that oozes curb appeal, stone wraps offer timeless beauty and enhanced home value. Faux stone wraps give the look of quarried stone without the weight and mess. Pros and cons include:
- Pros: Visually appealing, durable, increases home value
- Cons: Heavy, more expensive, mortaring can be tricky
Stone wraps run $200-$500 per post depending on size, but keep in mind they can boost your home’s value. With a variety of stone textures and shapes, you can find a style that fits your porch’s aesthetic. Just be prepared to put some muscle into the mortaring process.
Wood Wraps
If you want a more rustic, farmhouse charm, wood post wraps add natural beauty without breaking the bank. Here are some wood wrap considerations:
- Pros: Affordable, achieves rustic charm, variety of wood stain colors
- Cons: Requires regular maintenance and staining
Wood wraps made from cedar or redwood boards start around $50 per post. You’ll need to routinely apply stains and seals to protect the wood from weathering, but the work is worth the cozy, countryside vibe wood wraps provide.
Other Materials like Aluminum
In addition to the most common wraps, some less utilized options can provide benefits like extreme durability. For example, aluminum wraps are naturally weather-resistant and ultra low-maintenance. The strength of aluminum allows very thin wraps that install in minutes. If lifetime durability is your priority, aluminum deserves consideration despite its contemporary vibe.
How to Choose the Right Material
Now that you know the pros and cons of each material, here are some factors to keep in mind when choosing porch post wraps:
- Budget – Vinyl and wood wraps are the most wallet-friendly
- Desired aesthetic – Stone and wood provide the most natural curb appeal
- Maintenance – Vinyl and aluminum require almost none
- Durability – Stone and aluminum last the longest
Also make sure to choose a style that fits with your home’s existing architecture. For example, a stately, brick colonial home would suit stone wraps, while a cozy craftsman bungalow could pull off wood wraps elegantly. If you’ll be painting your porch posts, keep in mind lighter colors show less dirt and wear.
Measuring Front Porch Posts
Once you’ve settled on a material, proper measuring ensures your new wraps fit snug and look seamless. Here are some tips for measuring front porch posts with precision:
- Use a flexible cloth or metal tape measure
- Measure width, height, and corner-to-corner diameters
- Account for any taper or inconsistencies in shape
- Leave room for overlap and gaps if wraps don’t run flush
Carefully note each measurement and description since posts are rarely perfectly square or identical. Measuring corner-to-corner rather than just front and sides gives a truer shape. Write down notes and sketch posts if needed to remember nuances. Precision leads to the perfect fitting wrap installation.
Installing Different Wrap Types
Installation techniques will vary depending on your post wrap material. Here are some best practices for getting each type of wrap properly secured:
Installing Vinyl Wraps
Vinyl wraps make the installation process easy. Just follow these steps:
- Clean post surface so vinyl contacts it evenly
- Slide vinyl sleeve over post, aligning to desired height
- Secure top and bottom with adhesive, silicone caulk, or provided hardware
- Use a heat gun to smooth out any ripples
The flexibility of vinyl allows it to simply slip over and conform to the post shape. Just be careful not to damage the vinyl when sliding it on. And take time to properly seal the top and bottom for a finished look.
Installing Stone Wraps
Achieving full coverage with stone wraps requires proper mortaring techniques:
- Clean and dampen post surface
- Apply mortar adhesive to back of stones with trowel
- Firmly press stones into mortar, completely encasing post
- Let mortar cure fully before finishing
Work your way around the post, fully encasing it in stone until achieving the desired height. Pointing stones inward around corners creates a flush finish. Take care to completely fill mortar joints and gaps for an authentic look.
Installing Wood Wraps
Although wood wraps require a bit more measuring and cutting, the task is very doable with common tools:
- Cut boards to post width, allowing for seams
- Stain/seal boards on all sides before installing
- Attach boards with adhesive, nails, and wood glue
- Clamp tightly until glue dries completely
Pre-staining makes finishing faster. Let glue fully cure before exposing wood wraps to weather. Ultimately, proper measuring and centering boards results in tight seams and uniform appearance.
Enhancing Wraps with Decorative Details
To take your post wraps to the next level, consider complementing with trim accents:
- Add crown molding, lattice, or decorative caps on top
- Accent corners with subtle pilasters or ornate rosettes
- Paint, stain, or add designs for personalization
- Stencil on house numbers, monograms, or motifs
Embellishing with trim and paint details helps porch wraps seamlessly integrate into your home’s style. But don’t overdo it – the goal is an enhanced, not busy, appearance.
Maintaining Your Post Wraps
Depending on your material, proper care keeps your wraps looking like new:
- Vinyl – Wash periodically with mild cleanser to prevent dirt buildup and mildew.
- Stone – Re-apply mortar if cracks appear. Use a sealant to protect from weathering stains.
- Wood – Sand and re-stain worn areas every 1-2 years. Watch for splinters, cracks, and fungal growth.
- Aluminum – Wipe with a soft cloth to restore luster. Avoid abrasive cleaners that can scratch the finish.
Addressing issues early keeps wraps sound and beautiful for years. With the right prep and materials, it’s possible to get decades of enjoyment from high quality, well-maintained wraps.
We hope this guide has given you the preparation and confidence to install post wraps yourself. With some diligent measuring, material shopping, and elbow grease, you can complete this project in a weekend. Motivate yourself by remembering these home upgrade benefits:
- Porch wraps enhance curb appeal and invite guests inside.
- The right materials and designs complement your home’s existing features.
- Wraps require little maintenance when properly installed and cared for.
- You increase the value and impression of your home.
Follow this guide, and soon you’ll have a front porch dressed to impress. The finishing touches you add, like flower boxes, seating, and decor, will nicely highlight your wrap work. Before you know it, your home will be the envy of the neighborhood thanks to eye-catching, distinctive front porch post wraps offering unique, enhanced curb appeal and visual interest.
faux stone column wraps are an excellent choice for homeowners who want to add long-term curb appeal. The variety of shapes and styles available ensure there is an option to complement any home’s existing architecture. Combined with their weather-resistance and low-maintenance, stone column wraps make for an attractive upgrade that will retain its visual impact for years to come.
