Is your porch constantly invaded by bugs, making it impossible to relax outside? Do you dream of an extra living space to enjoy morning coffee or host backyard gatherings without pesky mosquitoes? Screening in your porch is a great way to get more use from your outdoor area, but hiring a contractor can cost a small fortune. With a little creativity and elbow grease, you can convert your porch into a stylish screened-in oasis while sticking to a budget. Read on for tips on planning, building, and decorating an affordable DIY screened porch addition.
Why Add a Screened-In Porch?
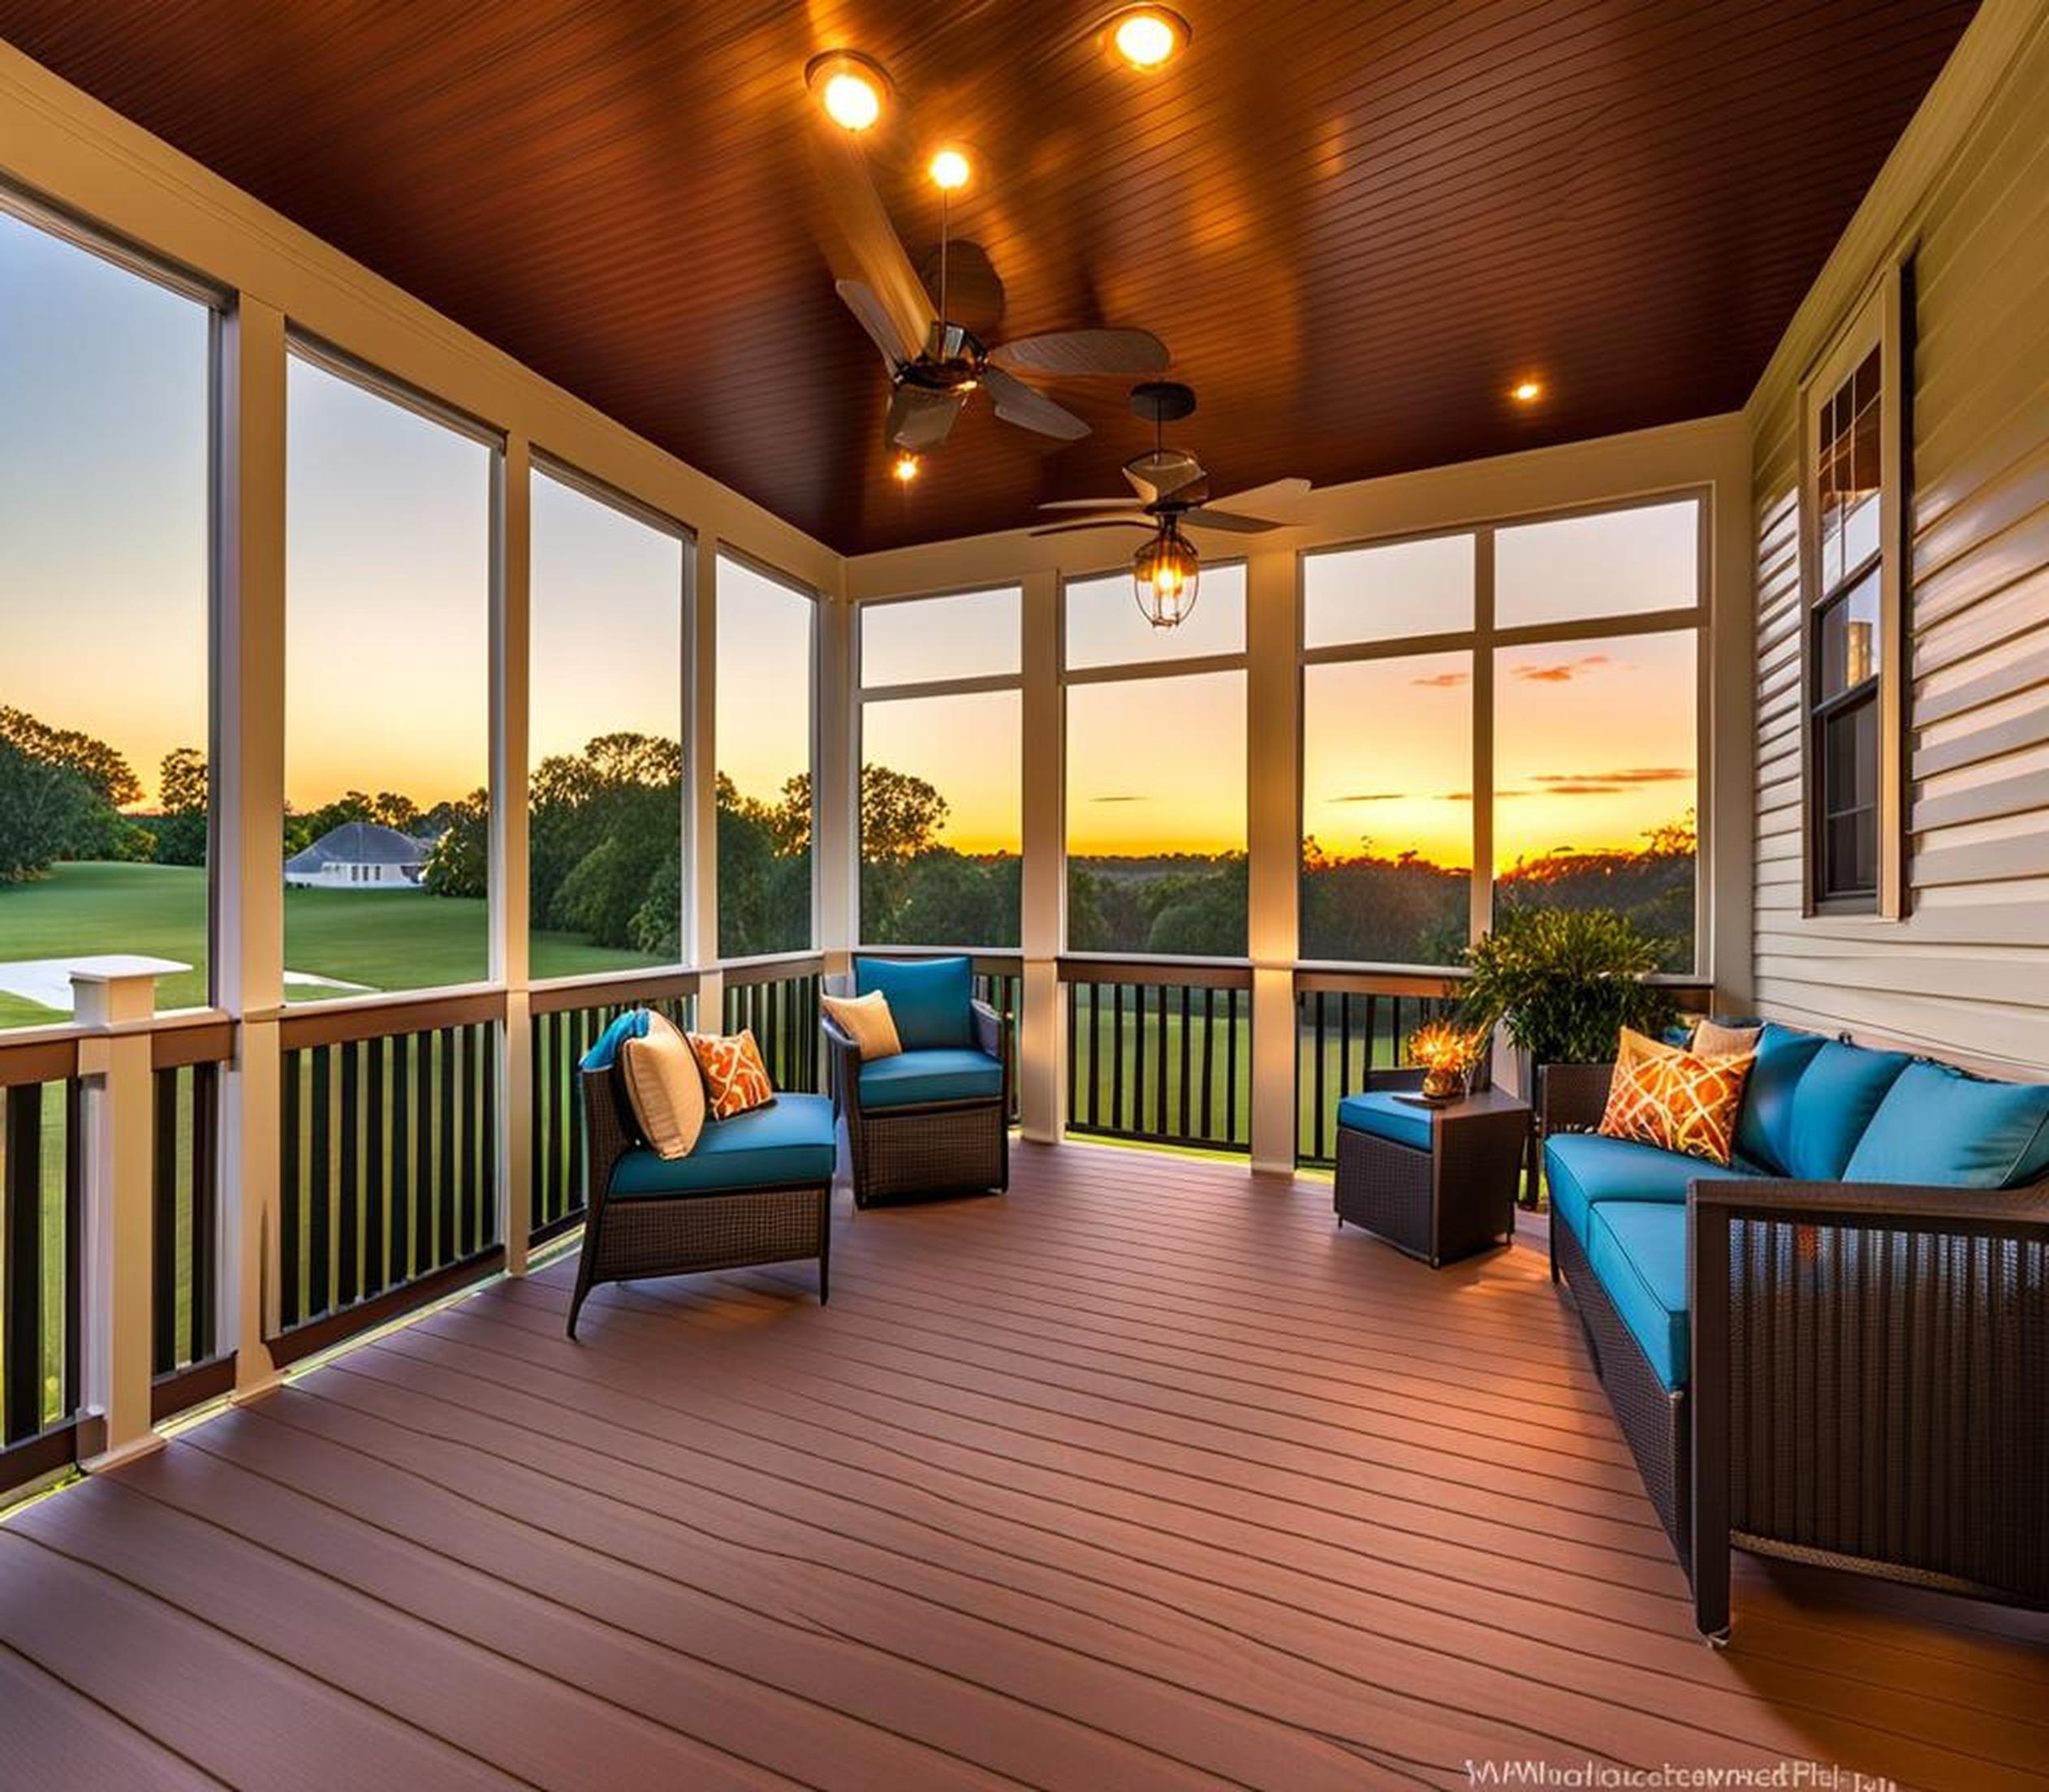
Screened-in porches offer many advantages over an open deck or patio. Keeping bugs out makes your porch far more comfortable for lounging, dining, or entertaining guests. You can fully enjoy the outdoors without getting bitten or distracted. A screened porch also essentially adds valuable square footage to your home, providing an extra space to relax, work, or pursue hobbies. With the protection from weather and pests, you’ll get more use from this versatile area.
Screening in an existing covered porch is also a smart investment, as it can significantly increase your home’s value. Enclosed porches appeal to potential buyers looking for additional living space. Realtors suggest a screened porch offers one of the highest returns on investment for home improvements. And nothing beats the appeal of extra room to enjoy fresh air in the warmer months.
Planning Your DIY Screened Porch
The planning stage is crucial when adding a screened porch addition yourself. Set a realistic budget and stick to it. Measure your porch carefully to determine the materials needed. If your budget allows, extending the footprint slightly or adding fun elements like corner windows can enhance the final design. Check with your city about required permits before getting started.
If you don’t already have a covered porch, adding a roof can increase costs quickly. We’ll go over money-saving options to build on a budget. Work within the existing framework of your home to take advantage of siding, electrical outlets, and overhangs that provide structure to build upon.
Affordable Screened Porch Kits
For those with a basic covered deck or porch already in place, an all-inclusive screening kit is an easy and budget-friendly option. Screen porch kits include everything you need – framing, screens, hardware, and instructions – to enclose your existing space. Kits with wood or vinyl framing range in price from around $700 for a basic 5×5 enclosure to $5,000 or more for larger or more intricate porch additions.
Benefits of using a pre-fab enclosure kit include simpler installation compared to building from scratch. The kits come with precision-fit screens and all necessary components so no guessing or last-minute purchases for missing items. On the downside, you are limited to standard sizes and designs. But for a straightforward square or rectangular DIY project, the convenience factor of a kit is tough to beat.
Quality kits can be ordered online or purchased at most home improvement stores. Choose rough opening sizes to match your existing structure for a custom fit. Having another person help with the installation is recommended since the framed screens can be unwieldy.
Alternatives If You Don’t Have an Existing Covered Porch
If you’re starting from square one without an existing covered porch, building a roof can increase project costs quickly. But that doesn’t mean screening in an area is out of reach. Here are budget-friendly options for adding a roof or cover:
- Use existing roof overhangs. If you home has eaves that extend out over a patio or deck, take advantage by screening just the area underneath.
- Build a simple gable roof. Triangle framed roofs are cheaper and easier to build than a hip roof. Use patio beams and rafters to construct an open A-frame roof.
- Attach a corrugated metal roof. Lightweight and inexpensive, metal roofing panels can be added to basic framing without needing to build roof rafters.
We recommend using the most affordable roofing material that fits your climate and design. Composition shingles, metal, and polycarbonate or fiberglass panels are all budget-friendly options to explore.
How to Install a DIY Screen Porch Kit
Adding screens to your porch with a kit is much easier than it sounds.
Tools needed: tape measure, ladder, level, drill, screwdriver, utility knife
Materials included: Screen panels, corner posts, top/bottom rails, spline, screen door, screws, instructions
Step 1: Measure area to enclose and order kit to exact size specifications
Step 2: Set corner posts following the measurements in kit instructions
Step 3: Attach top rails between posts using included hardware
Step 4: Hang screen panels onto frame, inserting spline along edges to hold in place
Step 5: Add bottom rails, door rails, and pre-hung door unit
Step 6: Trim any excess screening and reinforce joints
Following the kit directions closely will ensure proper installation. Having an extra set of hands helps when holding panels level and getting rails aligned.
Screens: Types and Installation
Screen material for your DIY porch enclosure serves the vital job of keeping pests out while allowing fresh airflow. Here are common economical options:
- Fiberglass screening: Low-cost and durable with smaller mesh holes to block tiny insects
- Aluminum screening: Affordable option that resists sagging and won’t rust
- Nylon mesh: Lightweight mosquito netting allows maximum breeze
Attaching screens securely is vital to prevent sagging over time. Use spline cord in the panel framing to hold edges of screening taut. Spline-lock channels make this process easy. Alternatively, specialized screen attachment screws provide a spline-free installation.
Make sure screened sections have some method of entry, such as a screen door. Hinged access panels placed strategically also allow you to reach outside when needed.
Customize with Windows, Doors, and Skirting
Personalizing your DIY screened porch with custom windows, doors, and architectural detailing will give it extra style. But specialty add-ons can also blow your budget quickly. Here are budget-friendly ways to make your enclosure unique:
- Size windows to work with standard, affordable sizes
- Opt for basic window styles like single-hung or sliding
- Check out salvage/resell stores for discounted secondhand doors and windows
- Use trim moulding or siding pieces as decorative skirting under the enclosure
When creating any openings in your framing, be sure to reinforce properly. Surrounding windows, doors, and access panels with additional corner posts and headers will prevent structural issues down the road.
Outfitting Your Screened Porch on a Budget
Furnishing your new screened-in porch doesn’t have to empty your wallet. Here are tips for decorating on a budget:
- Shop secondhand stores for unique vintage patio furniture finds
- Repurpose old kitchen or dining sets by adding weatherproof cushions
- Choose inexpensive wire fans and cafe string lights for overhead lighting
- Buy exterior peel-and-stick vinyl tiles instead of pricier composite decking
Don’t be afraid to mix and match colors and styles. The eclectic look is popular for outdoor living spaces. Add splashes of color with inexpensive outdoor pillows and rug accents purchased on sale.
Add Character with Plants, Curtains, and Decor
Take your enclosed porch up a notch with easy DIY touches:
- Hang airy curtains for adjustable shade and privacy
- Add hanging planters and climbing vines for natural greenery
- Paint or stencil floor tiles to look like more expensive pavers
- Make your own hanging signs, wind chimes, and unique wall art
Salvage old windows from garage sales to give your porch more character. For additional color, use repurposed wood to craft planter boxes or shutters for windows. Your local home improvement center likely offers workshops on DIY projects like these for beginners.
One great perk of screened porches is the extended use you get in spring and fall. Unlike an open deck, you can utilize the space even when it’s a bit too cool, windy, or wet outside for full comfort. Here are more ways to get the most from your new porch addition:
- Add portable heaters, fans, lighting to use into fall/winter
- Switch to weather-resistant outdoor furniture
- Decorate for each season – lanterns in fall, twinkle lights in winter etc.
- Turn your porch into a 3-season room for maximum enjoyment
After all the time and effort you put into building your budget-friendly screened-in porch, be sure to get the most value from the upgraded outdoor living area. The extra space to relax and entertain will be well worth the investment of your DIY makeover!
