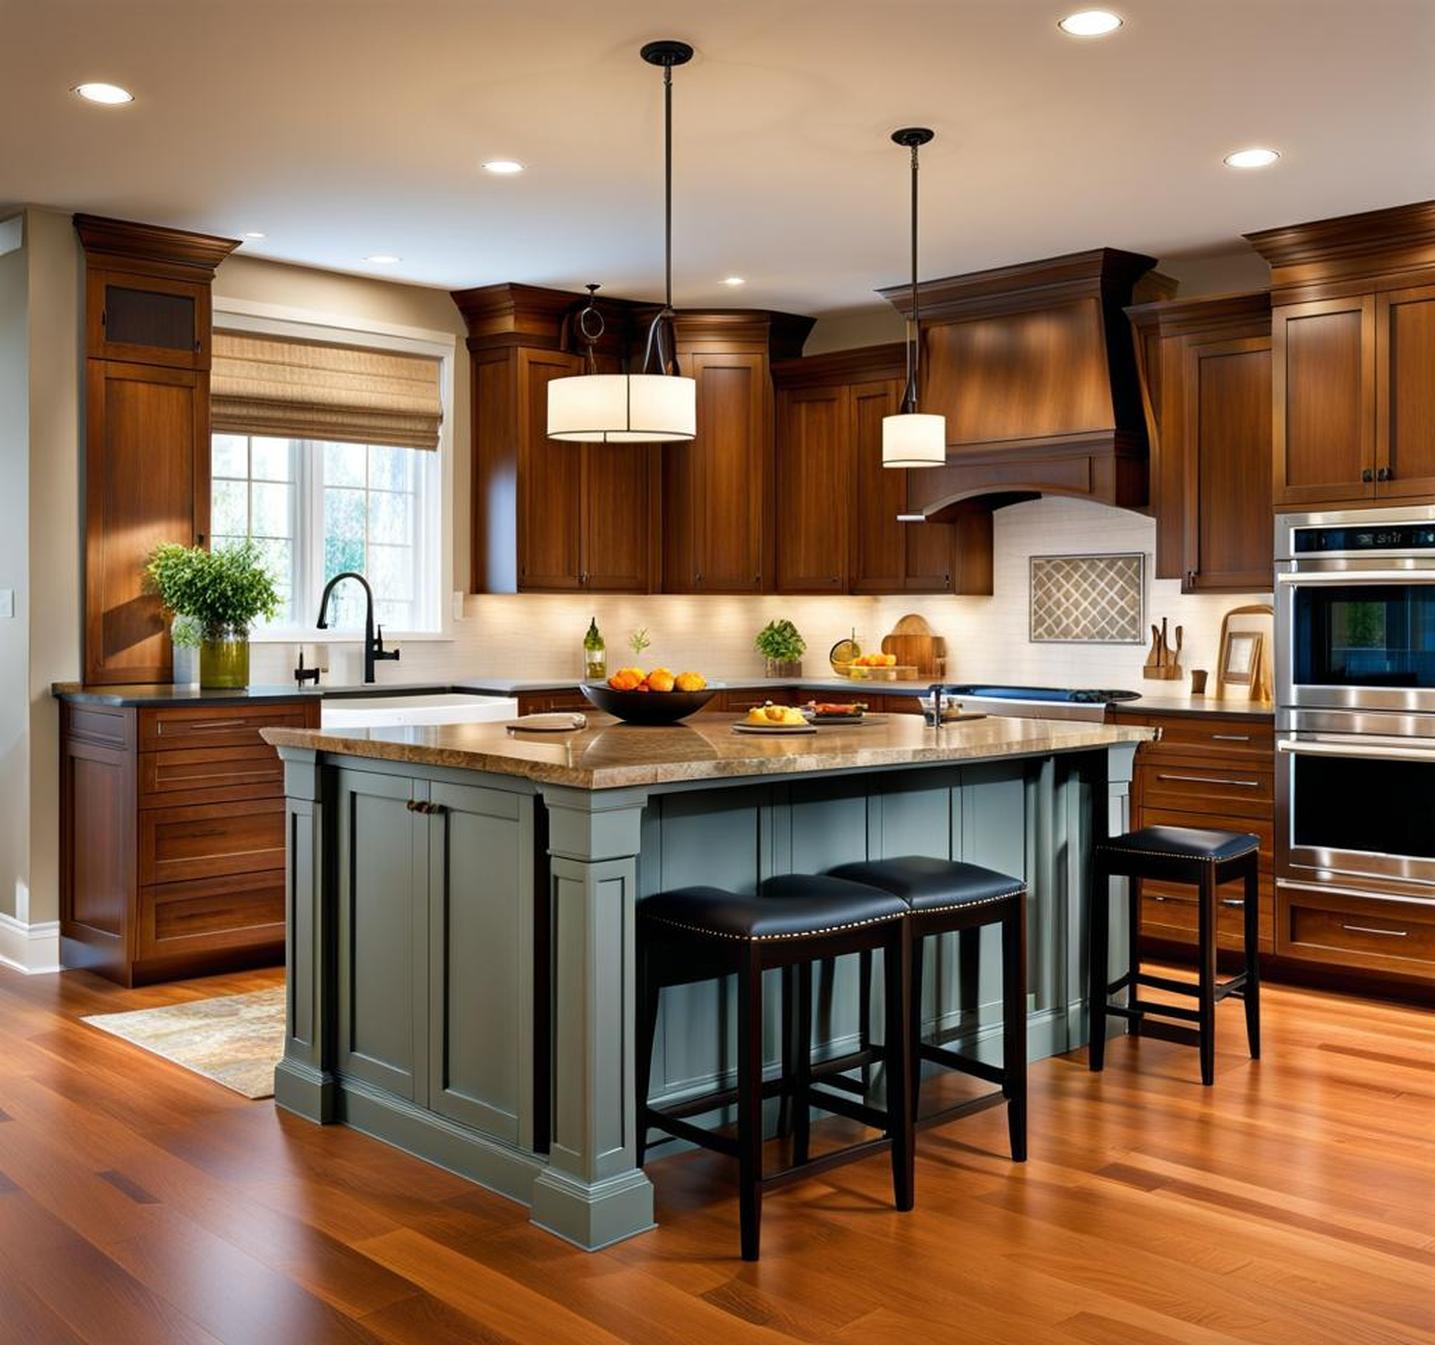
A kitchen island with seating takes the functionality of a standard island to the next level, creating a comfortable space for dining, entertaining, or casual hangouts in your home. With the right design, you can have a multipurpose island that provides extra prep space and storage while seamlessly incorporating stools or chairs for eating and socializing.
Building your own kitchen island with seating is a fulfilling DIY project for intermediate woodworkers. With good plans and attention to detail during the building process, you can create a custom island tailored to your space and needs.
Designing Your Dream Island
Careful planning is the first step to building a kitchen island that both looks amazing and functions effortlessly. Consider the following design factors as you envision your ideal island oasis:
Space Planning and Layout Options
Start by measuring your existing kitchen space and mapping out different potential configurations. Standard depths tend to range from 25-37 inches deep and lengths span anywhere from 4 to 10 feet long. Consider existing doorways, appliances, and foot traffic patterns when planning placement. Islands can utilize various shapes and sizes – rectangle, square, oval, or L-shaped are all great options depending on your needs.
Determining the Height
Standard kitchen countertops tend to fall between 34-37 inches high. For a designated seating area, a height of 36 inches provides comfortable dining. If you prefer more casual stand-up eating and mingling, consider a counter height of 42 inches. Bar stools generally require a few extra inches of overhang space, which can help define the seating zone.
Selecting the Right Materials
When choosing finishes, durability and your personal style should take priority. Granite, marble, and quartz make classic countertop materials that can withstand heavy use. Tile, reclaimed wood, or concrete are also attractive, more budget-friendly options. For the base cabinets, stock or custom-built both work well. Opt for cabinet doors and hardware that match your existing kitchen finishes.
Structural Elements for a Sturdy Island
Proper structural support ensures your island never wobbles or worse. A well-built frame and base can handle the additional weight of people sitting around it.
The Base
Islands can be supported in a few different ways. Legs placed at the corners or midpoints offer one solution. Attaching directly to the floor or walls is another option. A combination of legs and side supports helps fortify larger islands. Remember to account for toe kick access – a recessed area that lets you stand closer to the island.
Reinforcing the Structure
Adding interior framing, brackets, and braces prevents any weak points that could cause sagging over time. Consult building codes and work with an engineer for exact load specifications. A sturdy base coupled with additional reinforcements like corbels or cantilevers will allow ample overhangs for seating space without worry.
Building Your Island Step-by-Step
Once you finalize the structural design, the fun part begins! Follow these steps for seamless island construction:
Material Preparation
Gather your plans, supplies, and tools. Carefully go over cut lists and pre-cut your countertop slabs and cabinet panels to size ahead of time. This prep work reduces errors and makes the building process smoother.
Assembly
Start by fastening together the base framework and ensuring it is plumb and level. Then install cabinet boxes, shelving, and drawers per your plans. Affix doors and test that everything operates properly before moving on. The countertop should be the last piece attached after confirming all measurements.
Island Completion
Attach any remaining trim pieces to hide gaps and imperfections. Consider pendant lights above the bar area for both form and function. Use painter’s tape and drop cloths to protect your new island from dings during the rest of the kitchen remodel.
Maximizing Storage
A kitchen island provides the perfect opportunity to add storage and organization right where you need it most. Here are some ideas for outfitting your island with smart compartments and conveniences:
Drawer Designs
Standard drawer heights range from 5-7 inches tall, but consider your needs. Deep drawers around 18-24 inches could hold mixing bowls and bakeware. Shallower drawers nicely corral spices and utensils. Include dividers and trays to keep items neatly in place.
Doors and Shelving
Mix different cabinet sizes and orientations to maximize every inch. Try a vertical drawer stack with an adjacent full-height cabinet for large appliances. Add adjustable shelving to accommodate various heights. Spinning “lazy susan” shelves increase corner access.
Smarter Storage Solutions
Take advantage of the island real estate by incorporating specialized pull-outs like cutting board and towel holders. Use racks or baskets for frequently used items like spices. Built-in trash and recycling bins keep mess contained.
Styling Your Seating Area
Choosing comfortable stools and arranging them thoughtfully completes your kitchen island oasis. Keep these seating considerations in mind:
Stool Styles and Design
Select stools with a height that aligns with your counter height. Materials like wood, leather, or acrylic each have their perks. Style the stools to match your kitchen aesthetic – from traditional carved wood to sleek modern chrome. If space allows, consider incorporating some stool backs and armrests for additional comfort.
Arrangements for Companionship
Arranging stools face-to-face promotes conversation and interaction. This works well for curved or oval shaped islands. Lining them up side-by-side allows you to squeeze in extra seating and is ideal for rectangular islands. Make sure to leave ample legroom and pathways to enter and exit the area.
Finishing Touches
Add personalized details like placemats, throw pillows, or greenery to make the space inviting. Hanging pendant lights above the seating area illuminates both the counter space for tasks and the social space for gathering.
Entertaining Perfected
With a well-designed kitchen island and seating, you’ll wonder how you ever lived without it! Enjoy the many benefits this multifunctional space offers:
- Extra seating and dining space for gatherings large and small
- Convenient meal prep with everything within reach
- A place for kids to do homework while you cook
- The perfect spot for wine and appetizers when entertaining
- Casual seating for coffee, cocktails, or conversation
The island becomes the heart of the kitchen – a place for cooking, eating, mingling, and making memories. All of the upfront thought and effort spent constructing your dream island pays off in the day-to-day enjoyment it provides.
Building a kitchen island with seating is an involved yet gratifying project. From the initial design phase all the way through decorating and entertaining, embrace the process and the possibilities. Savor the pride of creating a beautiful, functional centerpiece for your kitchen. Most importantly, enjoy the memories made and moments shared around your island for years to come.
You can build a kitchen island with good plans and basic skills. Define how you want the space to function, both ergonomically and socially. Choose finishes that reflect your personal style. And don’t forget those final touches like lighting and decor that make it truly your own. For a gathering place tailored to you, roll up your sleeves and get ready to build!
