Outdoor kitchens have become increasingly popular spaces for grilling, dining, and entertaining. However, choosing the right countertop material that can withstand the elements is crucial. Natural stone and tiles can crack, stain, or fade when exposed to harsh weather over time. Enter epoxy resin–this versatile material creates a glossy, waterproof barrier that protects outdoor countertops for decades with proper care. Read on to discover why more homeowners opt for epoxy resin to upgrade their outdoor cooking space.
Overview of Epoxy Resin for Outdoor Kitchen Countertops
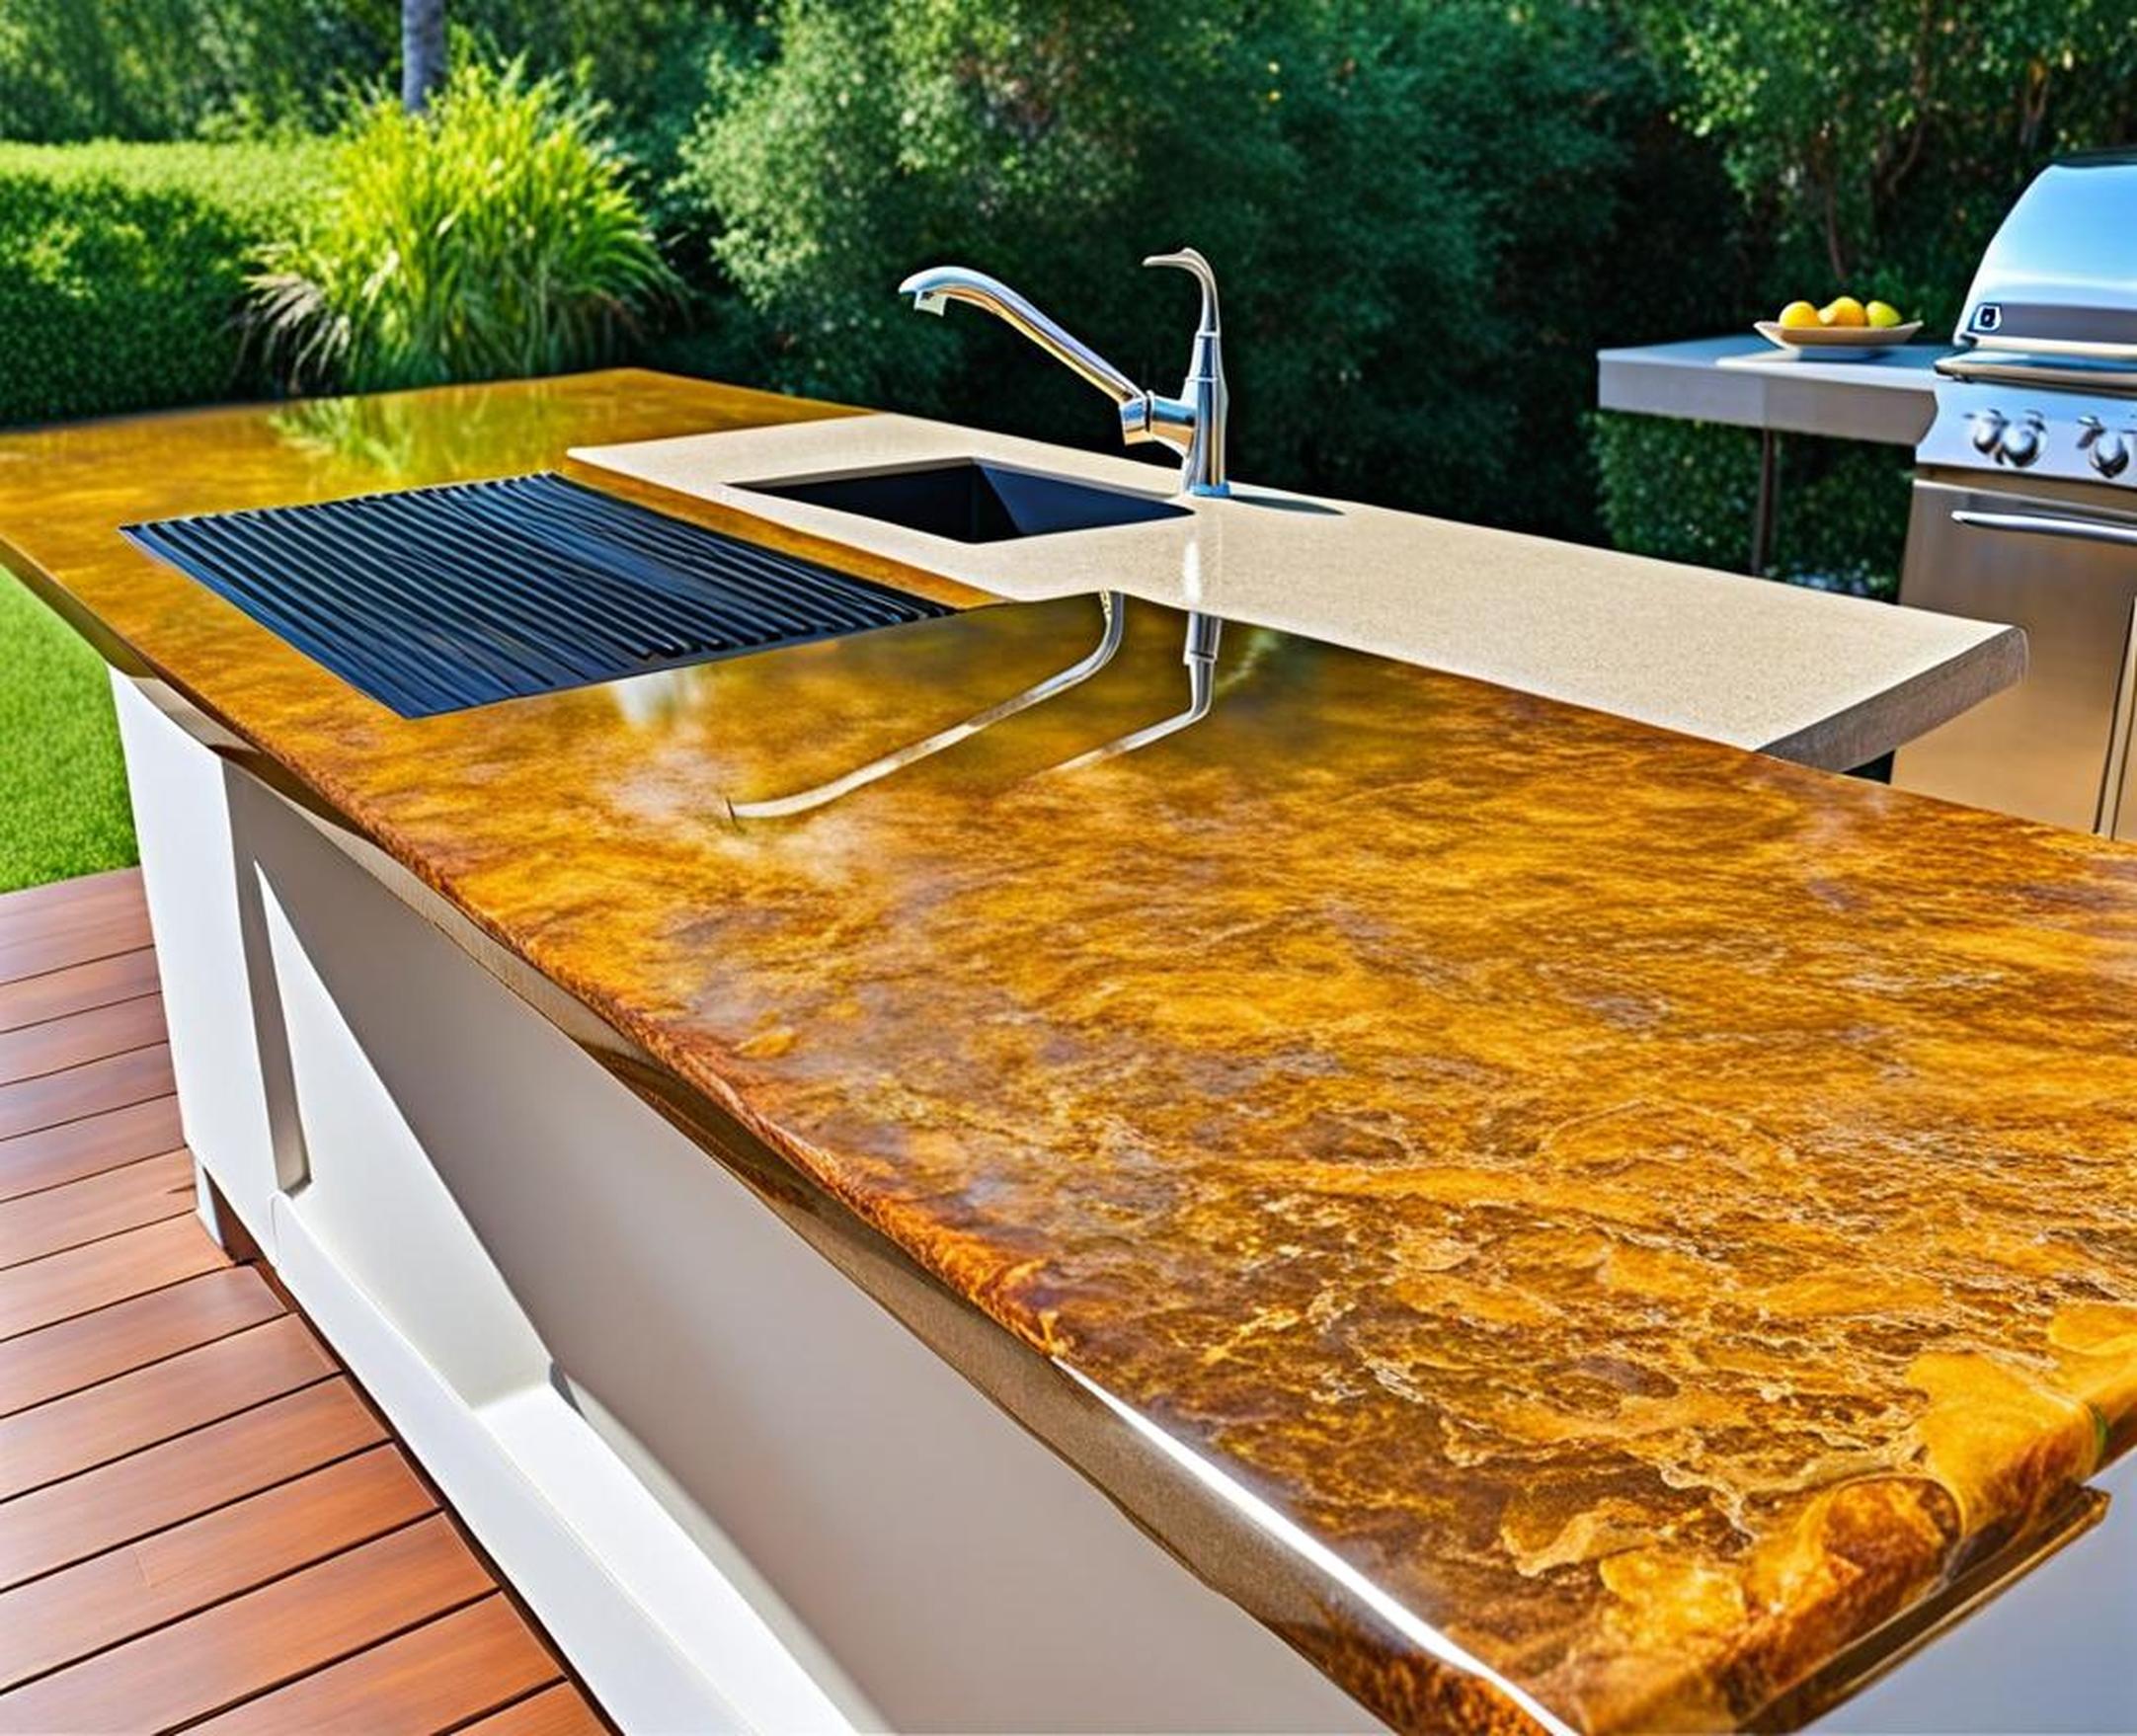
Epoxy resin is a two-part adhesive compound that permanently seals and bonds to surfaces once mixed and applied. It cures to form a thick, glossy, and completely waterproof coating.
Outdoors, epoxy resin has numerous advantages over natural stone, tile, concrete, and wood:
- Doesn’t fade, stain, crack, or peel from weather exposure
- Resists scratches, impacts, heat, and other physical damage
- Easy to clean and maintain
- Infinite custom color options available
- Much more affordable than granite or marble
From rustic country styles to modern minimalist, epoxy resin lets homeowners reinvent dull patios into their dream outdoor cooking oasis. Match any color scheme or design taste imaginable.
Why Choose Epoxy Resin for Outdoor Kitchen Countertops
Outdoor kitchens require building materials that can withstand Mother Nature’s elements. Epoxy countertops check all the boxes–not only waterproofing but also exceptional durability.
Weather and Water Resistance
Outdoor kitchens endure it all: sun, rain, snow, sleet, and wide temperature fluctuations.
Once cured, epoxy resin forms permanent bonds at a molecular level–water cannot penetrate below the surface. Rugged epoxy maintain its integrity and appearance despite years of exposure to rainfall, high humidity, freezing winters, cyclical thawing and refreezing.
Without moisture absorption issues, epoxy won’t swell, warp, or crack like natural wood or stone. No leaks, chips, peeling, mold, or other water damage either.
Durability and Longevity
While most tiles, laminates, and wood surfaces scratch and show wear after a few years outside, epoxy resin countertops resist signs of aging and heavy usage beautifully.
The resilient material stands up to cooking, hot pans from the grill, sharp knives, abrasive pots, and daily wear and tear exceptionally well. Properly mixed epoxy forms thicker and stronger bonds than concrete.
Don’t let scratches, wine spills, or grease stains ruin your outdoor sanctuary–epoxy surfaces clean up easily by sanding or refinishing.
With proper installation and care, expect 20-30 years of superb performance outdoors. No other mainstream countertop material lasts as long exposed to the elements.
Design Flexibility
While natural stone limits creative liberty, epoxy resin offers unlimited potential to complement your unique taste and style.
Achieve a high-end, seamless look for a fraction of the cost of quartz or marble. Enhance dull concrete or dated laminate in any color tone imaginable–earthy hues for Tuscan patios, vibrant colors for tropical vibes.
In addition to solid colors, introduce dimension by embedding sea glass, crushed shells, coins, dried flowers, photos, and other decorative objects into the epoxy topcoat.
Wood, tile, or concrete–transform any existing countertop surface without a complete tear out. Epoxy resin strongly adheres as a new protective top layer.
Preparing Your Outdoor Countertop Surface
Achieving flawless, long-lasting results with epoxy resin starts with proper surface preparation before application.
Evaluating Existing Outdoor Countertops
Over time, outdoor countertops settle resulting in slight dips and depressions on the surface. While tiles, concrete, or wood may seem flat to the eye, even 1/16 inch variances will affect epoxy curing and performance.
Carefully inspect existing counters for low spots, pop ups, large cracks in concrete, missing grout, splinters, or holes. Use a long level in several spots to identify uneven sections.
Before applying epoxy, fill small defects with patching compound. For significant damage, re-pour concrete, or use self-leveling underlayment to produce a flat, smooth finish.
Finally, roughen up surfaces by lightly sanding to help the epoxy properly bond. Then clean thoroughly before resin application.
Building New Outdoor Countertops
While epoxy resin refreshes existing surfaces beautifully, you can also create modern new countertops as an alternative to concrete, tile, or stone.
Use inexpensive substrates like marine grade plywood secured to a sturdy frame or base. Some choose concrete backerboard, reclaimed wood, or other unique materials too. Securing an underlying framework prevents movement and future cracks in the epoxy.
When selecting substrates, opt for surfaces smooth enough for easy resin spreading without telegraphing imperfections through the topcoat. Avoid repetitive physical patterns like wood grain.
Achieving a perfectly level platform takes precision–but prevents epoxy resin pooling and uneven curing issues. Building up low areas may require an intervening layer like self-leveling concrete prior to epoxy application.
How to Apply Epoxy Resin Outdoors Step-By-Step
Applying epoxy resin requires carefully following manufacturer’s mixing, spread rate, and drying recommendations–especially true outdoors.
While the process takes 2-3 full days, it costs thousands less than natural stone with money left for Grillmasters grill!
Mixing and Preparation Basics
Epoxy resin comes in two parts–resin and hardener–premeasured for error-free formulas. Mix ratios vary slightly by brand, so follow individual instructions closely.
Proper proportions and thorough mixing allows epoxy to cure as a durable, water-resistant plastic. Incorrect mixing won’t harden fully or achieve maximum strength.
Always use clean, dry containers and stir sticks to prevent contamination. Stir gently for 3-5 minutes scrapping container sides to fully incorporate.
Applying Epoxy Resin Outdoors
Working efficiently is key–most epoxy brands reach maximum thickness after pouring in one session. Apply too little, and protection suffers. Too much causes runny areas tough to level out.
Spread batches immediately after mixing using long metal trowels, putty knives, paint rollers or squeegees. Maintain even thickness moving left to right systematically.
Between thin coats, carefully pierce visible air pockets with a pin or syringe. Then use propane torch on lowest setting to eliminate smaller bubbles.
Repeat for two or three layers until reaching desired thickness around 1/8 inch or greater for demanding outdoor use.
Curing and Drying Considerations
Curing epoxy resin requires precisely controlled conditions–especially challenging for outdoor applications.
Expect tack free drying times 2-3x longer than indoor projects. Full curing and maximum scratch/heat resistance takes up to 7 days.
Avoid humidity, condensed moisture, rain, drips, or direct sunlight exposure while resin hardens over 48-72 hours.
Maintain ambient temps between 75-90 degrees if possible. Shift portable heaters or fans outdoors if weather fluctuates beyond epoxy’s safe zone.
Be extremely diligent with pets, kids, rearrange lawn decor to prevent accidental surface mars for a week post application. Consider cordoning off work areas.
Applying Top Coat Finishing Layers
Multiple top coats maximize moisture protection and longevity for outdoor epoxy countertops.
Consider three total pours for up to 1/4 inch thickness–especially if surface takes abuse from heavy platters or abrasive cookware.
For added resilience apply an extra layer of polyurethane, marine epoxy or spar varnish after initial curing. This guards against UV damage, oxidation, and surface scratches through years of BBQs.
Take care removing any deck screws, forms, or materials embedded in previous layers after full hardening. Prevent top coat punctures or gouges.
Caring for and Maintaining Outdoor Epoxy Countertops
With proper installation and care, epoxy resin countertops enhance outdoor living spaces for decades.
Regular Cleaning and Maintenance
Prevent build up of dirt, oil, smoke residue, and other grime by washing epoxy countertops regularly.
Use mild detergent, soap and water or all-purpose cleaners without abrasive chemicals. Avoid scouring pads, steel wool, or materials that could scratch the protective top coat.
Rinse thoroughly after washing. Wipe away standing water that could pool and leave mineral deposits over time.
Re-seal outdoor epoxy every 2-3 years by sanding lightly and applying 1-2 fresh top coats. This restores UV protection and water beading abilities dulled by exposure.
Repairing Damage
Oops. Despite durability, life happens. A dropped stoneware platter or wine glass leaves behind scratches or chips.
Thankfully, minor epoxy resin damage often disappears through light sanding and resealing. Or fill scrapes with coloring epoxy paste for quick patches.
For noticeable cracks or extensive damage, grind down entire surface with palm sander before recoating. Blend repair layers evenly with surrounding areas.
Beautiful, Waterproof Epoxy Countertops Transform Outdoor Kitchens
Pairing epoxy resin countertops with your new outdoor kitchen reimagines patio possibilities compared to porous tiles or natural stone.
Expect compliments on brilliantly modern, durable surfaces shielding grills, appliances, and prep space from the stresses of outdoor exposure.
Budget Friendly Upgrade Over Natural Stone
Why spend thousands on marble or quartz that gradually etch, pit, and dull outside? Epoxy costs a fraction yet outperforms its higher maintenance counterparts.
Kitchen upgrades no longer require financing like granite or professional installation fees. With proper planning, even homeowners comfortable with DIY painting projects can apply epoxy beautifully.
Save money for top tier outdoor ranges and appliances instead. Build your dream outdoor kitchen oasis focusing dollars on luxury features rather than designer countertop materials.
Outdoor kitchens don’t require lavish spending to achieve chic style and function. Epoxy resin affords high design without designer prices.
Even inexpensive tile, dated laminate or worn concrete transform into vibrant entertaining spaces. Use creativity with colors, textures, marbling, metallic flecks or embedded objects.
Waterproof epoxy resin coupled with new weather resistant cabinetry, cushy seating and warm lighting awakens tired exterior rooms into welcoming gathering places.
