Is your kitchen feeling cramped and cluttered? Are you constantly wishing you had more storage space for all your pots, pans, dishes, and pantry items? If so, extending your existing cabinets all the way up to the ceiling just might be the solution you’ve been dreaming of.
By building new cabinetry in the vacant space between your existing cabinets and the ceiling, you can dramatically increase storage capacity without expanding the footprint of your kitchen. This vertical extension can totally transform the look, functionality, and spaciousness of your kitchen in exciting new ways.
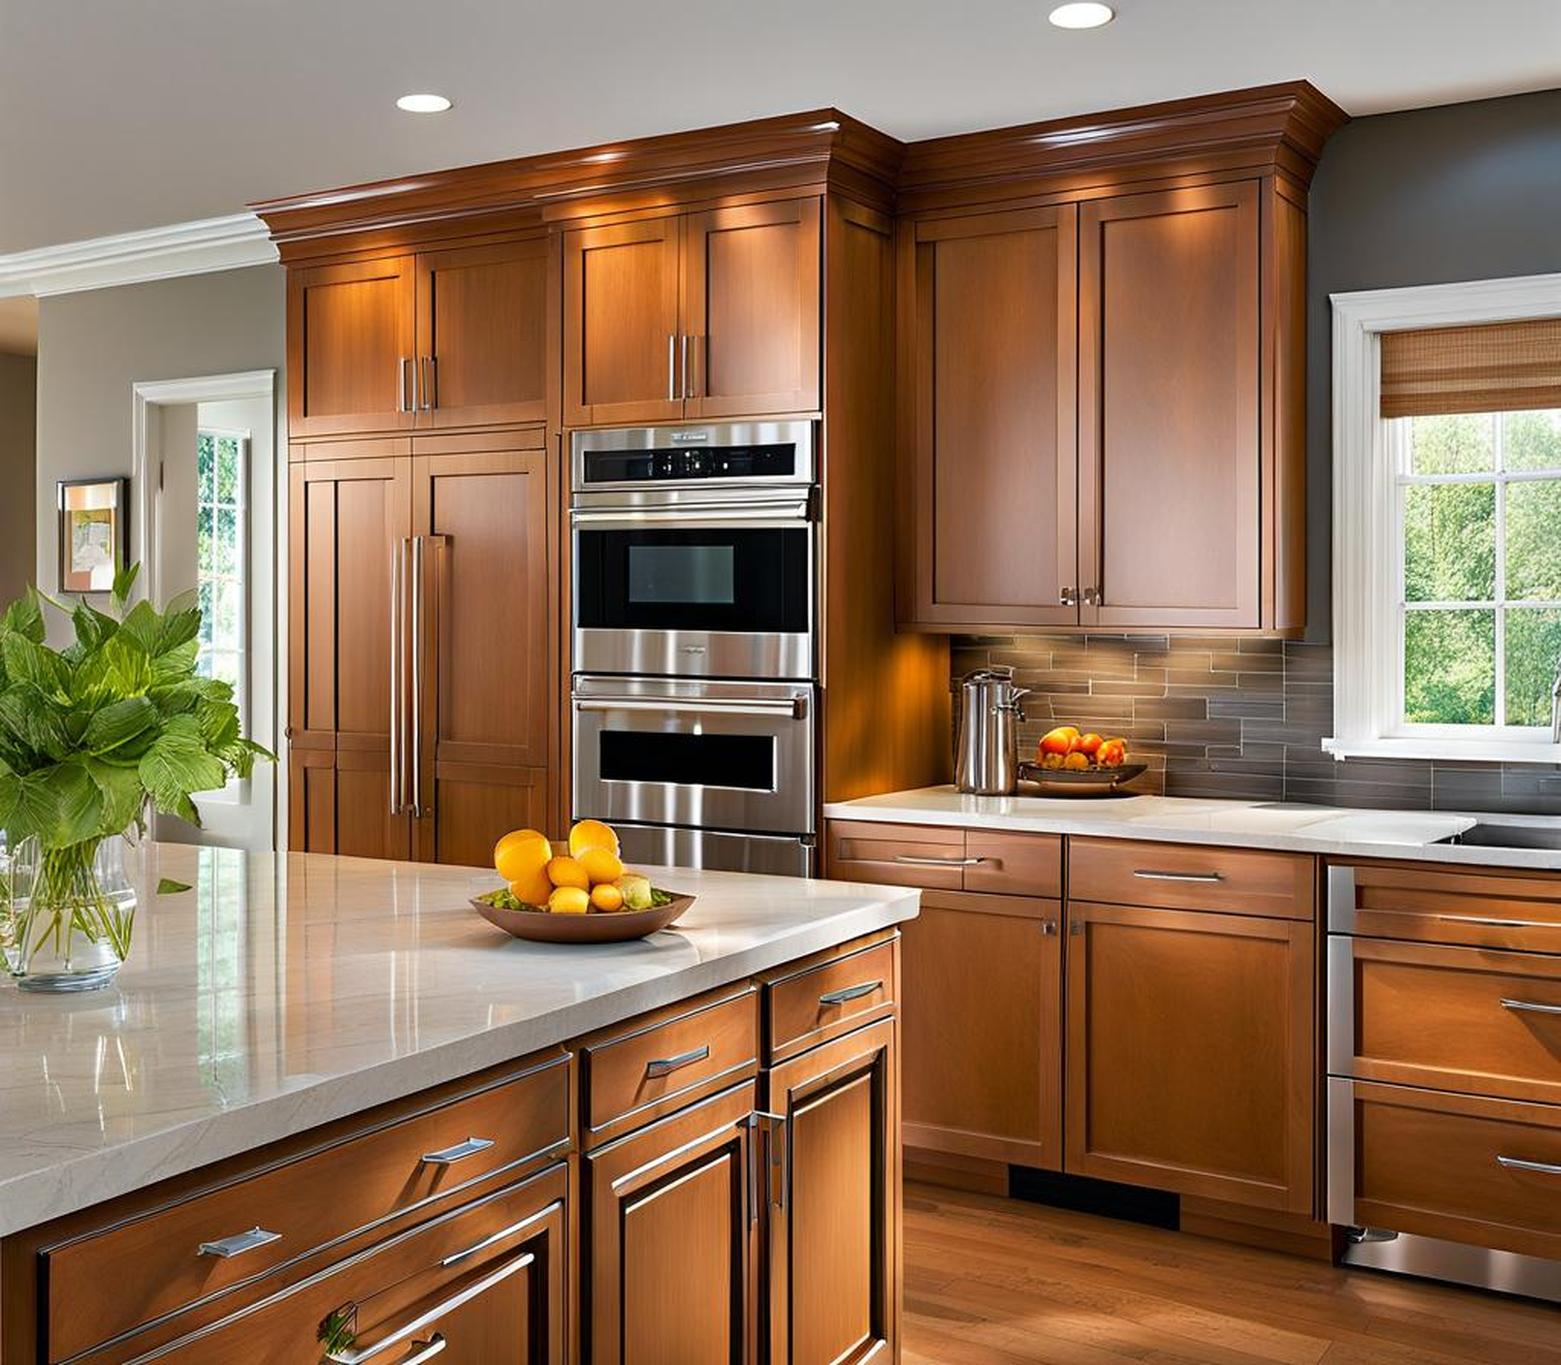
When to Consider Extending Cabinets Vertically
There are several situations where utilizing the empty space above your cabinets can be advantageous:
- Remodeling a small, cramped kitchen – Extra vertical storage can make the space feel more open and functional.
- Creating a custom, built-in look – Floor to ceiling cabinets appear upscale and integrated.
- Maximizing every inch – Take advantage of wasted vertical real estate in your existing layout.
- Adding storage without expanding – Increase capacity without altering your footprint.
By going vertical with your cabinetry, you can gain up to two or three feet of additional storage space while maintaining your current layout. This allows you to reimagine your kitchen without the cost and mess of a full demolition.
Planning Your Cabinet Extension Project
Carefully planning your ceiling-height cabinet installation will ensure optimal results. There are several key factors to consider in the planning process:
Assessing Your Current Cabinets
Start by taking measurements of your existing cabinetry and the open space above it. Look for these key dimensions:
- Height of existing cabinets
- Distance from top of cabinets to ceiling
- Exact width and depth of current cabinet boxes
You’ll need this data to design your extended cabinets. Also inspect the current condition of your cabinets. Refinishing or replacing worn cabinets may be prudent before extending them upwards.
Hiring a Contractor vs DIY
Decide whether you want to hire a professional or tackle the project yourself:
- Hiring a contractor provides expertise, saves time, and minimizes hassles.
- Opting for DIY will reduce costs but requires carpentry skills and tools.
If going the DIY route, be sure you have the necessary skills, help, and time for the demolition, construction, finishing, and installation work involved.
Design Considerations
Choose design elements that complement your existing style:
- Glass fronts maintain an open, airy feel while hiding contents.
- Staggered heights add architectural interest.
- Integrate crown molding for a seamless, built-in look.
- Include lighting and electrical as needed.
Smart design choices will maximize the benefits of your new extended storage space.
Step-by-Step Process for Extending Cabinets
Once you’ve completed the planning phase, it’s time to tackle the cabinet extension project. Follow these key steps:
Removing Crown Molding
Carefully detach any crown molding where your new cabinetry will be installed:
- Use a pry bar and hammer to gently loosen molding.
- Slowly work your way along the seam between the ceiling and cabinets.
- Save removed pieces to reinstall later.
Building the Cabinet Box
Construct a well-built cabinet box to mount above your existing cabinets:
- Cut wood boards to size according to measurements.
- Assemble cabinet sides, top, bottom and face frame.
- Secure into wall studs with long screws.
Installing Extended Cabinets
Mount your newly constructed cabinet box into place:
- Test fit the cabinet and make any adjustments.
- Shim until cabinet is plumb and level.
- Fasten securely into ceiling and wall with anchors and screws.
New Crown Molding
Finish off your extended cabinets by reinstalling crown molding:
- Precisely measure and cut crown molding sections.
- Nail into place with finishing nails.
- Caulk gaps then paint or stain for a seamless look.
Creative Solutions for Maximizing Your Extended Storage
You now have a blank canvas to build the vertical storage space of your dreams. Get creative with ways to maximize function:
- Use glass-front cabinets to maintain openness.
- Try open shelving for frequently accessed items.
- Install pull-out shelves and drawers for easy access.
- Build in racks for dishes, pots and pans.
Think through what you need to store and how you access those items. Optimize your extended cabinetry to suit your unique needs and preferences.
Transforming Your Kitchen’s Look and Functionality
By extending your existing cabinets up to the ceiling, you can utterly transform your kitchen in many exciting ways:
- Storage – Gain 25-36 cubic feet of storage capacity for maximizing what you can keep in your kitchen.
- Appearance – Visually raises the ceiling height for an airier, more expansive look.
- Spaciousness – Eliminates visual clutter and dead space for a more open feel.
Take a look at these stunning before and after photos of kitchens that added ceiling-height cabinets:
[insert inspiring before and after photos]
By harnessing the previously unused space above your existing cabinets, you can gain valuable storage, improve aesthetics, and make your kitchen appear more open – all without expanding the footprint. It’s an ingenious way to create your dream kitchen without the mess and expense of demolition.
Stop wasting vertical space in your kitchen. Take it to the next level and extend your cabinets to the ceiling today! With proper planning and execution, you’ll love the brand new spaciousness and functionality this project provides. It’s time to realize the full potential of your kitchen!
Energy Efficiency
Extending kitchen cabinets to the ceiling can also help improve energy efficiency. The added insulation between the existing cabinets and ceiling helps prevent heat loss through the roof. Using insulated cabinets or installing additional insulation creates a more airtight, insulated space to reduce energy costs.
Mold Prevention
Kitchens prone to mold and mildew can benefit from extended cabinets. Eliminating the gap between cabinets and ceiling removes moist air pockets where mold thrives. Water-resistant cabinet materials and proper ventilation keeps the extended space dry and mold-free.
Lighting Options
The new cabinet space presents exciting lighting possibilities. Recessed ceiling lights brightly illuminate countertops. Pendant lights over islands make a stylish statement. Installing lighting in extended cabinets provides both form and function.
Custom Design
Extending cabinets facilitates customized design with unique shapes, colors, materials and built-ins. Add a wine rack or glass-front cabinet. Integrate kitchen appliances. With extended cabinetry, you can incorporate creative touches that reflect your personal taste and lifestyle.
Resale Value
Ceiling-height cabinets are a top trend that appeals to buyers. Their clean, custom appearance raises perceived value. Consult local real estate agents to ensure your specific extended cabinet design aligns with area homebuyer preferences.
Safety Concerns
Despite benefits, extending cabinets has safety considerations. Reinforce cabinet structure to support heavy items stored above. Account for electrical and plumbing needs when installing appliances. Work with professionals to address safety concerns upfront.
When extending cabinets, minimize environmental impact by selecting sustainable materials like bamboo or reclaimed wood. Also opt for low-VOC paints and finishes. An eco-friendly approach ensures your kitchen remodel aligns with green living values.
