Is your bathroom in need of a makeover but you don’t want to break the bank on an expensive remodel? Installing a river rock shower floor could be the perfect solution to spruce up your space on a budget! With their organic shapes and multi-toned colors, river rocks add natural texture and beauty to any shower.
Read on to learn how to give your bathroom an affordable, luxury spa-like feel with this unique and stylish flooring option.
Benefits of River Rock Shower Floors
What makes river rock shower floors so special? Here are some of the top advantages they offer:
Natural Appearance
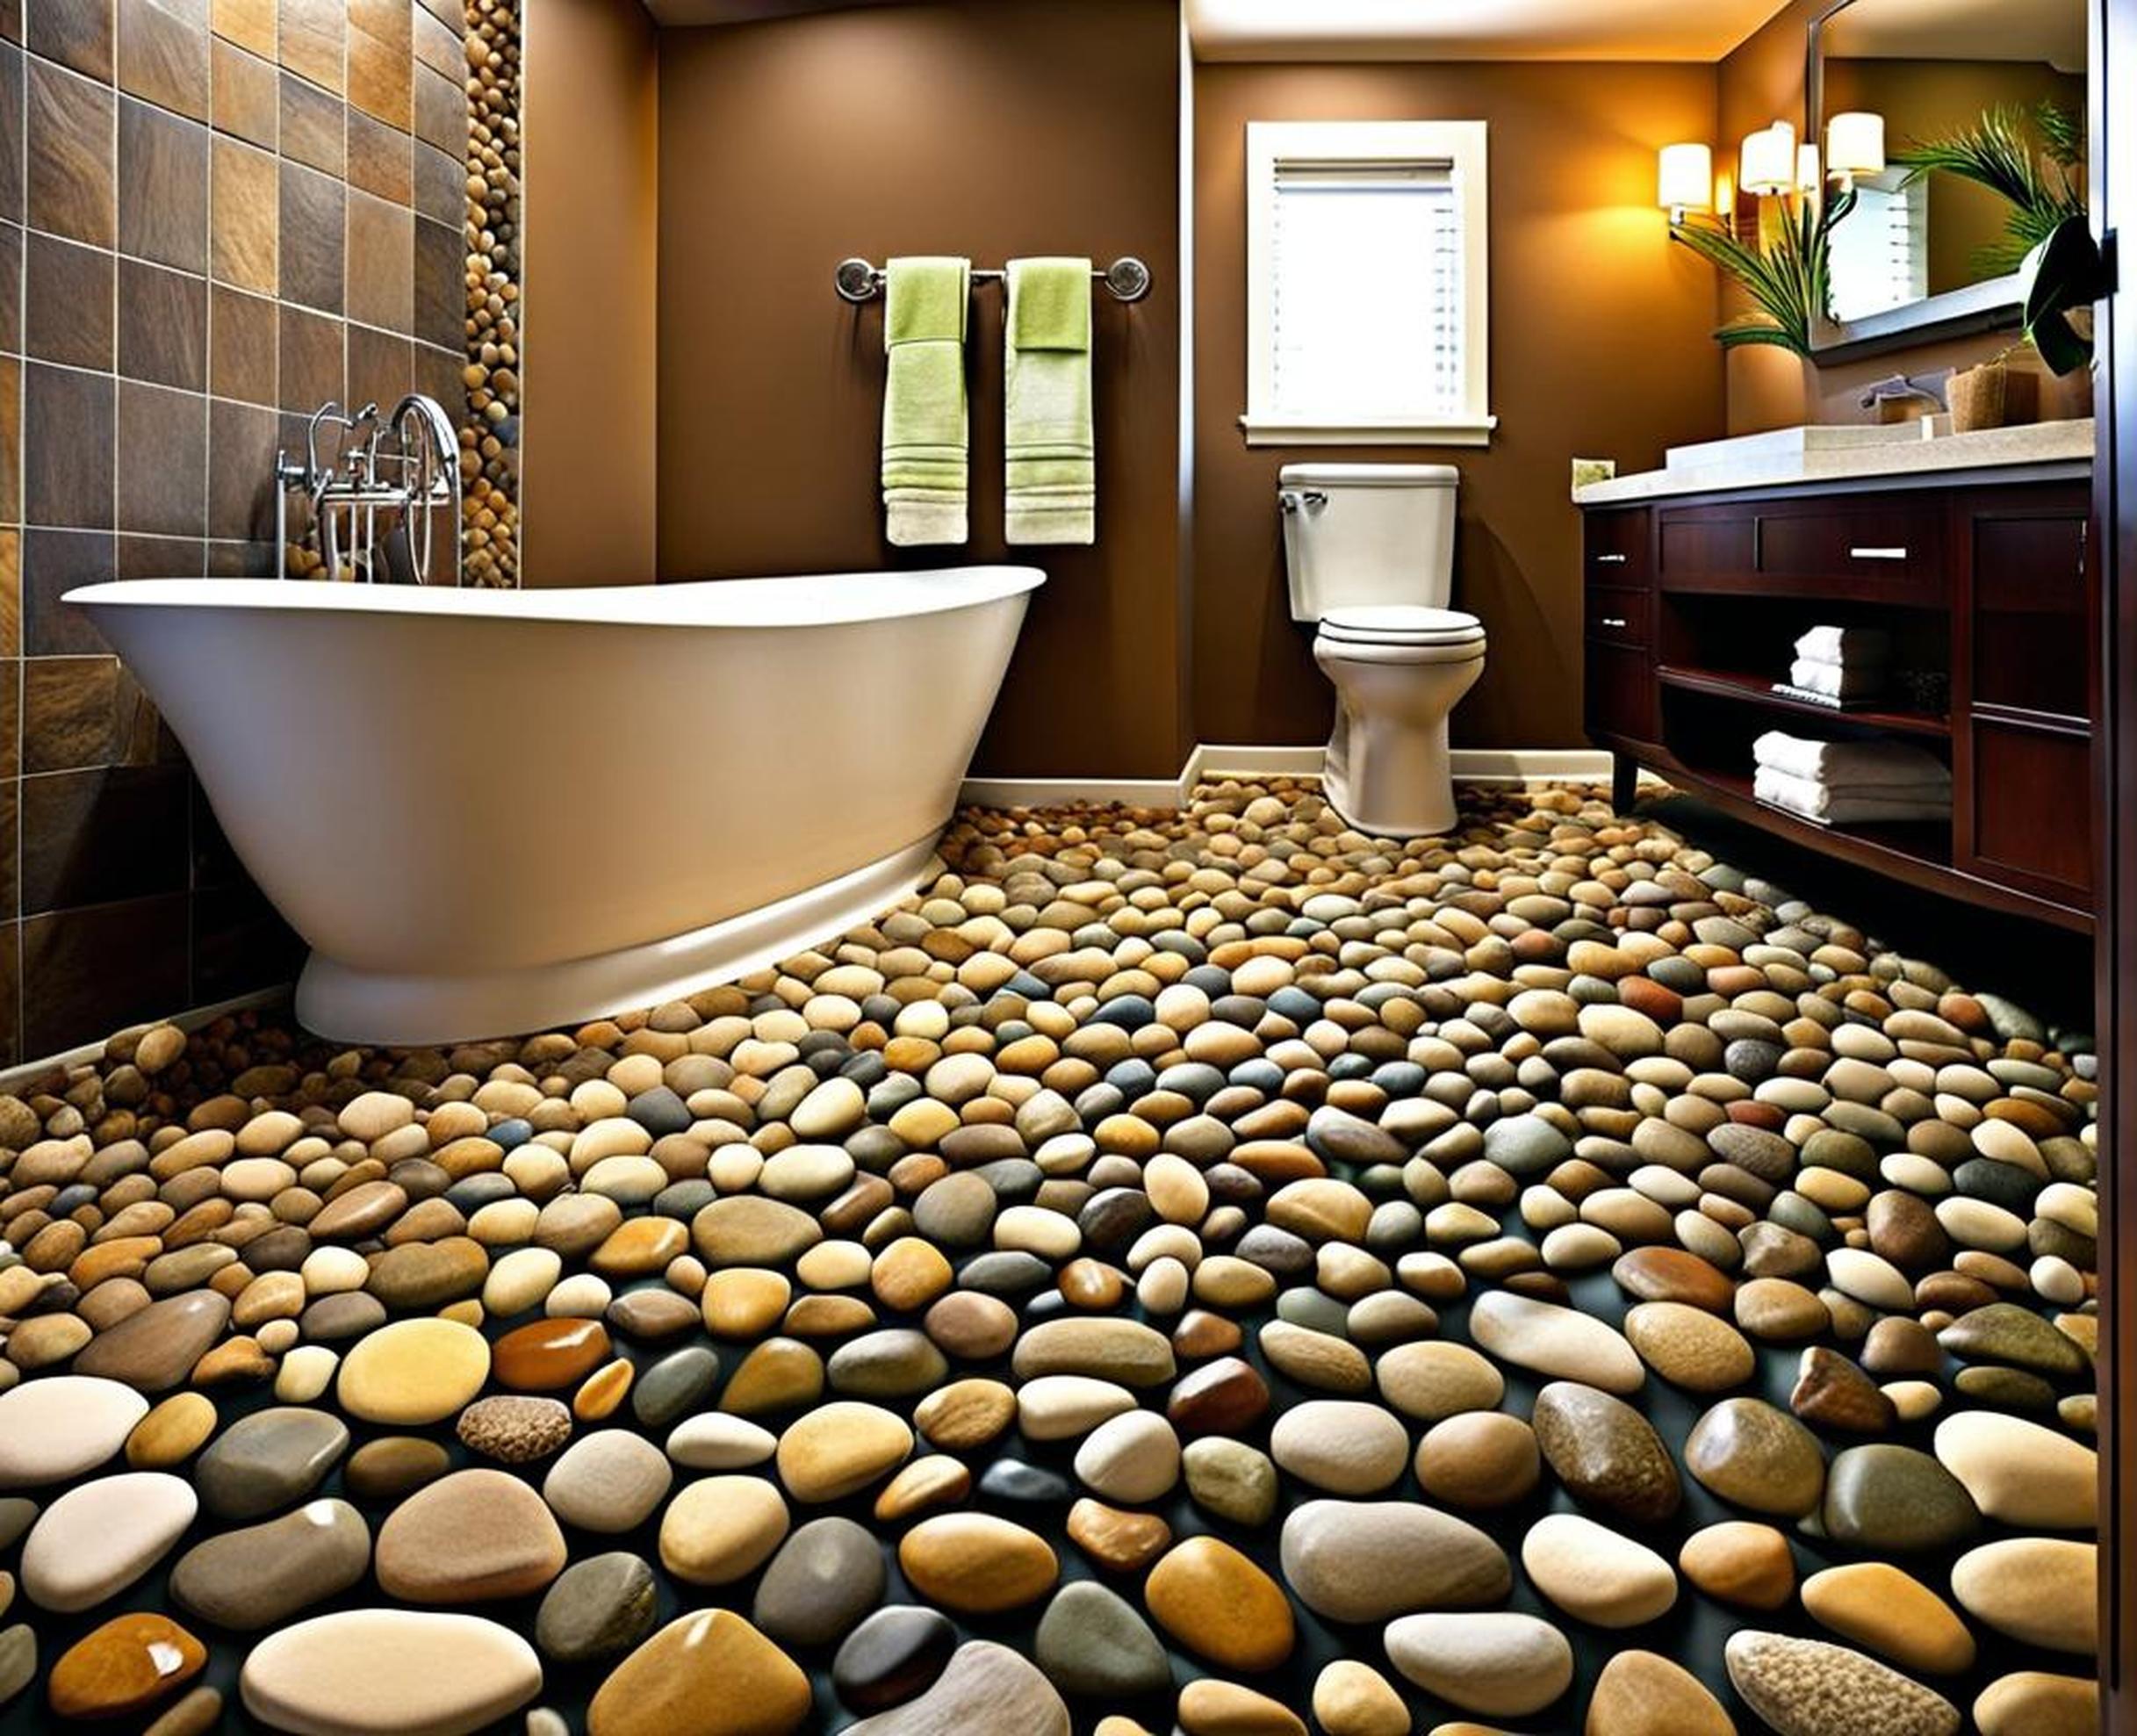
River rocks lend a soothing, organic look that feels more connected to nature than manufactured ceramic or porcelain tiles. The smooth, rounded pebbles are visually calming and provide an upscale ambiance. Their multi-toned blends of grays, tans and browns help bring the outdoors inside your bathroom.
Better Traction
The uneven, bumpy surface of river rocks prevents slipping, unlike flat tile floors which can get dangerously slick when wet. The pebbles provide traction underfoot, while grout between the rocks adds even more grip. This makes your shower safer for kids, seniors and those with mobility issues.
Easy Maintenance
River rock floors don’t require special cleaners or extensive maintenance like other surfaces. The pebbles prevent buildup of soap scum, mildew and hard water deposits. Grout allows water to drain through rather than pooling. Just sweep occasionally and use a mild detergent for a quick clean.
Choosing the Right Materials
To recreate the look and feel of a luxury spa bathroom in your own home, you’ll need to select the proper materials. Here are some tips on choosing components for your river rock shower floor:
Type of River Rock
Opt for small, smooth pebbles rather than larger rocks. Larger rocks have more space between them, allowing water to pool in gaps. This can lead to mildew and bacteria growth. Smaller rocks have a tighter mosaic appearance.
Epoxy Adhesive
Your rocks need to bond securely to prevent loose pebbles underfoot. Epoxy provides a waterproof yet flexible adhesive. Make sure to use an epoxy designed specifically for wet room shower floors.
Grout
Grout fills the spaces between your rocks. This prevents shifting rocks and provides added traction. Choose a grout color that matches or complements your pebbles for a unified, seamless look.
Preparing the Subfloor
Your river rock shower floor can be installed over several subfloor types, but concrete is ideal. Concrete offers superior durability and will remain stable over time, preventing loose or uneven floors. Wood or acrylic subfloors require additional preparation and sealing to withstand moisture.
Before installation, make sure your subfloor is completely flat and properly sealed. Any imperfections will transfer to your finished floor. For proper drainage, build in a slope of 1/4 inch per foot so water flows towards your drain and doesn’t pool.
Installing Your River Rock Shower Floor
Once you have your materials and subfloor ready, it’s time for the fun part – installing your new river rock floor! Follow these simple steps:
Step 1 – Apply Epoxy Adhesive
Thoroughly mix and spread epoxy adhesive evenly across the entire shower floor area using a notched trowel. The notched edge ensures an optimal thickness of adhesive. Spread only a manageable area that you can cover with rocks before the epoxy begins to cure.
Step 2 – Arrange River Rocks
Press river rocks firmly into the epoxy in a mosaic tile pattern, working in small sections. Use a variety of rock sizes and shapes for the most natural look. The rocks should be tightly packed to prevent gaps where water can collect.
Step 3 – Apply Grout
Use a rubber grout float to work grout deep between the pebbles, filling any crevices completely. Wipe away excess grout from the surface of the rocks using a damp sponge in a circular motion. Take care not to disturb the rocks.
Step 4 – Seal & Cure
Allow 24-48 hours for the epoxy adhesive and grout to fully cure before using your shower. Then apply a penetrating sealant formulated for wet areas. This provides extra waterproofing and enhances the color of the stones.
Maintaining Your River Rock Shower Floor
Caring for your river rock floor is simple. Just follow these tips to keep it looking great:
- Periodically check drainage and remove any debris like hair clogs.
- Reapply sealant every 1-2 years to protect from water damage.
- Clean as needed with a soft brush and mild non-abrasive cleaner.
Ready to add some nature-inspired style to your bathroom? Installing a river rock shower floor is an easy weekend DIY project that can completely transform your space. The smooth pebbles will give your shower a luxurious, spa-like feel while providing better traction and fewer slips.
Bring the beauty of river rock into your home bathroom to create a relaxing oasis. With minimal cost and simple installation, you’ll be enjoying an upscale, custom look and enhanced comfort in no time!
To further elevate the design, consider incorporating LED lighting into the river rock shower floor. This can add a unique and modern touch, while also making it easier to see in low light conditions. Additionally, think about using river rock with different textures or finishes to create a more dynamic and visually interesting floor. For example, opt for a smooth finish for a contemporary look or a more natural, rustic finish with a rougher texture. You could also use river rock in combination with other materials like glass or stone to provide more visual interest and texture. Consider laying the river rock in unique patterns or designs as well. Finally, use river rock alongside natural materials like wood or bamboo to foster a holistic, spa-like atmosphere in the bathroom. With the right touches, your new river rock shower floor can provide both style and luxury.
