Kitchen cabinetry is the foundation of your cooking space, but often the finishing details like end panels are overlooked. The right end panels, also called cabinet gables, can take your kitchen design to the next level. Read on to learn everything you need to know about selecting, installing, and styling cabinet end panels.
Types of Cabinet End Panels
There are several varieties of cabinet end panels, each with their own purpose and design considerations. Selecting the right panels comes down to your kitchen layout, style, and functional needs.
Base Cabinet End Panels
Base cabinet end panels attach to exposed sides of lower cabinets, like in an island or against a wall end. They give a cleaner, more integrated look compared to seeing the cabinet sides and interior shelving.
The most common materials for base end panels are plywood, MDF, and solid wood. Plywood offers durability at a lower cost. MDF provides a smooth finish for painted cabinets. Solid wood brings natural beauty but requires more maintenance.
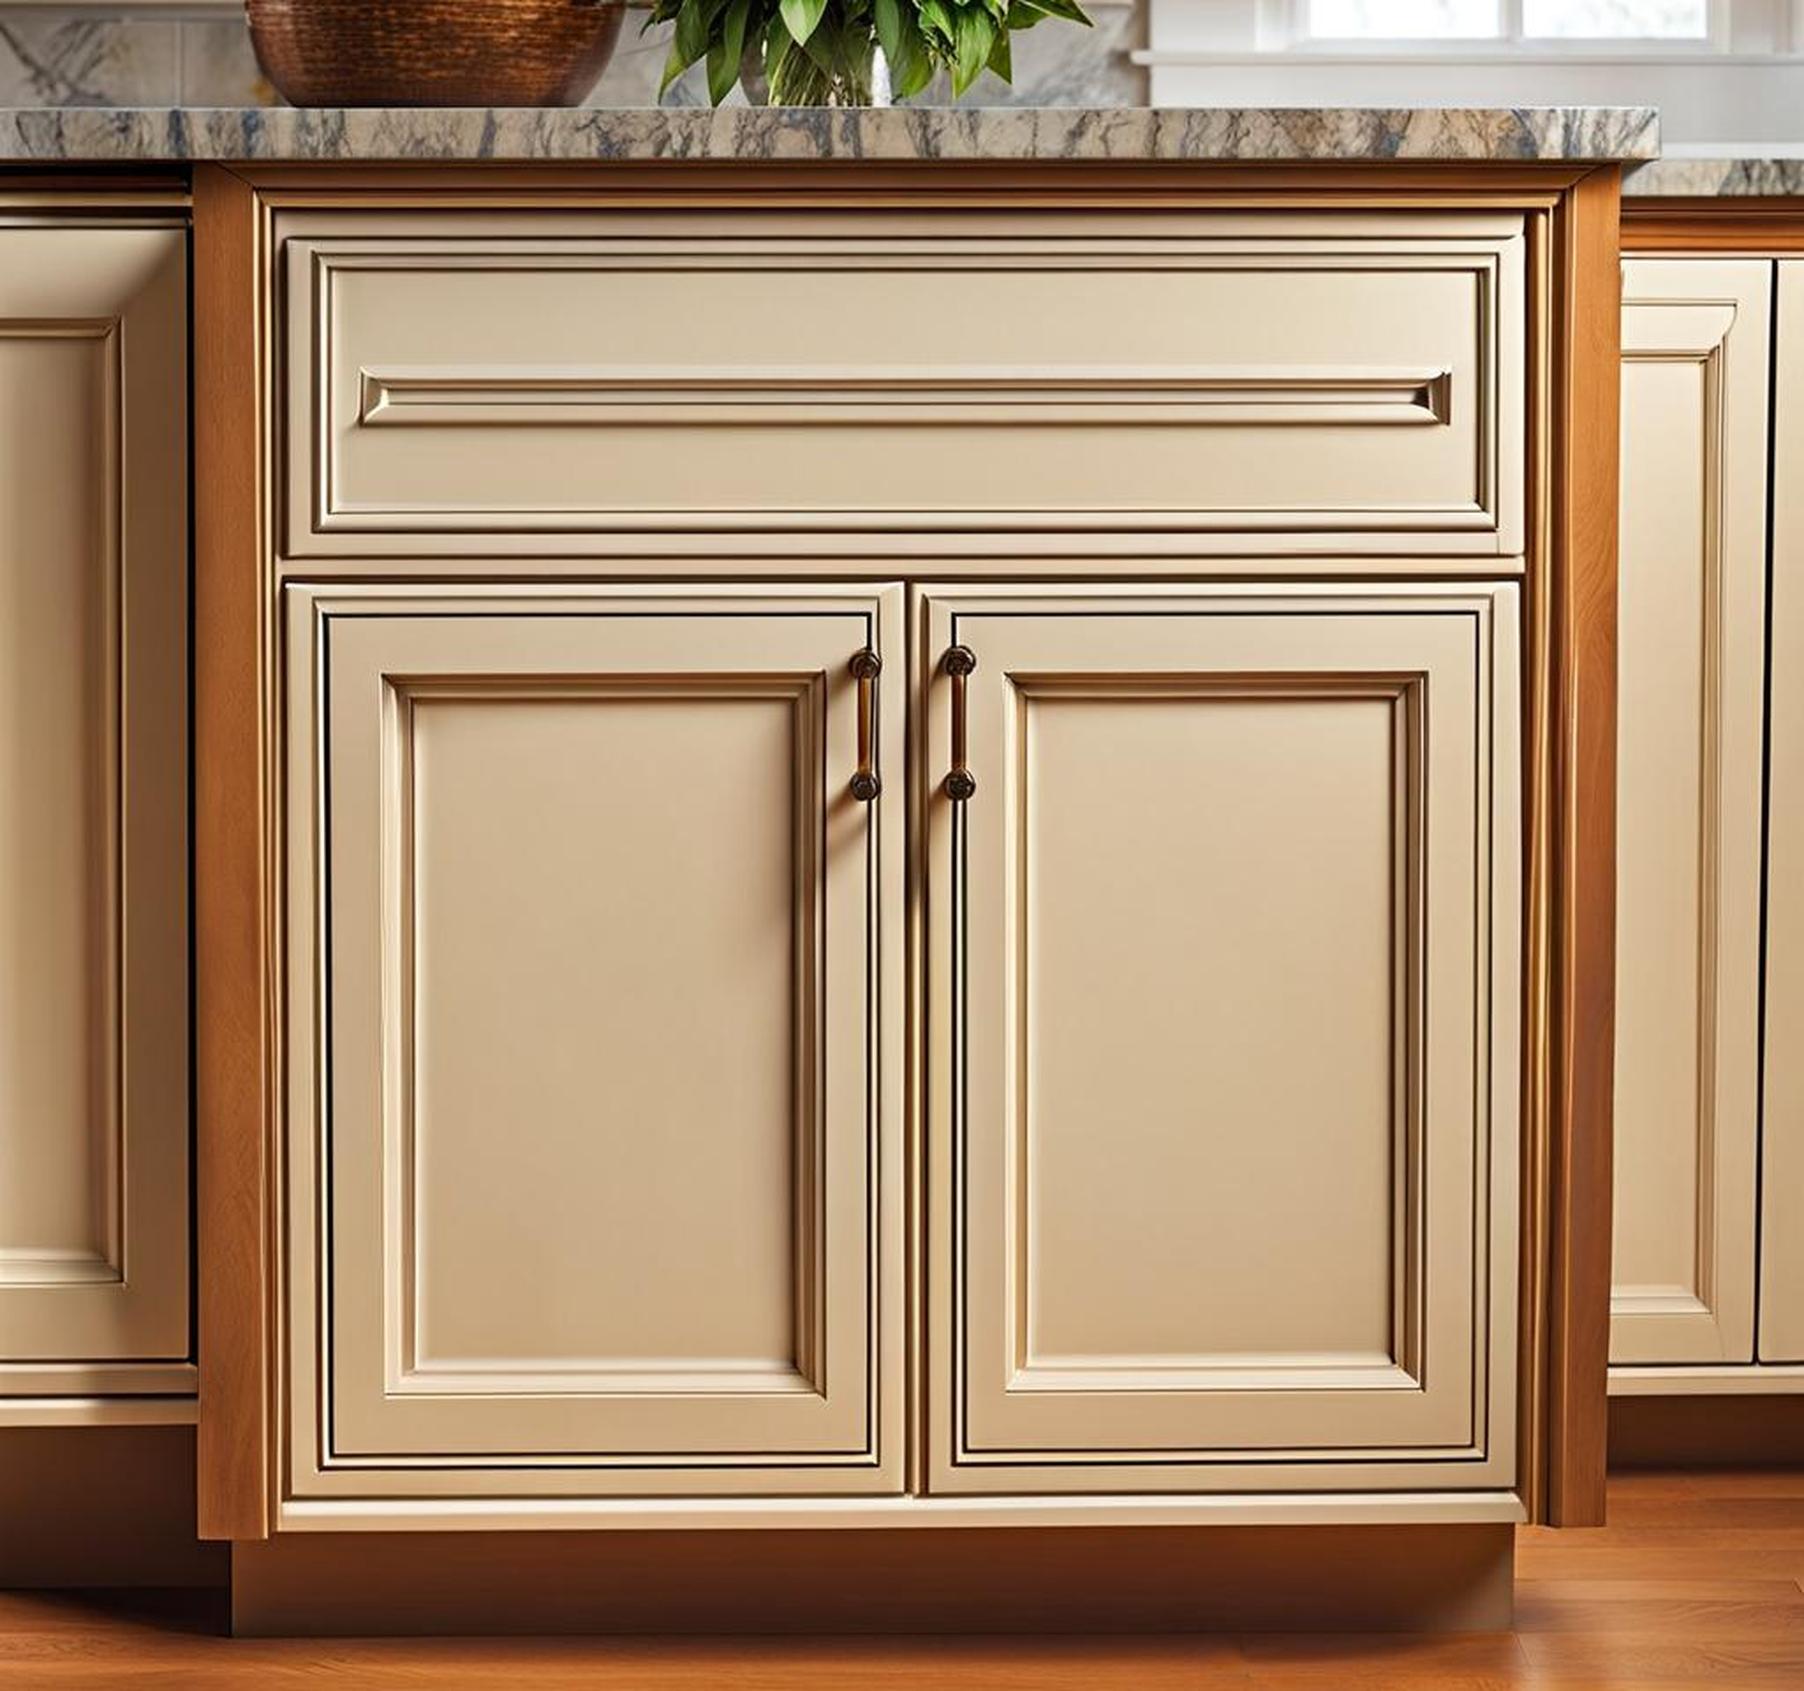
Design choices range from simple flat panels to raised or recessed profiles. Choosing panels with matching finishes to your cabinets gives visual harmony. Especially with visible base cabinets, the end panels should align with your kitchen’s overall style.
Installation is straightforward, either sliding into side grooves or screwing into place from the inside. Be sure to precisely measure to size prior to cutting panels.
Wall Cabinet End Panels
Wall cabinet end panels serve an identical purpose of concealing sides and achieving a built-in look for upper cabinets. They transform the appearance from disjointed wall boxes to a unified wall unit.
While matching your base cabinets is still important, wall end panels tend to be less visible so budget-friendly plywood or MDF are common choices here. However, consider visibility and access when choosing materials and finishes.
Installation techniques are similar to base cabinets. Precise sizing and pre-finishing panels prior to hanging cabinets makes this process easier and cleaner.
Refrigerator End Panels
Refrigerator end panels require special consideration because of their large scale and functional requirements. They must seamlessly integrate your fridge into surrounding cabinetry while allowing for door clearance and ventilation.
Many refrigerator manufacturers offer coordinating custom panels sized to match their models. Stainless steel panels give a built-in commercial look. Or, custom wood panels can align with cabinetry finishes.
Achieving a perfect inset fit requires careful measurement and alignment during installation. Allow proper ventilation space at panel tops and behind units. Take fridge door swing radius into account as well.
Decorative End Panels
For adding stylish flair, decorative end panels come in endless design options. Anything from raised moulding profiles, unique materials like glass or metal, customized carvings, inlaid patterns, and mixed media can make panels stand out.
The goal should be cohesion with your overall kitchen design rather than distraction. For example, glass panels featuring sleek lines harmonize with contemporary spaces. Lightly distressed wood carvings complement traditional country kitchens.
Heavier decorative panels may require additional structural reinforcement. Allow for extra installation time and cost. But decorative statement panels can transform simple cabinetry into true built-in works of art.
Factors to Consider When Selecting Panels
With endless options available, it helps to evaluate a few key factors when choosing your ideal end panels. Keep these elements in mind while planning your kitchen cabinet design.
Kitchen Design Style
Selecting panels suited to your kitchen’s overall design style results in the most cohesive appearance. Whether your space leans traditional, contemporary, coastal, industrial, or eclectic, end panels should complement the features that define your look.
Style alignment includes finishes like matching wood stains or painted colors. But also consider ornamental details like selecting a similar level of simplicity or intricacy. Consistency creates flow.
Cabinet Material
Your primary cabinetry material impacts which panel materials make sense. For example, solid wood cabinets would clash with starkly contrasting stainless steel end panels. Or painted shaker cabinets benefit from matching smooth MDF end panels accepting the same paint finish.
Ideally your panels should share common wood species, textures, and ability to accept the same stains or paints to prevent a disjointed look.
Budget
Cost considerations may guide you toward simple flatstock panels versus intricate custom designs or exotic woods. But attractive end panels can be achieved even on limited budgets.
For a balance of affordability and design, consider DIY-friendly MDF panels with painted finish, or inexpensive but durable plywood. Even budget panels properly sized and installed look far better than exposed cabinet sides.
Kitchen Layout
Evaluate your unique kitchen footprint to determine precisely where panels will be needed. Consider quantities for long spans like islands versus single panels on peninsula ends. Account for extra panels to integrate appliances.
Also look at ceiling height. Decorative raised panels best suit standard height rooms. Make sure dramatic oversized panels don’t overwhelm small spaces and restrict functionality.
Skill Level
Assess your comfort level for installing end panels or if hiring a professional makes the most sense. Factor in complexity of your planned panels – are they oversized, decorative, or require tricky integrated installation?
Standard flat panels are beginner DIY-friendly if you have basic carpentry skills. But specialty panels may require expert precision and know-how, especially for custom sizing and finishing.
How to Install End Panels
Once you’ve selected the ideal end panels for your kitchen, it’s time to tackle the installation process. Follow these steps to achieve a professionally finished look.
Tools Needed
Gather essential tools like:
- Tape measure
- Level
- Pencil
- Saw (jigsaw, circular saw, or handsaw depending on panels)
- Drill
- Screwdriver
- Nail gun
- Wood glue
- Sandpaper
Base Cabinet Installation
For base cabinets:
- Measure panel width and height accounting for panels sitting flush with cabinet tops and bottoms. Cut to size with saw.
- Apply glue to back edges of panel and slide into grooved sidetracks until seated fully into position.
- Alternatively, you can use screws attaching through the cabinet interior sidewalls into the panel perimeter.
- Use painter’s tape to hold panel in place until adhesive dries.
- Fill any gaps with wood filler, let dry, and sand smooth.
Wall Cabinet Installation
For wall cabinets:
- Measure panel width and height accounting for panels sitting flush with cabinet tops and bottoms. Cut to size with saw.
- Apply glue to back edges of panel and slide into side grooves or hold in position and drill pilot holes.
- Attach with finishing nails through perimeter of panel into cabinet sidewalls using nail gun.
- Alternatively, attach with screws driven into cabinet interiors.
- Use painter’s tape to hold panel in place until adhesive dries.
- Fill any gaps with wood filler, allow to dry, then sand smooth.
Decorative Panel Installation
For specialty decorative panels:
- Reinforce with additional wood blocking if needed for heavy materials like stone or metalwork.
- Pre-finish panels prior to hanging for easiest application of paints, gilding, etc.
- Use cleats and construction adhesive for large inset panels covering entire cabinet sides.
- Allow ample curing time for glue or adhesives to fully set.
- Fill gaps with tinted wood filler matched to panel finish.
Maintaining and Replacing Panels
Properly cared for, quality wood or plywood end panels can last upwards of 20-30 years. Follow these tips to keep them looking their best:
- Dust with soft cloth and wood cleaner. Avoid harsh chemicals.
- Inspect annually for damage or separation at edges. Reattach hardware or applicators as needed.
- Scratches can often be concealed with wood markers that blend into finishes.
- Badly warped or deteriorating panels may need replacing. Check for moisture damage.
- When renovating, consider refinishing panels to match new cabinet colors versus fully replacing.
End panels, while often overlooked, can make a dramatic difference in your kitchen’s style and cohesion. Follow this complete guide when planning your kitchen cabinet design to select the perfect panels to match your space and needs.
Pulling together all the elements – cabinetry, countertops, lighting, and decor – is key to creating a holistic kitchen design you’ll love. Integrating well-chosen end panels unites your look, producing a refined yet functional cooking space. With some planning and know-how, you can install cabinet end panels to take your kitchen from builder-basic to bespoke.
