If you’ve ever had the misfortune of having to repeatedly regrout the tiles in your home, you know what a tedious, messy, and expensive endeavor it can be. No matter how carefully you clean and apply new grout, it never seems to last longer than a few months before cracks form, tiles shift, and sections crumble away.
The agony of constantly re-grouting can leave you pulling your hair out trying to discover why your grout keeps failing. But often, the key lies in the type of grout itself and whether it’s suitable for your particular tiling application. Read on as we uncover the reasons behind grout failures, when to use sanded vs. unsanded grout, and how switching to sanded grout may finally give you the long-lasting results you desire.
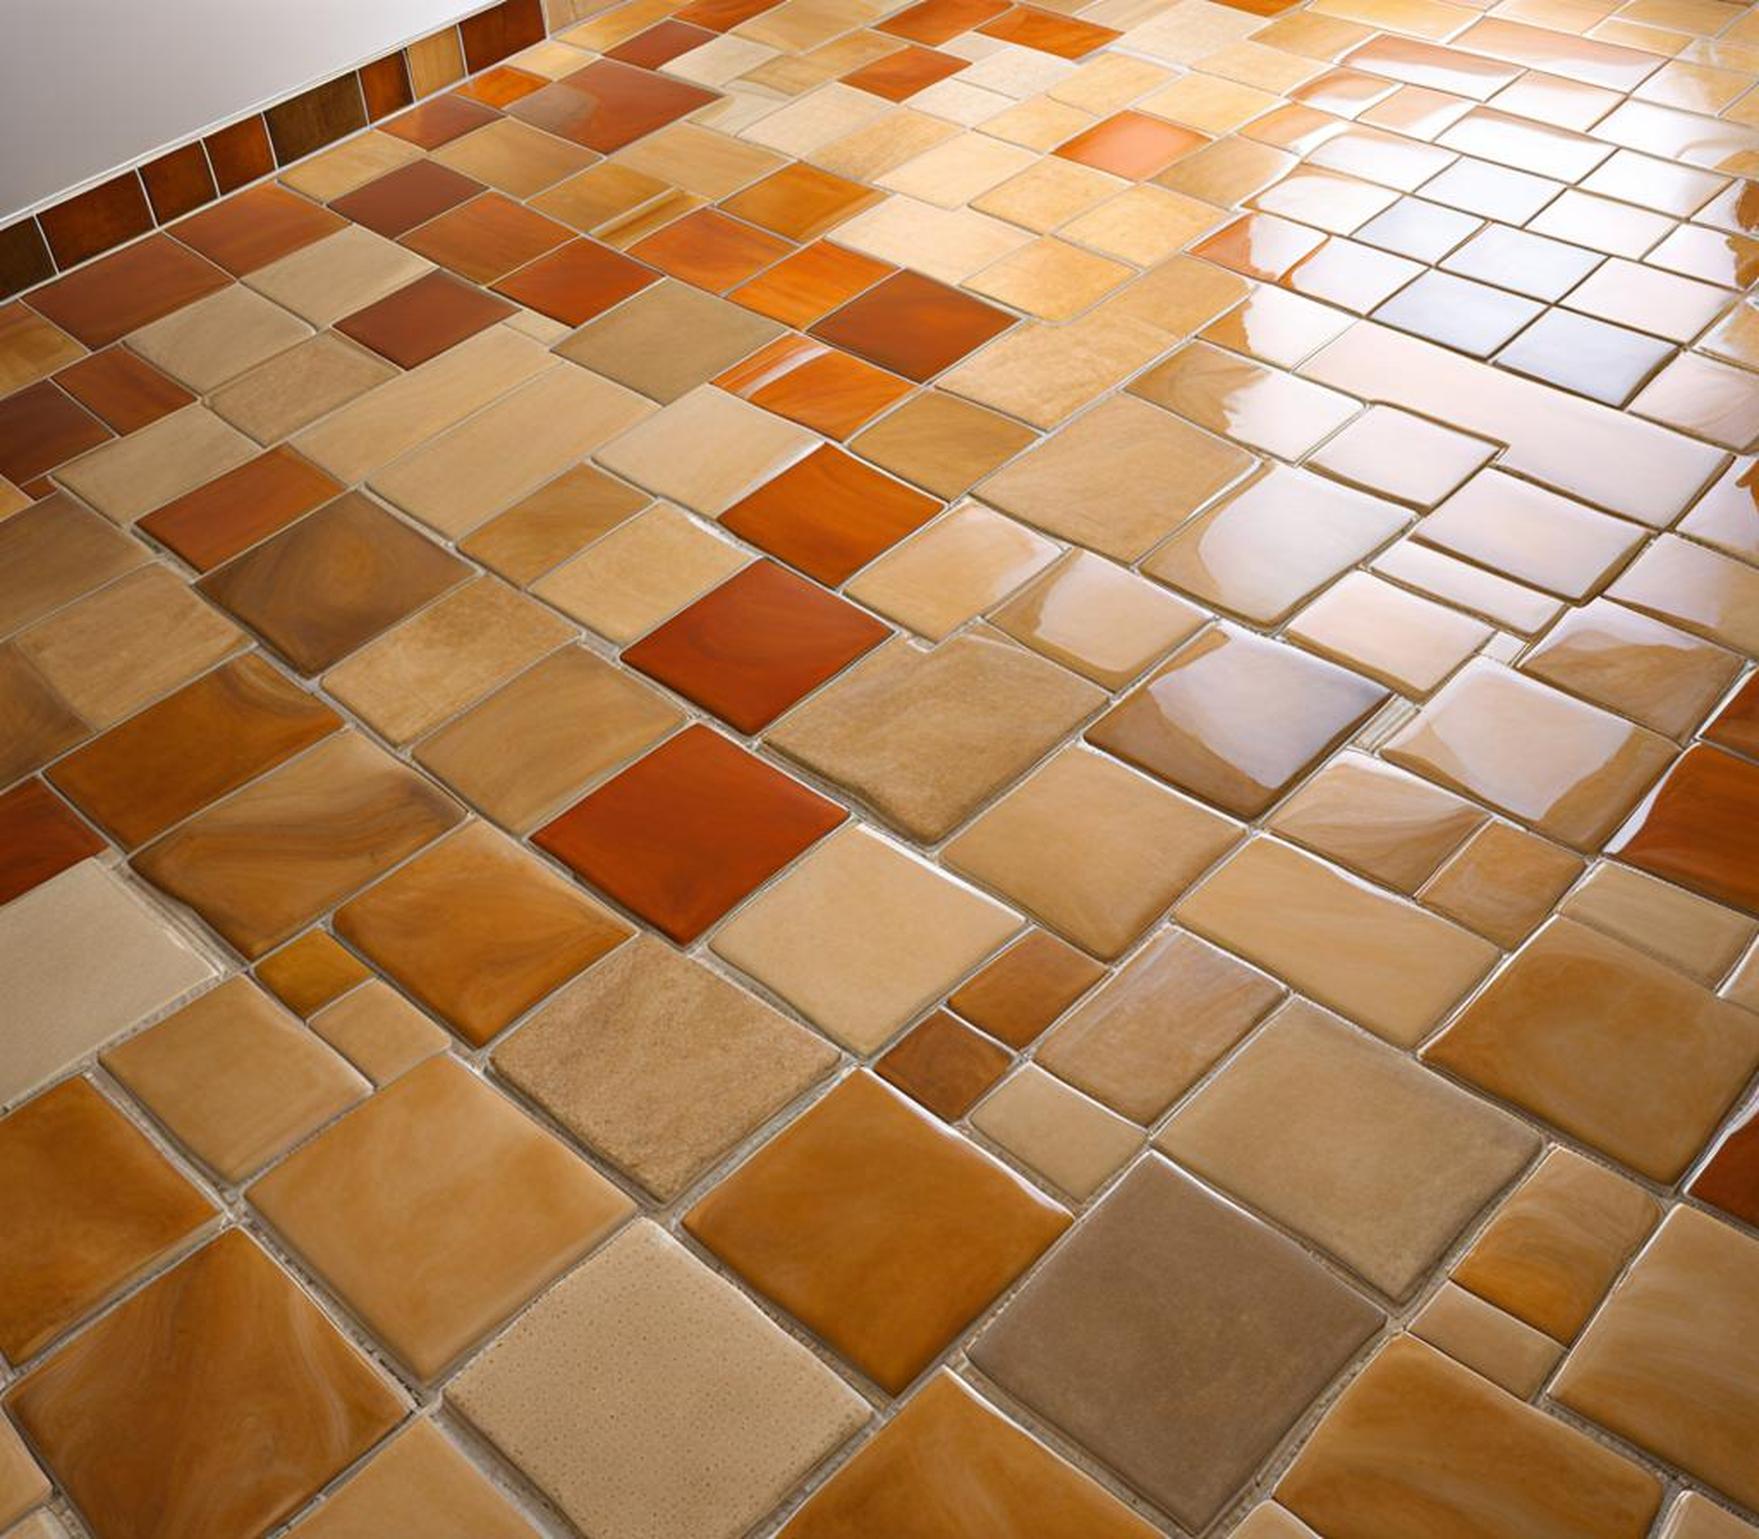
When to Choose Sanded Grout
For Floors vs. Walls
The first key consideration is using sanded grout for floors rather than walls. The sand particles in sanded grout make it thicker, allowing it to better withstand impacts, pressure, abrasions, and shrinkage when used on floor tiles. Sanded grout won’t work at all for vertical applications on walls where gravity causes it to slump out of joints before drying. For walls, smooth, fine unsanded grout is best.
For Large Grout Lines
Pay attention to your grout lines – if they are over 1/8 inch wide, sanded grout is the smartest choice. Its extra thickness keeps it from shrinking as it cures. Unsanded grout can fail in wider grout lines as gravity causes it to slump before hardening.
For High-Traffic Areas
Consider how much foot traffic, wear, and activity your tiles must endure. High-traffic floors such as entryways, hallways, kitchens and bathrooms do best with durable sanded grout rather than less resilient unsanded mixes.
For Hard Surfaces
Finally, if your tiles are made of sturdy, unyielding materials like natural stone, granite, marble or slate, flexible sanded grout stands up to their inflexibility best. Using unsanded grout on hard surfaces often results in cracking grout when the tiles expand, contract or shift.
Benefits of Using Sanded Grout
Increased Durability
With hardened sand particles binding the grout together, sanded grout simply lasts longer than unsanded mixes. The sand-reinforced matrix makes it more resistant to fractures, chips, cracks and typical wear. Sanded grout won’t powder out of joints from regular use the way soft unsanded grout eventually does.
Able to Withstand Moisture
Grout should never get wet or sit underwater. But when moisture penetrates poorly-sealed tiles, rigid sanded grout withstands it better than unsanded mixes. The sand particles help limit absorption and swelling compared to softer, more porous grout.
More Economical
Because sanded grout stands up to abuse and lasts much longer before needing repairs, it can save substantially on perpetual regrouting costs in the long run. The initial investment pays for itself over years of uninterrupted performance.
How to Properly Apply Sanded Grout
While sanded grout has clear advantages, you need to use proper technique installing it to get optimum results:
Gather the Right Supplies
Having quality tools ensures efficient, successful grouting. Essentials include:
- Grout float for forcefully packing joints
- Grout saw for precise cuts
- Sponges – lint-free recommended
- Buckets for mixing/cleaning
- Cheesecloth for final polishing
Prepare the Tile Joints
Before grouting, joints should be:
- Cleaned out to full depth
- Free of old grout, loose particles
- Vacuumed to remove dust
- Wiped with a damp cloth
This allows maximum grout contact with tile edges.
Mix the Grout
Prepare grout mix per package instructions, using the minimum amount of water needed to achieve a smooth, creamy texture for best performance. Allow to slake 5-10 minutes before use.
Spread the Grout
Apply grout diagonally across joints, packing firmly down into gaps. Hold float at a 45deg angle and use moderate, consistent pressure for solid contact and filling capability.
Clean Excess Grout
Wipe diagonally across tile with a lightly dampened sponge to remove surface grout before it dries, rinsing sponge frequently. Use minimal water to prevent it migrating into joints.
Apply Grout Sealer (Optional)
Using a grout sealer is an optional added step to protect porous grout from staining. It adds limited waterproofing properties as well.
Common Sanded Grout Issues and Solutions
Despite proper installation methods, grout problems can still occasionally crop up:
Cracking Over Time
If joints crack weeks or months after grouting, the cause may be:
- Poorly prepared subsurface allowing movement
- Failure to grout full joint depth
- Not applying grout release beforehand
Applying sealer helps but checking subsurface prep is key.
Discoloration
To limit staining or color change:
- Select polymer-reinforced grout
- Avoid highly pigmented mixes
- Use a grout release to minimize absorption
Unglazed tile edges often drive stains into joints over time regardless.
Powdery Residue
Grout turning into sand-like powder or crumbling out of joints indicates too much water was used in the initial mix, weakening cement binders. Tear out old grout and re-apply mix following package directions exactly.
Grout Haze
A cloudy film left on tiles just after grouting is called grout haze. Avoid it by:
- Wiping tiles early before drying
- Using minimal rinse water
- Polishing lightly with cheesecloth as final step
If haze develops, do not wet polish for at least 24 hours.
As unpleasant as re-grouting can be, you now have valuable insight into why grout fails and when sanded grout is the best choice for durability. Armed with tips for successful installation, you can tackle your next tiling project with confidence – and look forward to enjoying stable, long-lasting results thanks to strong, sandy grout joints for years to come.
