Kitchen islands are the hottest trend in kitchen design, offering expanded prep space, storage, and gathering areas. But incorporating an island requires careful planning regarding placement, shape, and size. Follow these essential tips when designing your dream island kitchen.
Choosing an Island Shape
The first decision in planning your kitchen island is choosing a shape that fits your space and needs. Here are some of the most popular options:
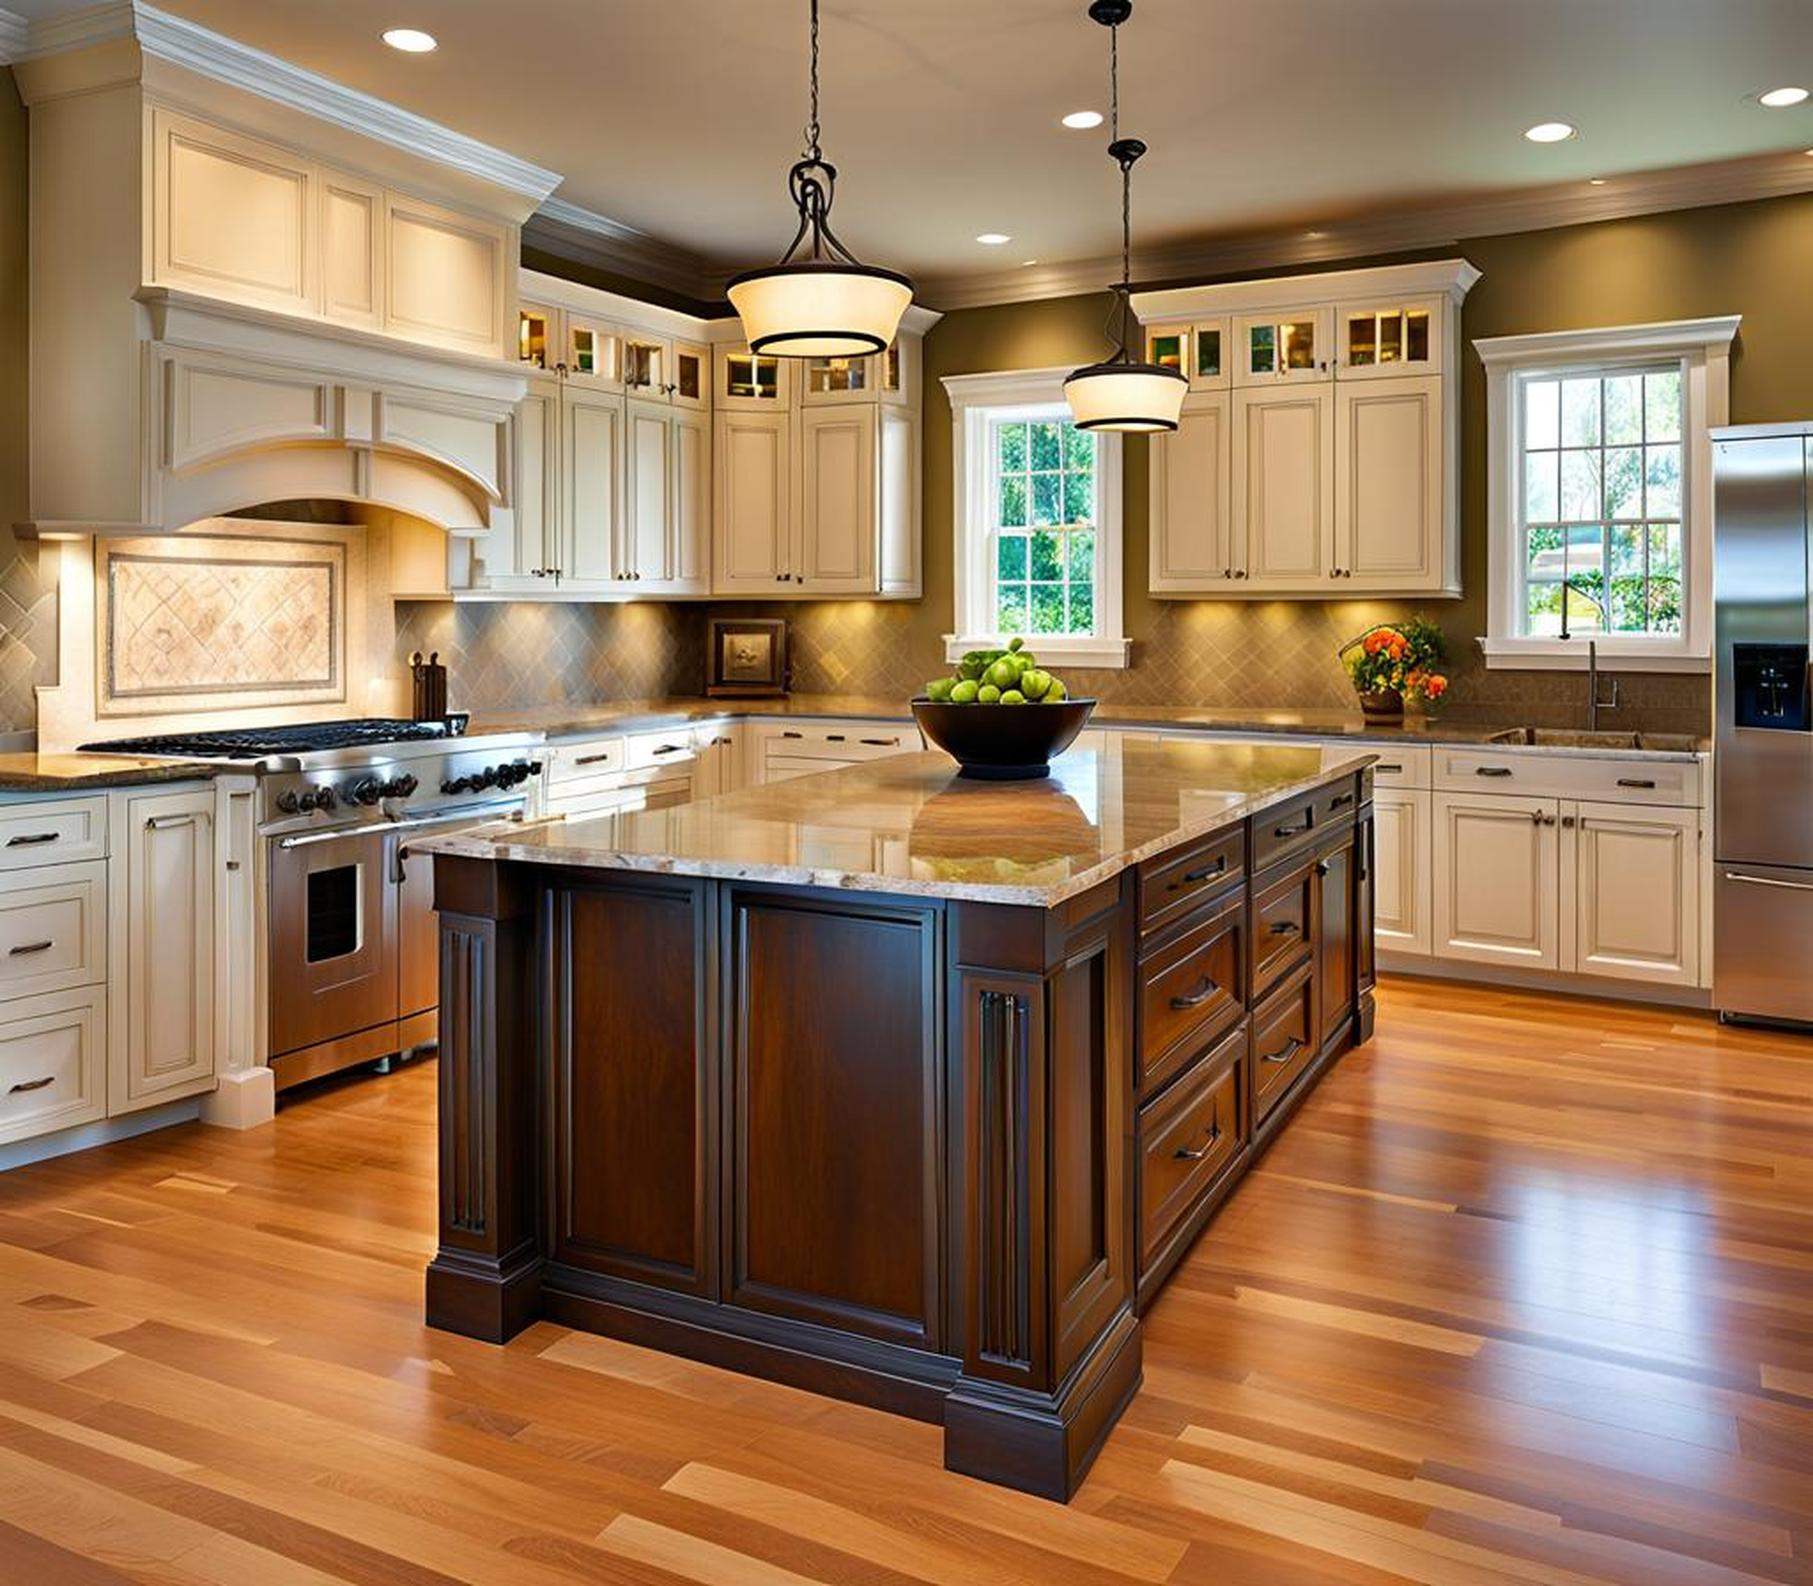
Rectangular Island
A rectangular island is the most common and straightforward shape. It can easily fit into any kitchen layout. The straight, parallel sides maximize usable counter space. Rectangular islands work well paired with round or square dining tables. A potential downside is limited seating space compared to curved islands.
L-Shaped Island
An L-shaped island provides ample room for seating along two adjoining sides. The distinctive shape can add visual interest to your kitchen. L-shaped islands are ideal for large, open floor plans. One drawback is limited space for appliances compared to rectangular islands.
U-Shaped Island
A U-shaped island offers seating all the way around with a clean, uninterrupted look. This island shape maximizes storage with base cabinets on three sides. But the solid U-shape can obstruct kitchen traffic flow. It’s best suited for large kitchens.
Curved Island
A curved island brings a unique, dramatic look to a kitchen. The rounded sides create an inviting, social focal point. Curved islands blur the boundaries between kitchen and dining space. On the downside, curved design limits storage and counter space versus straight islands.
Positioning Your Island
Proper island placement establishes an efficient kitchen workflow. Avoid cramping key work zones or interfering with traffic lanes. Here are optimal island positions for popular kitchen layouts:
Galley Kitchen Island
In a single-wall galley kitchen, center the island along the stove and sink wall. Ensure at least 4 feet clearance on each side. For double-wall galley kitchens, an island paralleling the length of the room provides ample counters and storage.
L-Shaped Kitchen Island
Tuck a rectangular island into the corner intersection of an L-shaped kitchen. An L-shaped island can also nestle into the crook against the cabinets. Avoid blocking the main L-shaped counter.
U-Shaped Kitchen Island
Place a U-shaped island within the mouth of a U-shaped kitchen. Position a rectangular island along the open base of the U, taking care not to constrict the work triangle.
Island Size Guide
Island dimensions impact functionality and traffic flow. Follow these guidelines when sizing your island:
Length
The island length depends on your kitchen’s size and layout. Allow at least 4 feet clearance on all sides. In large kitchens, islands can span 6-12 feet to maximize workspace and storage.
Depth
Standard island depths range from 30-48 inches. Shallower islands (24-30 inches) work well in compact kitchens. Deeper islands (42-48 inches) provide ample meal prep space and dining areas.
Clearances
Maintain at least 48 inches clearance between the island and surrounding cabinets or appliances. Wider clearance (5 feet) allows multiple cooks to work comfortably.
Incorporating Storage
Islands provide the perfect opportunity to increase your kitchen’s storage and functionality. Consider these storage options:
Cabinets
Base cabinets offer concealed storage for cooking equipment, dishes, pantry items, and more. Optimize storage with roll-out trays, racks, and other inserts.
Shelving
Open shelving adds handy space for cookbooks, small appliances, and frequently used ingredients while contributing to the island’s visual appeal.
Drawers
Deep drawers around the island perimeter maximize storage for utensils, linens, and other kitchen tools. Drawers keep items organized and easily accessible.
Appliances
You can incorporate appliances like sinks, dishwashers, cooktops, or even mini-fridges into your island for added functionality.
Pantries
An extended island with a built-in pantry provides generous space to organize canned goods, baking ingredients, and bulk supplies.
Adding Gathering Space
One advantage of a kitchen island is the ability to add casual dining and gathering areas. Here are some tips for creating an eat-in social space:
Overhang
An island with a countertop overhang allows seating on one side. The overhang length depends on seating type – allow 12 inches for counter stools or 18 inches for chairs.
Barstool Seating
High-backed barstools tuck neatly under an island overhang. Allow at least 15 inches of overhang per stool. Swivel stools make conversation easy.
Pendant Lights
Pendant lights hanging above the island define the dining zone. Position pendants 32-48 inches above the counter surface.
Decorative Touches
Beyond function, your kitchen island can provide eye-catching style. Consider these decorative elements:
Paint Color
An island with bold, contrasting color grabs attention. Bright white islands pop against dark cabinetry. Deep hues like navy or charcoal make dramatic statements.
Tile Backsplash
Accent the island with a tile backsplash for visual interest. Add pops of color, texture, and patterns not used on the other kitchen walls.
Legs
Elevate your island with decorative legs or feet. Fluted, chamfered, or curved wooden legs lend classic appeal. Sleek metal brings contemporary style.
Accent Lighting
Mini-pendants, recessed lighting, or LED strips illuminate the island’s decor. Accent lighting can highlight backsplashes, shelving, or other features.
Budgeting and Costs
Islands range widely in price. Basic prefab islands cost as low as $1,500. Larger custom islands with high-end finishes can run $5,000-$15,000 or more. Here are some factors affecting island costs:
- Size – Larger islands require more materials, driving up costs.
- Materials – Natural stone, quartz, high-grade wood and premium finishes are pricier.
- Features – More storage, appliances and custom elements increase expense.
- Labor – Installation costs are higher for custom designs.
Focus your budget on durable countertops and functional storage. You can scale back on decorative finishes to save money without sacrificing utility.
By considering layout, dimensions, and functionality, you can design a kitchen island that meets both your practical needs and design vision. An island helps unify the kitchen as an efficient workspace and inviting social center. With these tips in mind, you can create an island oasis perfectly tailored to you and your home.
Planning and designing a kitchen is an exciting journey full of possibilities. Approach each decision – like choosing the perfect island – as an opportunity to bring your unique kitchen dream to life. Before you know it, you’ll be gathering loved ones around your custom-crafted island.
1. The benefits of having multiple kitchen islands: While having a single island in a kitchen can be functional, adding multiple islands can provide even more benefits. Here are a few: – More storage: With multiple islands, you can have more cabinets and drawers for storing dishes, utensils, and other kitchen essentials. – More counter space: This is especially important if you enjoy cooking or baking, as it allows you to have more space to prep ingredients and spread out your tools. – More seating options: By having multiple islands with seating, you can create different areas for dining or socializing, which can be especially useful if you entertain frequently. – More flexibility: With multiple islands, you can customize the layout and function of your kitchen to fit your specific needs. For example, you might have one island dedicated to meal prep and another for entertaining or dining. 2. The importance of island placement: When designing your kitchen with islands, it’s crucial to consider the placement of the islands to ensure they are functional and not in the way. Here are some tips: – Consider the flow of the room: Think about how people will move around the kitchen. Islands placed in high traffic zones will become obstacles. – Maintain the kitchen work triangle: Make sure islands don’t interfere with the sink-stove-refrigerator primary workflow. – Allow proper clearance: Islands need at least 4 feet clearance from other kitchen elements on all sides. Anything closer will feel cramped. – Create defined spaces: Position islands to help differentiate cooking, dining, and entertaining zones.
