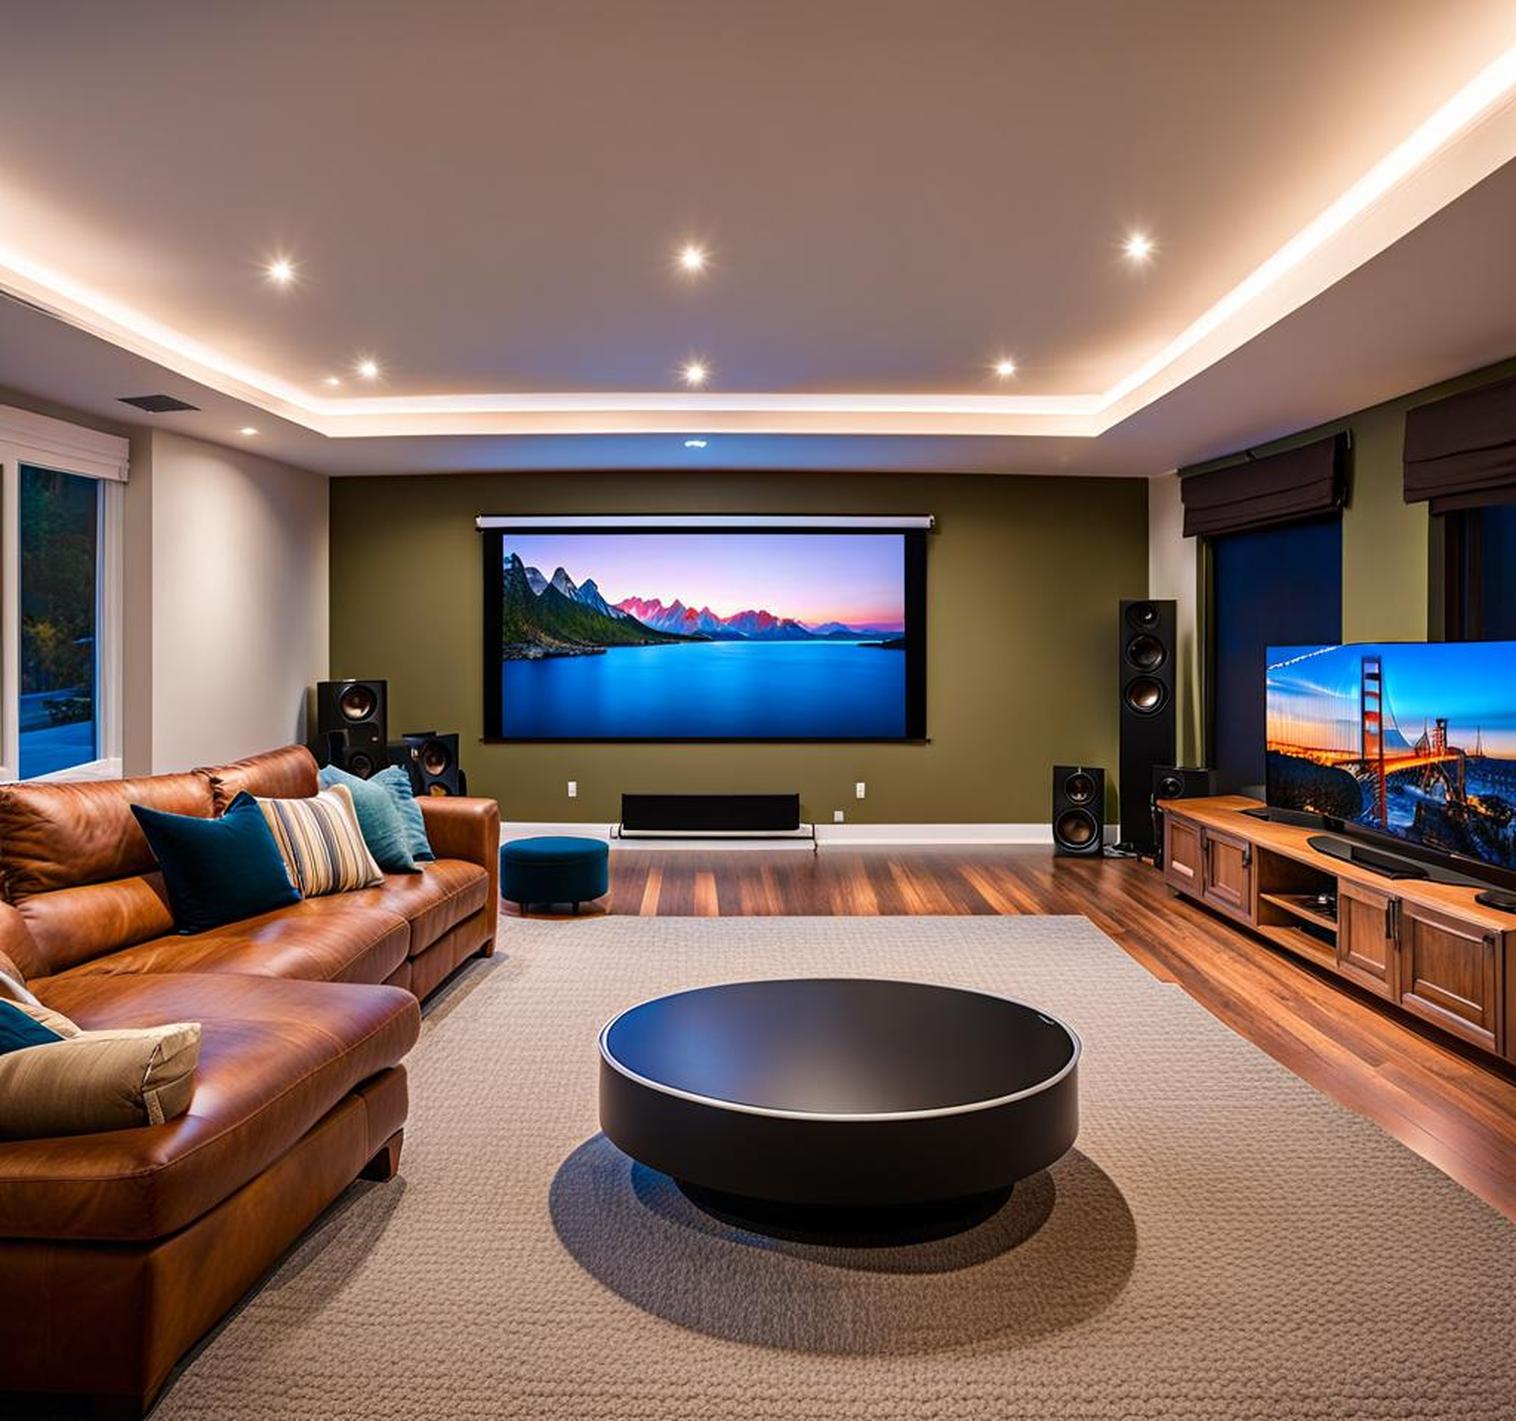
Are you looking to seriously upgrade your living room entertainment experience? Installing a projector can transform any living space into a private home theater perfect for movies, TV, gaming, and more. Projectors offer some unique advantages over traditional flat panel TVs that make them an excellent choice as the centerpiece of your living room.
First and foremost, projectors allow for massive screen sizes of 100 inches or larger that simply cannot be achieved with normal TVs. Being immersed in a cinematic, larger-than-life image will make you feel like you’re at the theater every time you watch a movie or TV show. The bigger picture and enhanced sense of immersion leads to higher enjoyment of any video content.
Benefits over Regular TVs
In addition to much larger possible screen diameters, projectors give you more flexibility in placement options compared to a wall-mounted TV. You also won’t have thick borders or bezels interrupting the picture. Most importantly, today’s 1080p and 4K home theater projectors are very competitively priced versus similarly specced large flat panel televisions.
Entertainment Uses
A living room projector setup delivers an awesome experience for movie watching, TV shows, and gaming. The big screen is also perfect for live sports viewing parties so you and your friends can catch all the action. For family movie nights, kids will be thrilled by the theater environment right inside your home. Gaming consoles or PCs connect just like they would to a TV. And you can use the large projected display for work presentations, slideshows, or instructional videos whenever needed.
Affordability of Home Theater Projectors
Projectors that can produce TV-sized 120-150 inch pictures now cost around the same as a high-end 65 inch TV. For the cost of just a mid-range flat screen you can set up an epic projection system that transforms your space. Prices have come down a lot while picture quality continues to improve with 4K models and new projection technologies that optimize for living rooms.
Projector Placement Considerations
The location where you place the projector is one of the most important decisions that will impact your viewing experience and installation complexity. As you evaluate options, keep these factors in mind:
Mounting Options
The most popular placement methods are:
- Ceiling mount: Offers an unobstructed projection path and keeps the projector out of the way.
- Shelf: Situate the rear of the projector on a shelf or media cabinet behind the seating area.
- Portable stand: Allows you to easily move the projector around the room.
Throw Distance to Screen
The throw distance is the amount of empty space needed between the lens of the projector and the screen surface. A longer throw distance requires a more powerful lens with a wider zoom range. Make sure to choose a projector model with a throw ratio range that fits your room layout.
Ambient Light/Windows
Controlling ambient light is crucial for optimum picture quality. Blackout curtains on windows pointing toward the screen are highly recommended. If there are too many uncontrolled light sources, consider a high-contrast projector boasting at least 15,000:1 contrast ratio for better image reproduction.
Adjustability Needs
Having the ability to digitally adjust critical parameters like image shape, height, and focus without physically moving the projector is very convenient. Many models include lens shift, digital keystone correction, and focus tools.
Aesthetics
For permanent ceiling or shelf installations, an inconspicuous black projector will likely blend into your environment better than a white one.
Selecting the Right Projector
With a wide range of home theater projectors on the market sporting different specifications at various price points, choosing the right model for your living room requires some careful consideration. Use this buyer’s guide when researching options:
Brightness (Lumens)
Projector brightness is measured in lumens. For rooms with some ambient light, choose at least 3000 lumens. In a fully light-controlled theater setup, 2000 lumens can work well. Brighter isn’t always better – make sure to balance brightness with contrast ratio.
Resolution
1920 x 1080 (Full HD 1080p) resolution is fine for most, but you may want to invest in a 4K model if you plan to pair your projector with an Ultra HD Blu-Ray player or 4K streaming device. Support for HDR is also nice to have for expanded contrast and more vivid colors.
Inputs and Connectivity
Ensure your projector has the ports and inputs needed to accommodate your devices. Look for at least two HDMI ports and audio output options to connect speakers. Wireless connectivity like WiFi and Bluetooth adds flexibility for streaming and casting content.
Contrast Ratio
A higher contrast ratio indicates whiter whites and blacker blacks for a more dynamic picture. Try to get a projector rated for at least 15,000:1 contrast. Contrast is what makes the picture pop!
Lens Zoom and Shift
More zoom range gives you better positioning flexibility and allows for larger projected screen sizes in relation to throw distance. Lens shift lets you digitally adjust the placement of the image without having to physically move the projector – very handy!
2D vs 3D
While less common today, support for active 3D via HDMI 1.4a and DLP Link can future-proof your projector if you want the option for immersive 3D movies using shutter glasses.
Brand Comparisons
When evaluating different models, consider brands like Epson, Optoma, BenQ and Viewsonic that specialize in home theater projectors. Read reviews and comparisons to pick the standout choice from each company that fits your feature needs and budget.
Projection Screen Selection
While blank white walls can work in certain setups, installing a purpose-built projection screen optimizes the video quality of your living room projector. Refer to this buying guide when picking out the perfect screen:
Fixed vs Motorized
Motorized screens with remote control offer the ultimate in convenience, but come at a higher price. Manual pull-down screens are cost effective. Fixed frame screens are the most budget friendly choice.
Size/Viewing Calculations
A general rule of thumb is a diagonal screen size of 1/2 to 1/3 the distance from your seats to screen. For example, with 12 feet seating distance, a 100 to 135 inch screen hits the ideal size range. Use a viewing calculator to dial in the perfect dimensions.
Aspect Ratio
16:9 widescreen is the most universal format for HDTVs and media content. But 2.35:1 ultrawidescreen (Cinemascope) delivers a more cinematic experience for movie watching if you have the wall space.
Material Choices
- Matte: Diffuses ambient light well in light-controlled rooms
- Angular Reflective: Adds extra brightness in bright rooms
Framing or Not
Framed screens combine durability with a clean, finished aesthetic. Frameless screens have very narrow exposed edges offering a floating, near-invisible effect.
Ambient Light Rejection Screen
ALR (ambient light rejection) screens utilize optical coating layers to increase contrast. Helpful for setups where you can’t fully control lighting conditions.
Connecting Your Video Sources
To interface the projector with your TV boxes, consoles, streaming sticks and other sources, you’ll need cables plus potentially some AV gear:
HDMI Cabling Best Practices
- Use certified Premium High Speed HDMI cables
- Active/powered HDMI cords handle 4K HDR signals over longer distances without degradation
- Plan out routing to cut down on excess cable slack
Cable Extenders, Concealers
Wire channel raceways neatly contain cables against baseboards and crown molding transitions. Wall-mounted cable boxes clean up wiring to mount points.
AV Receiver/HDMI Switch
A central home theater AV receiver or powered HDMI switch lets you connect multiple devices while handling 4K/HDR passthrough. Allows centralized source input switching.
Wireless Casting
For cable-free video streaming, use wireless screencasting protocols like Chromecast, Apple AirPlay, or Miracast to beam content from mobile devices to the projector over WiFi.
Audio System Considerations
While projectors feature built-in speakers, they don’t provide the best fidelity or surround sound capabilities. Adding dedicated speakers creates an awesome theater audio experience. Here’s what to think about for your sound setup:
Speaker Placement Guidance
Ideally speakers should be at seated ear-level, evenly spaced around the room. Angle surround speakers toward the central seating area. Bass should be intensified by corner subwoofer placement.
Surround Sound Setup
A 5.1 or 7.1 surround system with front L/R, side surrounds, rear surrounds and powered sub delivers incredible immersion for movies and games.
Soundbar vs External Speakers
Seamless soundbars offer simple plug-and-play audio boosts. For customizable speaker configs a la carte floorstanders, bookshelves and satellites paired with a receiver provide ultimate flexibility.
Final Installation and Configuration
Once you have all the gear, it’s time to bring your living room theater together. Follow these tips for seamless projector integration:
Physical Mounting/Install
For ceiling mounts, carefully site overhead joists and use the proper hardware to support the projector’s weight. Have helpers to test positioning and dial-in adjustments.
Focus and Alignment
Use test patterns while tweaking the manual focus ring and digital lens shift/keystone settings. Get the squares perfectly lined up and image geometry as rectangular as possible.
Display and Sound Settings
Go through menus like picture mode presets, brightness/contrast, color temp, audio EQ to calibrate for optimal video and sounding viewing.
Testing Images and Video
Pull up vibrant test pictures with bright and dark elements to assess contrast and color reproduction. Play varied video content at different resolutions to confirm cabling works properly.
Optimizing for Room Conditions
Tweak settings like high lamp brightness for daytime use or high contrast cinema mode for dark room viewing. Listen from multiple seating spots when adjusting audio balance and speaker volumes.
Enjoy Your New Home Theater!
After putting in all that effort researching equipment, running cables neatly behind walls, and dialing in the perfect picture, it’s time to reap the rewards and start enjoying your awesome new living room projector setup! Here some fun ideas to celebrate:
Host Movie Nights
Show off your new crown jewel home theater setup to friends and family with movie nights. Make fresh popcorn and pick a new action thriller or comedy to showcase the epic projection screen.
Gaming
Gamers will feel completely immersed battling baddies on over 100 inches of display goodness! First-person shooters and sports titles pop with vivid detail.
Sports Viewing Parties
March Madness and the big game look incredible on the big screen! Have the crew over, order some pizza, and enjoy every bit of game action like you’re courtside.
Make work presentations more effective and impressive beamed onto your home theater screen. Clients will be wowed by the scale.
