Searching for that perfect stained wood table to match your home’s coastal decor scheme but coming up empty handed? Rather than settling on a stain color, why not mix custom table stain colors to create your dream hue? Blending wood stains is surprisingly simple with some handy tips. Read on to become a custom stain mixing pro!
Overview of Blending Wood Stains for One-Of-A-Kind Colors
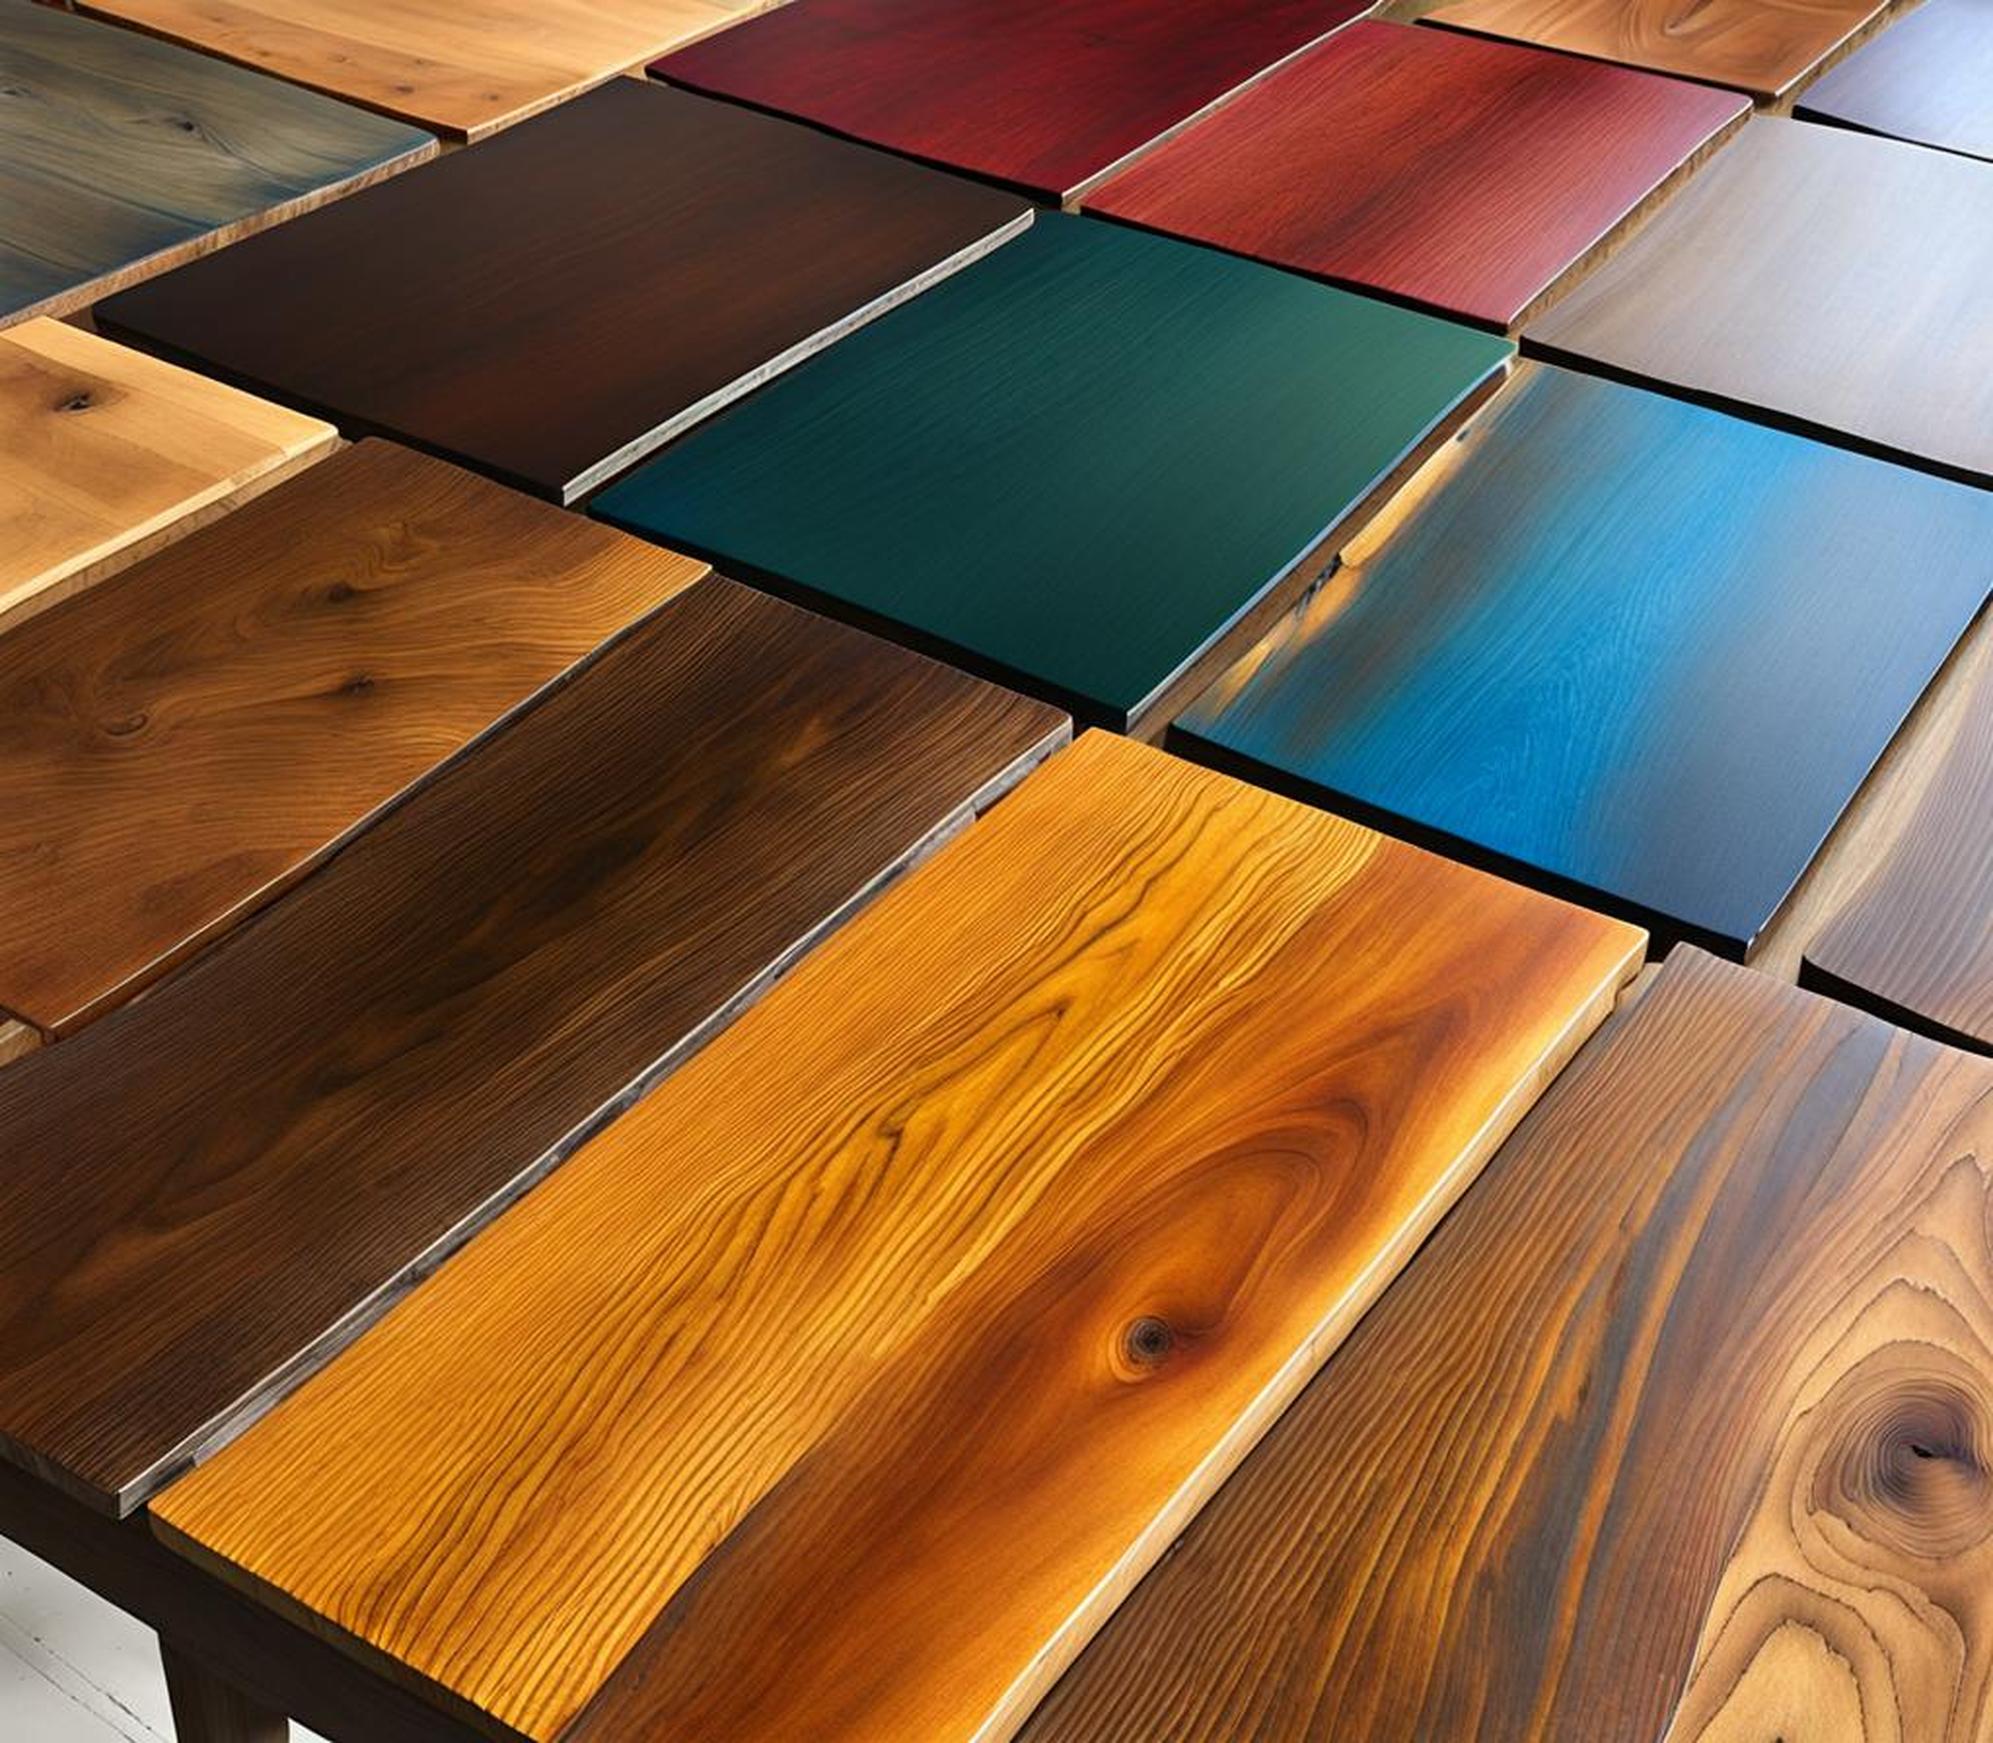
Pre-made wood stain options at the hardware store may cover the basics like “oak” or “walnut” tones. But when seeking a more unique stained table shade to coordinate with your eclectic color scheme, combining stains grants superior customization. You can curate the exact intensity, undertones, and finish sheen you have in mind. Doesn’t that table-to-be deserve special treatment?
Crafting custom blends allows you to:
- Neutralize any unwanted yellow, green, or orange wood undertones
- Deepen color depth without muddiness
- Experiment with on-trend faded and driftwood looks
- Match coastal decor palettes for beachy weathered finishes
With a few starter wood stains, vessels for mixing, and stain brushes, your options for one-of-kind tables expand exponentially. But before getting staining, let’s cover choosing base colors.
Choosing Base Stains as a Mixing Foundation
To concoct that flawless custom stained table shade, the stains you mix act as “base colors,” like blue and yellow when mixing paint pigments. But how do you select wood stains for blending? Consider what tone you hope the end result to become. Then…
Pick 1-2 Colors that Complement the Wood’s Undertones
Factor the table’s wood type into the equation if using unfinished planks. For example, pine contains yellow/orange undertones. Choose stains touting grayish-blue tones like Weathered Oak or Driftwood to neutralize the warm overtones. This prevents the custom color from skewing overly golden or ruddy when applied.
Or, Select Stains that Contrast the Wood’s Undertones
What if you prefer your Pine table to sport a rich cherry or mahogany-esque tone? Lean into the existing orange-ish appearance instead of fighting it. Pick two deep red/brown stains as mix bases to intertwine the wood’s natural vibrancy with your custom color for stunning outcomes.
Additionally, keep opacity in mind. Blending both transparent and opaque bases allows modulating sheens from bold solids to weathered washes to multi-dimensional layers.
Tips for Blending Multiple Stains Evenly
As when mixing custom paint colors, accuracy in measuring out stain ratios prevents ugly color mishaps. To blend multiple table stains into one cohesive brew:
1. Select Stain Vessels and Set Up Workspace
Gather sealable glass jars, plastic tubs, or metal cans for mixing. Cover your work surface well–stains can stubbornly stick to laminates. Consider working outside to avoid indoor stain splatters.
2. Pour Equal Parts of Each Stain
No need to meticulously measure with cups–eyeballing works for basic 50/50 stain splits. But jot down amounts if concocting larger batches to recreate the ratios later. Screw lids on tightly and…
3. Shake or Stir Dyes Thoroughly
Vigorously shake capped containers with both hands for 30+ seconds to fully incorporate both base stain colors. You may also use a paddle to stir inside open containers until no streaks remain before sealing.
Voila! Your two colors now become one in a vessel ready for testing on wood samples. But if the end result misses the intended mark, add more of one base until satisfied.
Testing Custom Stain Mixes on Wooden Planks
It’s finally time to preview your handcrafted mixed stain masterpiece! But wait–don’t go slathering it all over that table quite yet. Unpredictable factors like wood type, age, texture, and more influence how it accepts stain.
So first, paint your blend onto wood pieces exhibiting the table’s properties. Here’s how to test custom stains:
- Sand a few scraps with similar wood grain
- Fully stain scrap boards and let dry overnight
- Decide if your custom color hits the target or adjust ratios
If completely missing the mark, you can restart blending from scratch with different base stains. But minor color tweaks only demand adding a splash more of one or the other shades previously mixed. Test, and repeat.
Applying Your Custom Stain Creation to DIY Tables
Once happy with your proprietary stain concoction after testing, it’s finally time to transfer that gorgeousness onto your furniture! Here are tips for flawlessly staining tables with your blended mixture:
Prep the Wood Surface
Sand until smooth and wipe away all residual dust, dirt, or oils. Failing to properly prep almost guarantees streaks, blotches, or other uneven distressing (unless that’s the look you want!)
Stir the Stain Before Using
Give that custom color another vigorous mixing so pigments distribute evenly from bottom to top.
Use Quality Brush Techniques
Apply stain in smooth, long strokes while gently pressing bristles to work into grain. Avoid drips by periodically brushing out excess.
Wait at least 24 hours between coats to allow proper drying. Lightly sand then wipe clean between layers.
Creating Deeper Dimensions by Mixing 3+ Stains
Once comfortable blending two stains, why not incorporate even more base colors? Tres chic!
Combining three or more stains sweeps you into pro mixer territory for adding visual dimension through:
- Layering translucent and opaque colors
- Neutralizing multiple wood tones
- Deep charcoal and black accents for contrast
- Antiquing and driftwood weathering effects
But keep written notes of each stain addition so your magic mix can be replicated again later if desired. Baroque-style excel spreadsheet not required–jotting on scrap paper suffices!
Troubleshooting Tricky Custom Stain Mixes
Uh oh, your latest combination resulting in a color resembling nuclear ooze? Before panic sets in about ruining your coastal farm table, this can resolve by rebalancing the mix.
Too Dark from Overloading Pigment
Black is a powerful stain pigment for producing deep espresso hues. But adding too much risks muddying custom blends into brackish oblivion. Lighten overly-sooty mixes by adding more of the original base stain colors.
Too Red, Yellow, Blue, Etc. In Tone
Tweak staunch color casts stemming from one overpowered stain by pouring additional amounts of the other base color(s) until reaching pleasing equilibrium again.
Enhancing Wood Grain Beauty in Mixed Stains
Blended stains easily produce trendy faded patinas, but also beautifully celebrate natural wood characteristics. Try these grain-flaunting finishes:
Penetrating Oil-Based Stains
Thin, translucent oil stains fully saturate pores while allowing texture and growth rings to shine through.
Stain & Clear Coat Combo Finishes
Water-based stain+poly blends color wood without concealing grain behind solid opaque pigment.
White Wash Pickling
Driftwood weathering created by layering white over custom stain retains plenty of woodsy character.
And voila–your very own signature stain unlocked for coastal, farmhouse, or modern mixed media tables textured with beautiful woodsy essence.
FAQs: Your Lingering Custom Stain Blending Questions, Answered
We’ve covered quite a bit of mixology ground so far. But any remaining beginner questions before grabbing stain brushes and stirring those first blends? Here are answers to a few FAQs:
Can I Use Paint Instead of Stain for Mixing?
Mixing interior wood paints does allow custom colors. But paint fully obscures wood grain with thick opaque pigment. Stains better showcase texture.
Which Finish Should I Choose?
Consider sheens like gloss, satin, or matte. Gloss boasts durability and richness. Satin/matte offer more subtlety while allowing wood to shine.
How Many Coats of Stain Should I Apply?
2-3 thin, even coats typically provides adequate color saturation without drips or pooling.
What’s the Best Wood Stain Brand?
Top choices include Minwax, Varathane, General Finishes, and Zar. Test brands to compare saturation and clarity.
Armed with essential mixing methods, troubleshooting tips, and grain-flaunting tricks, you now possess the framework for creating custom wood stains like a pro. From neutralizing orange oak tones to handcrafting eroded sea glass finishes, embrace your inner artist!
For additional inspiration on coordinating tables and stain colors within complete room schemes, browse our coastal decor posts. And as always, we welcome hearing about your stain blending journeys through commenting below or contacting our studio.
