Is your kitchen looking a bit dated and tired? Do you want to give it a fresh, modern update without a full renovation? Installing shiplap under your kitchen bar is an easy DIY project that can instantly modernize the look of your space.
With its clean lines and rustic charm, shiplap brings warmth and character to any area its added to. By using it under your bar rather than a basic backsplash, you can transform your kitchen into a casually chic gathering place for family and friends.
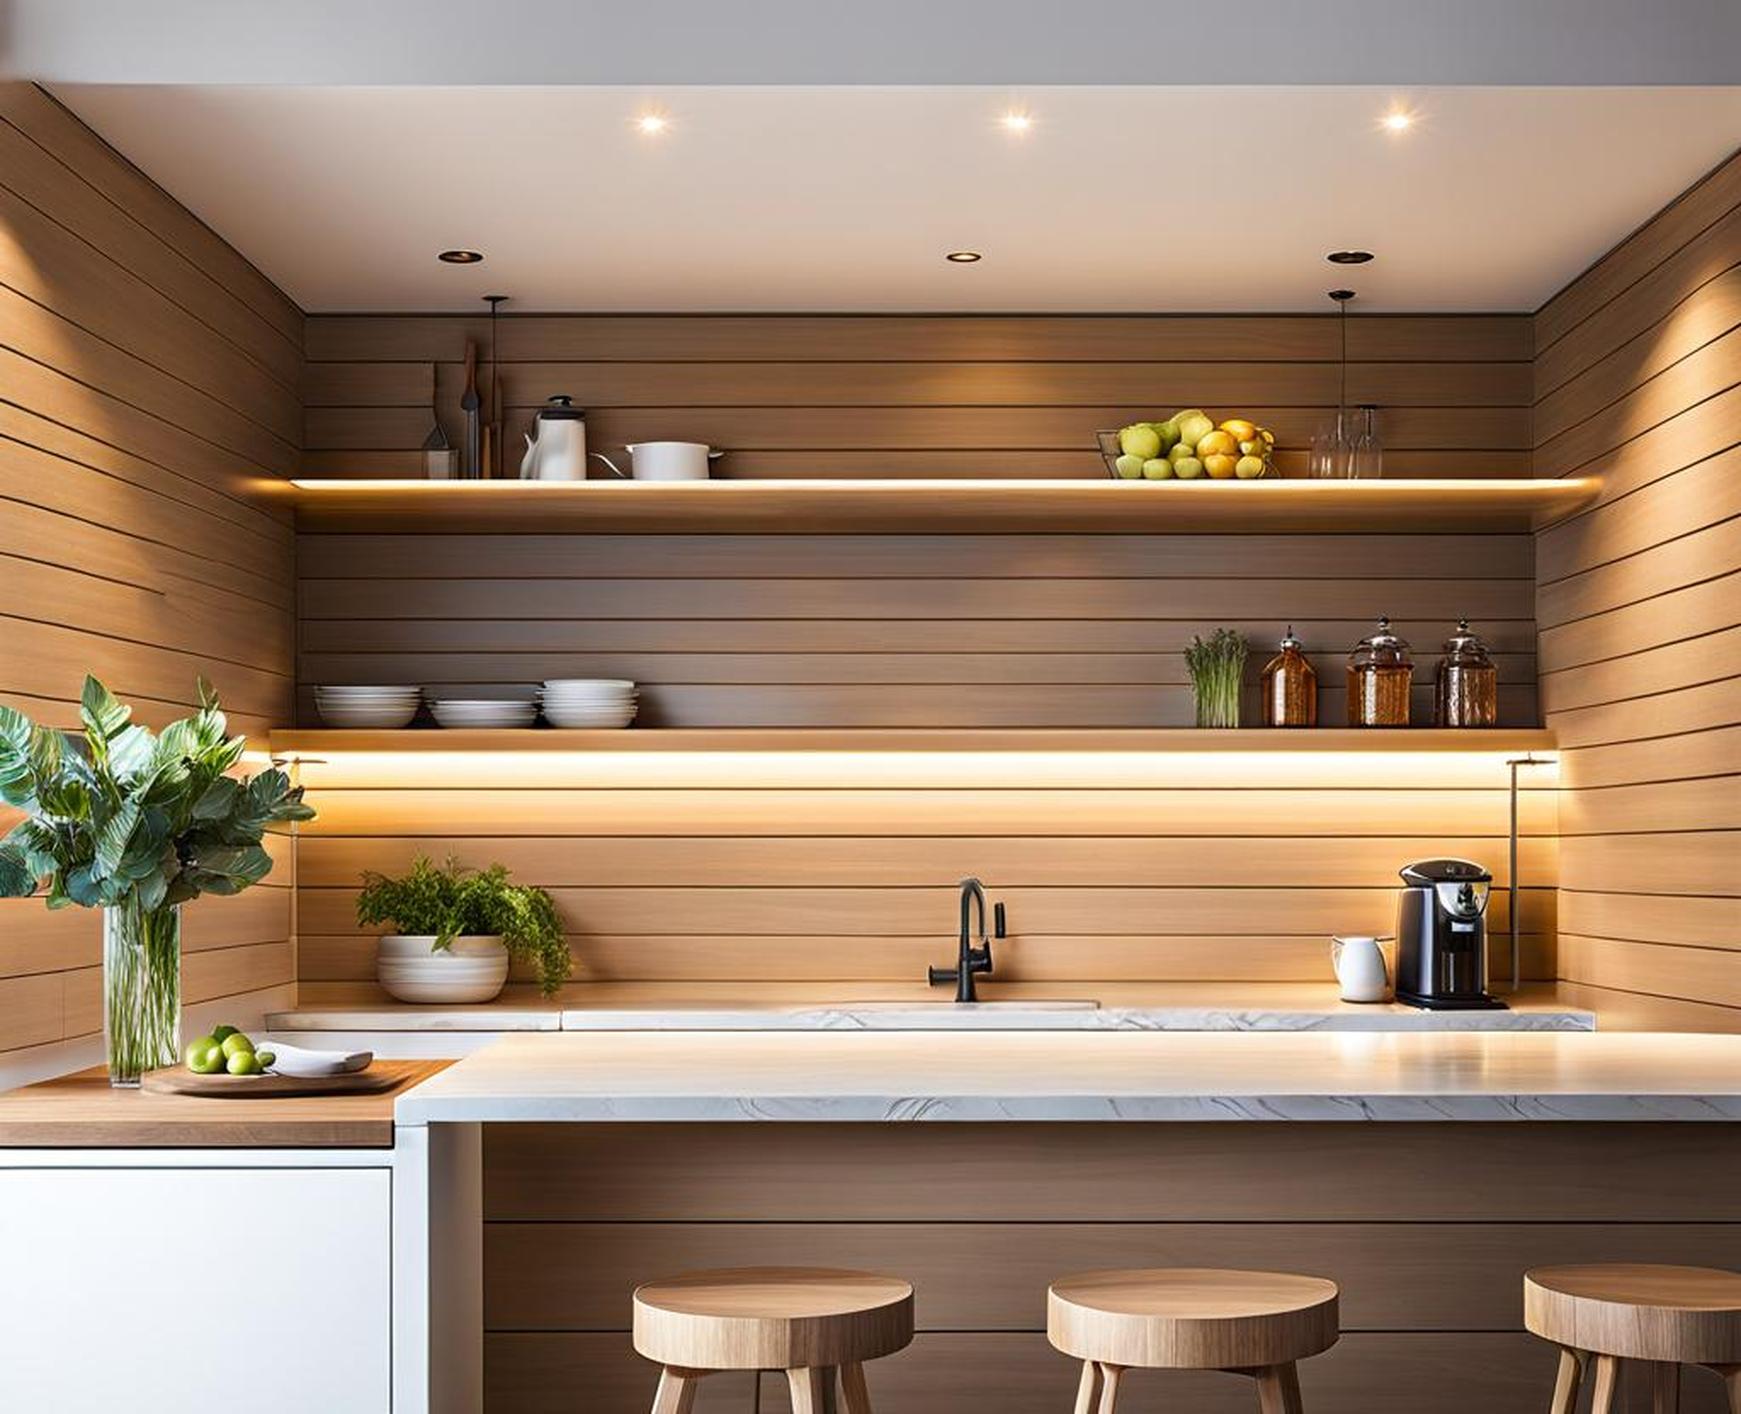
What is Shiplap?
Shiplap refers to horizontal wooden boards that have rabbeted edges, which create a tight, flush fit when installed next to each other. This gives shiplap its signature grooved look.
The most common types of wood used for shiplap are pine, oak, poplar and cedar. Pine is relatively inexpensive and has a knotty, rustic appearance that works well for achieving that farmhouse vibe.
Painted vs Natural Wood Shiplap
One of the great things about shiplap is that it can be left natural or painted any color you like. Painted white shiplap has a crisp, coastal feel that pairs well with light cabinets and marble or quartz countertops. Natural stained shiplap brings warmth and texture.
Full Wall Accent vs Under the Bar
While shiplap is commonly used as a full wall accent, such as behind a kitchen sink, using it solely under your bar is another great option. This allows you to add a special design detail just to your bar area without overhauling the whole kitchen.
Preparing for Installation
The great news about using shiplap under a kitchen bar is that it’s a pretty straightforward DIY project. But to ensure it goes smoothly, there are some key steps to take before beginning installation.
Selecting Your Shiplap Boards
First, decide on the width of the shiplap boards you want. Wider 6-8 inch boards make more of a statement. Narrow 3-5 inch boards have a more delicate, refined look. Choose a width that fits the scale of your kitchen.
Next, pick between real reclaimed shiplap, which has a genuinely aged appearance but costs more, or new pine boards made to look old and rustic. There are also faux shiplap boards made from plywood or PVC that cost less than real wood.
Measuring Your Bar Area
Carefully measure the area under your bar that you’ll be covering with shiplap. Don’t forget to account for any corners or uneven surfaces. Leave an extra 8-10% for any potential cuts or waste.
This will tell you how many square feet of shiplap you need to purchase. Most home improvement stores sell shiplap boards by the square foot.
Gathering Supplies
Before installation day, make sure you have all the necessary supplies on hand:
- Shiplap boards
- Finishing nails and/or wood screws
- Power drill
- Stud finder
- Level
- Safety goggles and masks
- Wood filler
- Primer and paint or wood stain
It’s also a good idea to have construction adhesive to really secure the shiplap boards to the wall.
Step-by-Step Installation
Once you have all your supplies ready, you can start the exciting process of installing shiplap under your kitchen bar. Follow these simple steps:
Prepping the Wall
Start by ensuring the wall surface under your bar is clean, dry and ready for installation. Use painter’s tape to mark the area the shiplap will cover.
Use a stud finder to mark where the wall studs are. You’ll secure the shiplap boards by nailing into the studs for the strongest hold.
If there are any outlets in the way, carefully cut openings in your shiplap boards to accommodate them.
Installing the First Board
Begin with the first shiplap board in a bottom corner of the bar area. Use a level and your stud marks to ensure it’s perfectly straight. Apply adhesive to the back of the board.
Predrill holes for finish nails or screws, and secure the board into the wall studs. Check that it fits flush against the wall with no gaps.
Filling in the Space
Continue installing boards, leaving 1/8″ gaps between them to allow for expansion and contraction of the wood. Stagger boards so the seams don’t all line up in a predictable pattern.
Use wood filler to patch any gaps. Periodically smooth joints with sandpaper. Work methodically until the entire area is covered.
Finishing Touches
Fill any visible nail holes with wood filler and sand smooth. Apply primer and your choice of paint color or wood stain. We recommend classic white for a light and airy look.
After the paint or stain has dried, caulk all around the edges for a polished finish. Now sit back and admire your work!
The fun part after installation is styling and decorating your gorgeous new shiplap bar. Here are some quick tips:
- Add barstools with woven or leather seats for an organic feel
- Incorporate black metal accents and pendant lighting for contrast
- Display fresh flowers and herbs in planters along the bar
- Hang a vintage-style mirror or piece of wall art
The natural beauty of the wood paired with the clean lines of your kitchen cabinetry and countertops creates a casually sophisticated look. Shiplap instantly warms up the space while still feeling current and fresh.
Your kitchen will become a chic and inviting space for gathering with friends and family with the help of stylish barstools. The addition of shiplap under your bar completely transforms the look while being a budget-friendly DIY project. It’s amazing what a simple design detail can do!
