For homeowners with uneven or sloped yards, building a traditional deck supported by piers and footings dug below the frost line can be challenging. But with the right floating deck design and materials, you can construct a sturdy, level deck without excessive excavation. Floating deck blocks make it possible to elevate a deck over uneven ground for a fraction of the effort and cost of a regular framed deck. Read on to learn how floating deck blocks work and how to build a deck that adapts to the natural slopes and contours of your landscape.
Choosing a Floating Deck
Floating decks are a great solution for properties with uneven terrain or slopes. By using blocks designed for floating deck foundations, you can avoid the need for substantial excavation, retaining walls, and other earthwork. Floating blocks sit right on the ground, allowing you to adjust and level the deck regardless of the grade beneath it.
When a Floating Deck Works Best
There are a few situations where opting for a floating deck build really makes the most sense:
- Your property has areas of sloped, uneven, or rocky terrain where digging traditional footings would be extremely difficult.
- You want to avoid the higher cost and labor of excavating holes for concrete piers in favor of a simpler foundation.
- The frost line in your area is very deep, requiring long pier footings to meet code.
- You don’t want to have tall railings or steps following the slope of your yard.
In these cases, a floating deck is often the most affordable and practical solution for having a usable outdoor living space.
Floating vs. Traditional Deck
How does a floating deck compare to a more traditional deck structure?
With a regular deck, the joists sit atop concrete piers or footings that extend below the frost line. This means excavating deep holes across the deck footprint for the footings to prevent frost upheaval. The base of the deck stays fixed at this below-grade depth as the joists and decking are built on top.
A floating deck relies on blocks set right on the ground surface instead of footings. The first row of blocks gets leveled on the existing soil or grass. Then additional blocks are stacked in a staggered pattern to support a frame of joists floating above. The whole structure rises and falls with any contours of the yard.
Let’s compare some key pros and cons:
Floating deck pros:
- Adapts to uneven terrain without retaining walls or grading
- No need for deep excavations for footings
- Much less site preparation needed
- Fewer permit requirements in most cases
- Less chance of frost heaving compared to footings
- Can follow the natural slope of yard
Floating deck cons:
- Deck height may be limited based on block options
- No option for space beneath the deck
- Generally not recommended for larger decks
- May require periodic leveling adjustments
For most homeowners dealing with a bumpy, uneven yard, the pros of simpler construction and not fighting the terrain outweigh the drawbacks. That makes a floating deck an ideal DIY project!
Deck Block Options
Interlocking blocks designed specifically for floating deck foundations are the key to building up over uneven ground. There are two main material choices:
Plastic Deck Blocks
Plastic deck blocks are a lightweight and affordable option. They are made from durable polypropylene plastic and molded with either a square or round interlocking design. The blocks stack together in layers, with each level set perpendicular to the row beneath it for stability. Built-in spacer tabs leave room for water drainage and prevent shifting.
Some of the benefits of plastic deck blocks include:
- Very lightweight and easy to handle
- Resist damage from moisture and freezing
- Adjustable build height from 2″ up to 36″ high in some brands
- Often less expensive than concrete options
Brands like DeckBlocks, RDI and SnapStone offer complete plastic block systems. The downside is that plastic can become brittle and crack over time when exposed to a lot of direct sunlight.
Concrete Deck Blocks
For a heavier duty foundation, poured concrete blocks are another good choice. These solid blocks offer more weight bearing capacity for larger decks. Leveling and stacking the blocks is more labor intensive. But they won’t shift or settle as easily as lightweight plastic.
Benefits of concrete deck blocks:
- Very strong and durable
- Higher weight capacity than plastic options
- Provide stability even during freeze/thaw cycles
- Won’t degrade as quickly from sun exposure
Popular brands of concrete deck blocks include Anchor Deck Blocks, DeckLok, and VersaDeck. There are also interlocking pillar block systems like the MatchBlock system, which can achieve greater heights.
The downside is that concrete blocks can crack under extremely heavy loads. And they are much heavier, weighing around 30 lbs each, so harder for a single person to reposition and level once in place.
Structural Design Elements
Now that you understand the floating deck block foundation, let’s look at how to build up the rest of the structure.
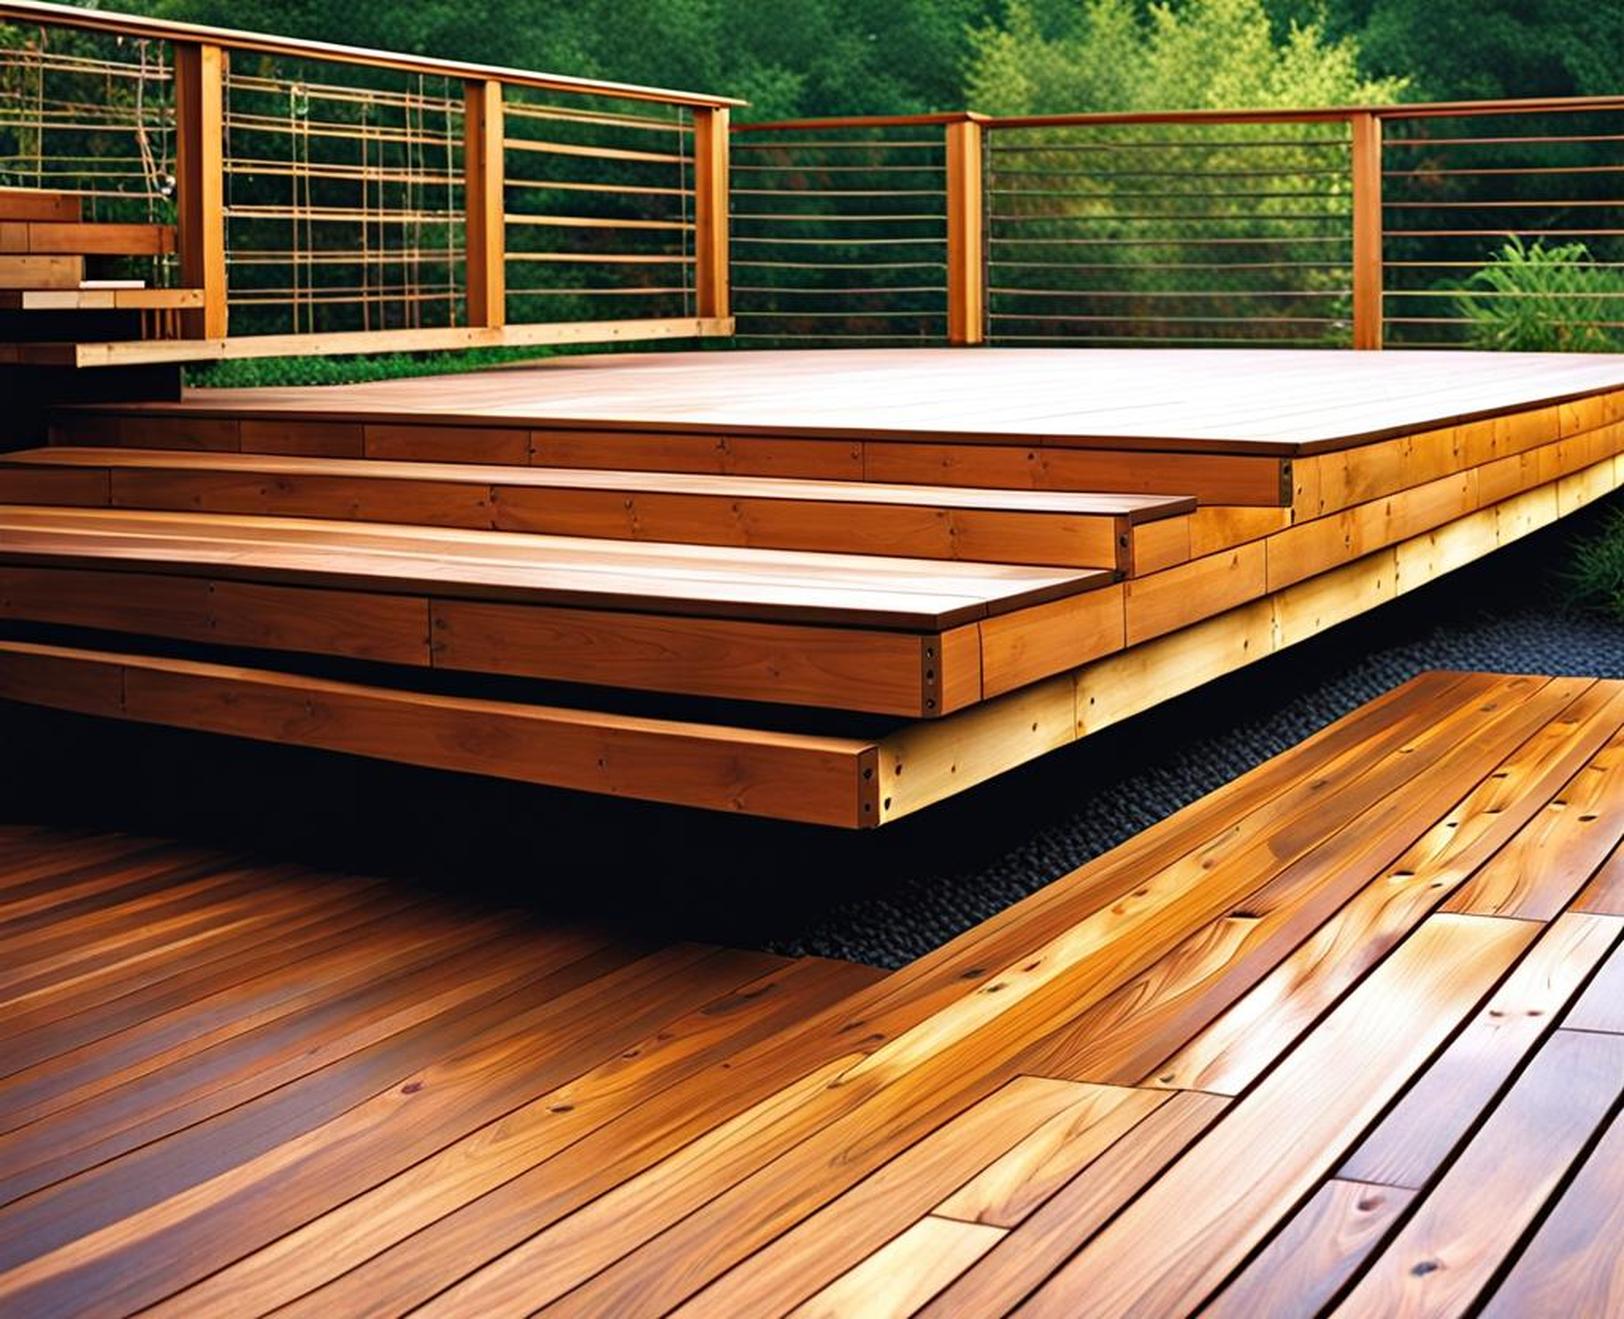
Joists
On a floating deck, the joists sit on top of the stacked deck blocks instead of resting on fixed footings or piers. 2×6 or 2×8 pressure treated joists are commonly used since they don’t require as much load bearing capacity.
The joists should be positioned perpendicular to the span direction, with each joist crossing over at least three blocks for stability. Adjacent joists are typically spaced 16″ on center based on the width of standard decking boards.
With a floating foundation, the joists are not physically attached to the blocks below. The staggered blocks prevent lateral movement while still allowing some rise and fall with ground contours. Using joist hangers at the ledger board and rim joists will lock the joist ends in place.
Decking
On top of the joists, you can use virtually any type of decking material. The benefit of a floating structure is that you don’t have to match up decking perfectly across uneven piers or footings. The joints between deck boards can follow the natural contours.
Some good decking options include:
- Pressure-treated lumber – inexpensive but requires yearly sealing
- Cedar – pricier but naturally rot-resistant
- Composite – no rotting but can get very hot in sunlight
- PVC – long lasting with cooler surface than composite
Proper gapping between decking is crucial for drainage and airflow. A general guideline is a 1/8″ gap for dry lumber increasing up to 1/4″ for wet lumber. Composite and PVC boards require slightly larger gaps.
Additional Framing
Even though the joists are floating rather than fixed to footings, you still need proper connections where the joists meet perimeter beams. Joist hangers should be used at the ledger board running along the house. Full-depth rim joists around the outer edge help contain the ends.
Diagonal bracing underneath is also recommended to provide lateral stability. This is important since the floating structure can shift a bit seasonally. Braces under the deck can counteract sideways movement or torque.
Building Process
Now that you understand the components, let’s look at the process of actually building a floating deck using blocks.
Planning
The first steps are to map out the size and layout of your planned deck. Measure the footprint area taking note of slopes and grade changes. Sketch a layout for optimal flow and functionality.
Determine the decking material you want so you can calculate joist spacing. Estimate the number of deck blocks you’ll need based on projected square footage and height. Order all your lumber and materials ahead of time.
Installing Deck Blocks
Start by clearing and leveling the installation area. Remove any sod or plants where the blocks will go using a flat shovel or spade. A gravel base is ideal but you can also place blocks directly onto soil or grass.
Position the first row of blocks around the perimeter, using a level to make sure they sit evenly. Stack additional blocks in a staggered pattern, rechecking for level frequently. Leave 1/8″ gaps between blocks for drainage and prevent shifting.
In especially uneven areas, you may need to dig out small areas of soil or use sand beneath specific blocks. The key is taking the time to ensure this first layer of blocks forms an even base.
Framing the Deck
With your blocks in place, you can start installing the deck frame. Cut a ledger board to fit snug against the house where the deck will attach. Then cut and position joists crossing perpendicular over the blocks.
Use galvanized joist hangers to secure the joist ends to the ledger. This allows lateral movement while resisting vertical forces. Installing full-depth rim joists around the perimeter helps contain the outside joist ends.
Space joists at your planned on-center spacing based on the decking material. Typical spacing is 16″oc or 24″oc. Adjacent joists should cross over different deck blocks to distribute weight.
Allow a 1/4″ gap between joists and any fixed walls or posts so the floating structure can expand and contract naturally with changes in moisture and temperature.
Adding Decking
Once you have a fully framed deck, installation of the decking is very similar to a standard deck build. Ensure proper gapping between boards based on the material. Use screws rather than nails for a more secure hold.
Pay attention to any uneven areas and slopes. Varying the gaps between deck boards can help smooth transitions between higher and lower sections.
Staggering the end joints between rows avoids alignment that could loosen decking over time. Using hidden fasteners or screw plugs results in a cleaner look compared to exposed deck screws.
Proper gapping is crucial for water drainage and debris clearance. Follow manufacturer guidelines for appropriate spacing based on expected wood expansion and contraction.
Maintaining a Floating Deck
A benefit of floating deck blocks is their adjustability. Settling or frost heaving can sometimes cause blocks to shift position over the first year. As a result, periodic inspection and tuning up is recommended.
Check for level in several spots on your deck during each season the first year. Realign and add or remove shims as needed to re-level any problem areas. Keeping gaps between blocks clear ensures proper drainage.
Long-term maintenance involves re-sealing or re-staining decking at the appropriate intervals. Always allow the floating structure to expand and contract naturally seasonally.
Avoid storing heavy objects in one area that could contribute to uneven settling over time. And use caution with deck additions like pergolas that could impose forces outside the original design.
Building a floating deck offers a great way to create useable outdoor space on a yard with uneven terrain or substantial slopes. Deck blocks eliminate the need for extensive grading, retaining walls, or dug footings simplifying the construction process. And the result is a deck that works in harmony with the natural contours of your landscape.
With proper planning and layout, floating deck blocks can be used to build a level deck surface on the ground. Just take things step-by-step, adjusting as you go to compensate for any unevenness. Soon you’ll be enjoying a new outdoor living area that rises above whatever your property can throw at it!
