The art of drapery installation requires a lot of knowledge. These essential tools provide precise measurements for achieving the perfect balance between aesthetics and functionality in window treatments. A drapery stack back chart offers invaluable guidance, ensuring that your curtains hang beautifully while allowing optimal light control. By delving into the intricacies of these charts, you’ll elevate your drapery game, creating stunning, professional-looking results that transform any space into a well-designed haven.
Understanding Drapery Stack Back Charts: A Comprehensive Guide
Drapery stack back charts are indispensable tools in the world of window treatments. They serve as a roadmap for determining the exact amount of space required between the window and the drapery when it’s open. This crucial measurement affects both the visual appeal and practicality of your window coverings.
At its core, a drapery stack back chart considers several key factors:
- Fabric thickness
- Carrier width
- Pleat spacing
- Lining details
By taking these elements into account, the chart provides precise measurements that ensure your draperies look stunning when both open and closed.
The importance of stack back measurements cannot be overstated. They directly impact the overall aesthetics of your room, influencing how much natural light enters the space and how the draperies frame your windows. A well-executed stack back can make your windows appear larger, your ceilings higher, and your room more spacious.
Professional drapery installation relies heavily on accurate stack back calculations. Without proper planning, you might end up with curtains that bunch awkwardly when open or fail to cover the entire window when closed. By utilizing a drapery stack back chart, you ensure that your window treatments not only look polished but also function flawlessly.
Understanding the nuances of stack back charts allows you to make informed decisions about your drapery design. You can confidently choose the right fabric, hardware, and installation method to achieve your desired look. Whether you’re aiming for a sleek, modern aesthetic or a more traditional, luxurious feel, the stack back chart serves as your guide to achieving professional-quality results.
Mastering the Art of Drapery Stack Back Planning
To become proficient in drapery stack back planning, you’ll need to familiarize yourself with essential tools and techniques. A measuring tape, level, and pencil are your basic necessities. For more precise measurements, consider investing in a laser measure device. These tools will help you achieve the accuracy required for professional-looking results.
Creating a drapery stack back chart involves several steps:
- Measure the width of your window
- Determine the desired fullness of your draperies
- Calculate the total width of fabric needed
- Measure the rod length
- Consult the stack back chart to determine the appropriate stack back width
Remember, the goal is to create a harmonious balance between the open and closed positions of your draperies.
Different stack back patterns can dramatically alter the look of your window treatments. Some common patterns include:
- Center draw: Draperies open from the middle, stacking back evenly on both sides
- One-way draw: Curtains stack back to one side of the window
- Multiple panels: Several smaller panels create a layered effect when stacked back
Each pattern has its unique charm and can be tailored to suit various room styles and window configurations.
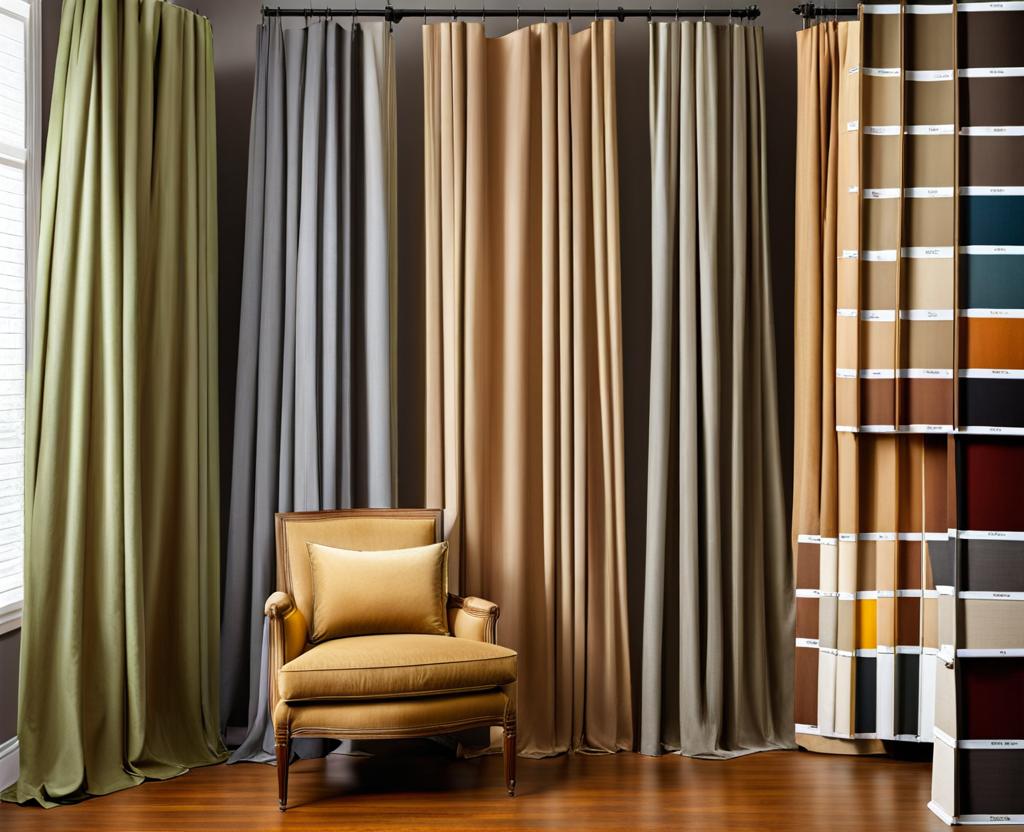
Optimizing stack back calculations for different fabric types is crucial for achieving the desired look. Heavier fabrics like velvet or lined curtains will require more space when stacked back compared to lighter materials like sheer voile. I always recommend adding an extra inch or two to your calculations for heavier fabrics to ensure smooth operation and a polished appearance.
By mastering these techniques and understanding the nuances of stack back planning, you’ll be well-equipped to create stunning drapery installations that elevate any space. Remember, practice makes perfect, so don’t be afraid to experiment with different patterns and fabrics to find the perfect combination for your unique style.
Exploring Alternating Drapery Stack Back Designs
Alternating drapery stack back designs offer a fresh and dynamic approach to window treatments. This innovative technique involves varying the stack back pattern across multiple windows or within a single large window treatment. The benefits of incorporating alternating stack backs are numerous and can significantly enhance the visual interest of your space.
One of the primary advantages of alternating drapery stack backs is the creation of a rhythmic, balanced look. By strategically varying the stack back positions, you can achieve a sense of movement and flow in your room design. This approach works particularly well in spaces with multiple windows, where a uniform stack back might feel monotonous.
To achieve a well-balanced alternating stack back, consider the following techniques:
- Alternate between left and right stack backs for adjacent windows
- Create a center-open pattern on one window and side-stack patterns on others
- Vary the fullness of stack backs to create depth and dimension
- Combine different fabric weights or textures for added visual interest
The key is to maintain a sense of intentionality and harmony in your design choices.
Alternating stack backs can be creatively applied to various room styles. In a traditional setting, you might opt for a more subtle alternation, perhaps varying the fullness of the stack backs while maintaining a consistent side-draw pattern. For contemporary spaces, bold contrasts in stack back positions can create a striking, modern look.
While alternating drapery stack backs can elevate your window treatments, they also come with potential challenges. One common issue is achieving consistent light control across different stack back positions. To address this, I recommend using light-filtering linings or layering sheer panels behind your main draperies. This approach ensures a uniform light distribution regardless of the stack back pattern.
Another consideration is maintaining proper functionality with alternating stack backs. Ensure that each drapery panel has enough space to stack back fully without obstructing the view or interfering with nearby furniture. Careful measurement and planning are essential to avoid these pitfalls.
By thoughtfully incorporating alternating drapery stack back designs, you can transform ordinary windows into captivating focal points. This technique allows you to showcase your creativity while maintaining the practical benefits of well-designed window treatments. Remember, the goal is to create a cohesive look that enhances your overall interior design while providing the light control and privacy you desire.
Professional Techniques for Hanging Drapery with Precise Stack Back
Achieving a professional-looking drapery installation with precise stack back begins with proper preparation of the window area. Start by thoroughly cleaning the window frame and surrounding walls. This step ensures that your measurements are accurate and that the hardware will be securely attached.
Next, you’ll want to measure and mark your stack back positions with utmost precision. Here’s a step-by-step guide to help you through this process:
- Measure the width of your window opening
- Add the desired stack back width to each side (refer to your stack back chart)
- Mark these points lightly on the wall with a pencil
- Use a level to ensure your markings are perfectly straight
- Double-check all measurements before proceeding with hardware installation
Remember, even small discrepancies can lead to noticeable imperfections in the final look of your draperies.
To achieve perfect drapery stack backs, you’ll need the right tools and hardware. Essential items include:
- A high-quality drapery rod with smooth gliders or rings
- Sturdy brackets that can support the weight of your draperies
- A laser level for precise alignment
- A power drill for secure hardware installation
- Drapery weights to ensure proper hanging and stack back
Investing in quality hardware will make the installation process smoother and result in a more polished final look.
Now, let’s walk through the process of hanging draperies using stack back charts:
- Install your drapery rod according to your marked measurements
- Attach your drapery panels to the rod, ensuring even distribution of pleats or folds
- Slowly open the draperies, guiding them to their stack back positions
- Adjust the stack back width if necessary, ensuring it aligns with your chart measurements
- Use drapery weights or ties to train the fabric to hold its shape when stacked back
Take your time with this process, as rushing can lead to uneven stack backs or misaligned panels.
One pro tip I always share is to “train” your draperies after installation. This involves leaving them in the stacked back position for 24-48 hours, allowing the fabric to settle into its new shape. This simple step can make a significant difference in how your draperies look and function over time.
By following these professional techniques and paying close attention to your stack back chart, you’ll achieve drapery installations that look like they were done by a seasoned expert. The result will be window treatments that not only enhance the beauty of your space but also function flawlessly for years to come.
As you delve deeper into the world of professional drapery installation, you’ll discover that advanced stack back strategies can elevate your window treatments from good to extraordinary. One powerful tool at your disposal is the drapery stack back calculator. This digital resource takes into account multiple variables such as fabric weight, pleat style, and rod length to provide precise stack back measurements.
To use a drapery stack back calculator effectively:
- Input accurate window and rod measurements
- Select your fabric type and weight
- Choose your desired pleat style
- Specify any lining or interlining
- Review the calculated stack back width and adjust as needed
These calculators are particularly useful for complex designs or when working with unusual window shapes.
Speaking of unique window configurations, incorporating stack back considerations into custom drapery patterns requires a keen eye for detail. For arched windows, for instance, you might need to create a curved stack back that follows the window’s contour. In the case of bay windows, consider how the stack backs will interact at the corners to maintain a cohesive look.
Innovative approaches to stack back planning can truly set your window treatments apart. Here are some advanced techniques to consider:
- Layered stack backs: Combine sheer and opaque fabrics for depth and versatility
- Asymmetrical designs: Create intentional imbalance for a modern, artistic look
- Motorized stack backs: Incorporate smart home technology for precise, automated control
- Decorative stack back covers: Use fabric-wrapped boards or valances to conceal the stacked fabric
These techniques can transform ordinary windows into stunning focal points.
Let’s explore a case study that showcases successful implementation of professional stack back techniques. I recently worked on a project involving floor-to-ceiling windows in a penthouse apartment. The client wanted a luxurious look without sacrificing the panoramic view. We opted for a combination of sheer panels and heavier draperies, using a motorized system for the stack backs.
The stack back chart indicated we needed 24 inches on each side for the heavy drapes and 12 inches for the sheers. We used a drapery stack back calculator to fine-tune these measurements based on the specific fabrics chosen. The result was a stunning installation that allowed for complete privacy when closed, unobstructed views when open, and a range of light-filtering options in between.
Another innovative approach we’ve employed is the use of decorative stack back covers. In a traditional dining room, we created custom-upholstered cornices that perfectly concealed the stacked draperies when open. This technique added an extra layer of polish to the room while maintaining the functionality of full-length draperies.
By mastering these advanced stack back strategies, you’ll be equipped to handle even the most challenging window treatment projects. Remember, the key to success lies in careful planning, precise measurements, and a willingness to think outside the box. With these skills in your arsenal, you’ll be able to create window treatments that are not just beautiful, but truly extraordinary.
