Tackling the challenge of how to build a pallet deck on uneven ground can seem daunting, but with the right approach, it’s an achievable DIY project that can transform your outdoor space. Whether you’re dealing with a slight slope or a more dramatic incline, we’ll cover techniques to ensure your deck is stable, level, and ready for years of enjoyment. Let’s dive into the world of pallet deck construction and turn that tricky terrain into a fantastic outdoor living area!
Building a Pallet Deck on Uneven Ground: Essential Preparations
Before we dive into the nitty-gritty of constructing pallet decks, it’s crucial to lay the groundwork with thorough preparation. The success of your DIY pallet deck project hinges on these initial steps, especially when you’re dealing with uneven ground.
First things first, let’s talk about assessing your terrain. I always recommend walking the area where you plan to build your deck, noting any significant changes in elevation. Use a long level or string level to get a sense of how much the ground slopes. This step is vital because it will inform your entire approach to building the pallet deck.
Once you’ve got a good handle on your terrain, it’s time to break out the measuring tape. Accurate measurements are your best friend when it comes to organizing pallet deck construction. Measure the length and width of your proposed deck area, and don’t forget to account for any obstacles like trees or large rocks that you’ll need to work around.
Now, let’s talk tools and materials. For building pallet decks, you’ll need:
- Pallets (obviously!)
- Saw (circular or reciprocating)
- Drill and screws
- Level
- Hammer
- Measuring tape
- Safety gear (gloves, goggles, dust mask)
- Concrete blocks or pier blocks
- Gravel
- Landscape fabric
- Wood stain or sealant
Having these on hand will make your pallet deck construction process much smoother.
Selecting the right pallets is crucial for a sturdy and long-lasting deck. I always look for pallets that are in good condition, free from rot, and made of hardwood if possible. Heat-treated pallets (marked with ‘HT’) are ideal as they’re more resistant to pests and moisture. Remember, not all pallets are created equal, and choosing the right ones can make a big difference in the longevity of your deck.
Safety should be your top priority when working on uneven ground. Always wear appropriate safety gear, and be extra cautious when using power tools on sloped surfaces. It’s also a good idea to have a buddy around to lend a hand and keep an eye on things.
By taking the time to properly prepare, you’re setting yourself up for success in your pallet deck project. Trust me, the effort you put in now will pay off big time when you’re enjoying your new outdoor space!
Leveling Techniques for Constructing Pallet Decks on Sloped Surfaces
Now that we’ve covered the prep work, let’s tackle one of the most crucial aspects of building a pallet deck on uneven ground: leveling. This step is where the rubber meets the road, or in our case, where the pallet meets the earth.
Creating a level foundation on uneven terrain is the key to a stable and safe deck. One method I’ve found effective is using a combination of digging and filling. Start by digging out the high spots and using that soil to fill in the low areas. This process can be labor-intensive, but it’s worth it for a solid base.
For more severe slopes, you might need to get creative with your leveling techniques. This is where adjustable deck supports and concrete blocks come into play. These are game-changers when it comes to deck pallet construction on tricky terrain.
Here’s a simple way to use concrete blocks for leveling:
- Lay out your blocks where you plan to place your pallets
- Use a long level to check the height difference between blocks
- Adjust the height by adding or removing soil under each block
- Once level, fill around the blocks with gravel for extra stability
This method allows you to create a level surface even on significantly sloped ground.
For areas with a more dramatic incline, consider implementing a stepped design. This approach involves creating multiple level sections at different heights, connected by short stairs. It’s a bit more complex, but it can result in a unique and visually interesting deck that works with the natural contours of your land.
Don’t forget about drainage! Proper water management is crucial when you’re dealing with uneven decking. Ensure that your design allows water to flow away from your house and deck. You can achieve this by slightly sloping your deck (about 1/8 inch per foot) away from your home’s foundation.
Here’s a pro tip: Before laying your pallets, put down a layer of landscape fabric. This will help prevent weeds from growing up through your deck and can also aid in drainage. Top it with a layer of gravel, and you’ve got a solid, well-draining base for your pallet deck.
Remember, patience is key when leveling your site. Take your time and double-check your work. A level foundation is the difference between a wobbly, unsafe deck and one that will stand the test of time. Trust me, your future self will thank you for the extra effort you put in at this stage!
Now that we’ve got our site prepared and level, it’s time for the exciting part – actually building our pallet deck! This is where your vision starts to take shape, and all that prep work pays off. Let’s dive into the step-by-step process of assembling your DIY pallet deck on that tricky uneven ground.
First up, let’s talk about preparing the ground and laying a weed barrier. Even though we’ve already done some prep work, it’s crucial to ensure the area directly under your deck is ready:
- Clear any remaining debris or vegetation
- Smooth out the surface as much as possible
- Lay down your landscape fabric, overlapping the edges by about 6 inches
- Secure the fabric with landscape staples
- Add a layer of gravel on top for extra drainage
This creates a solid, weed-free foundation for your pallet deck surface.
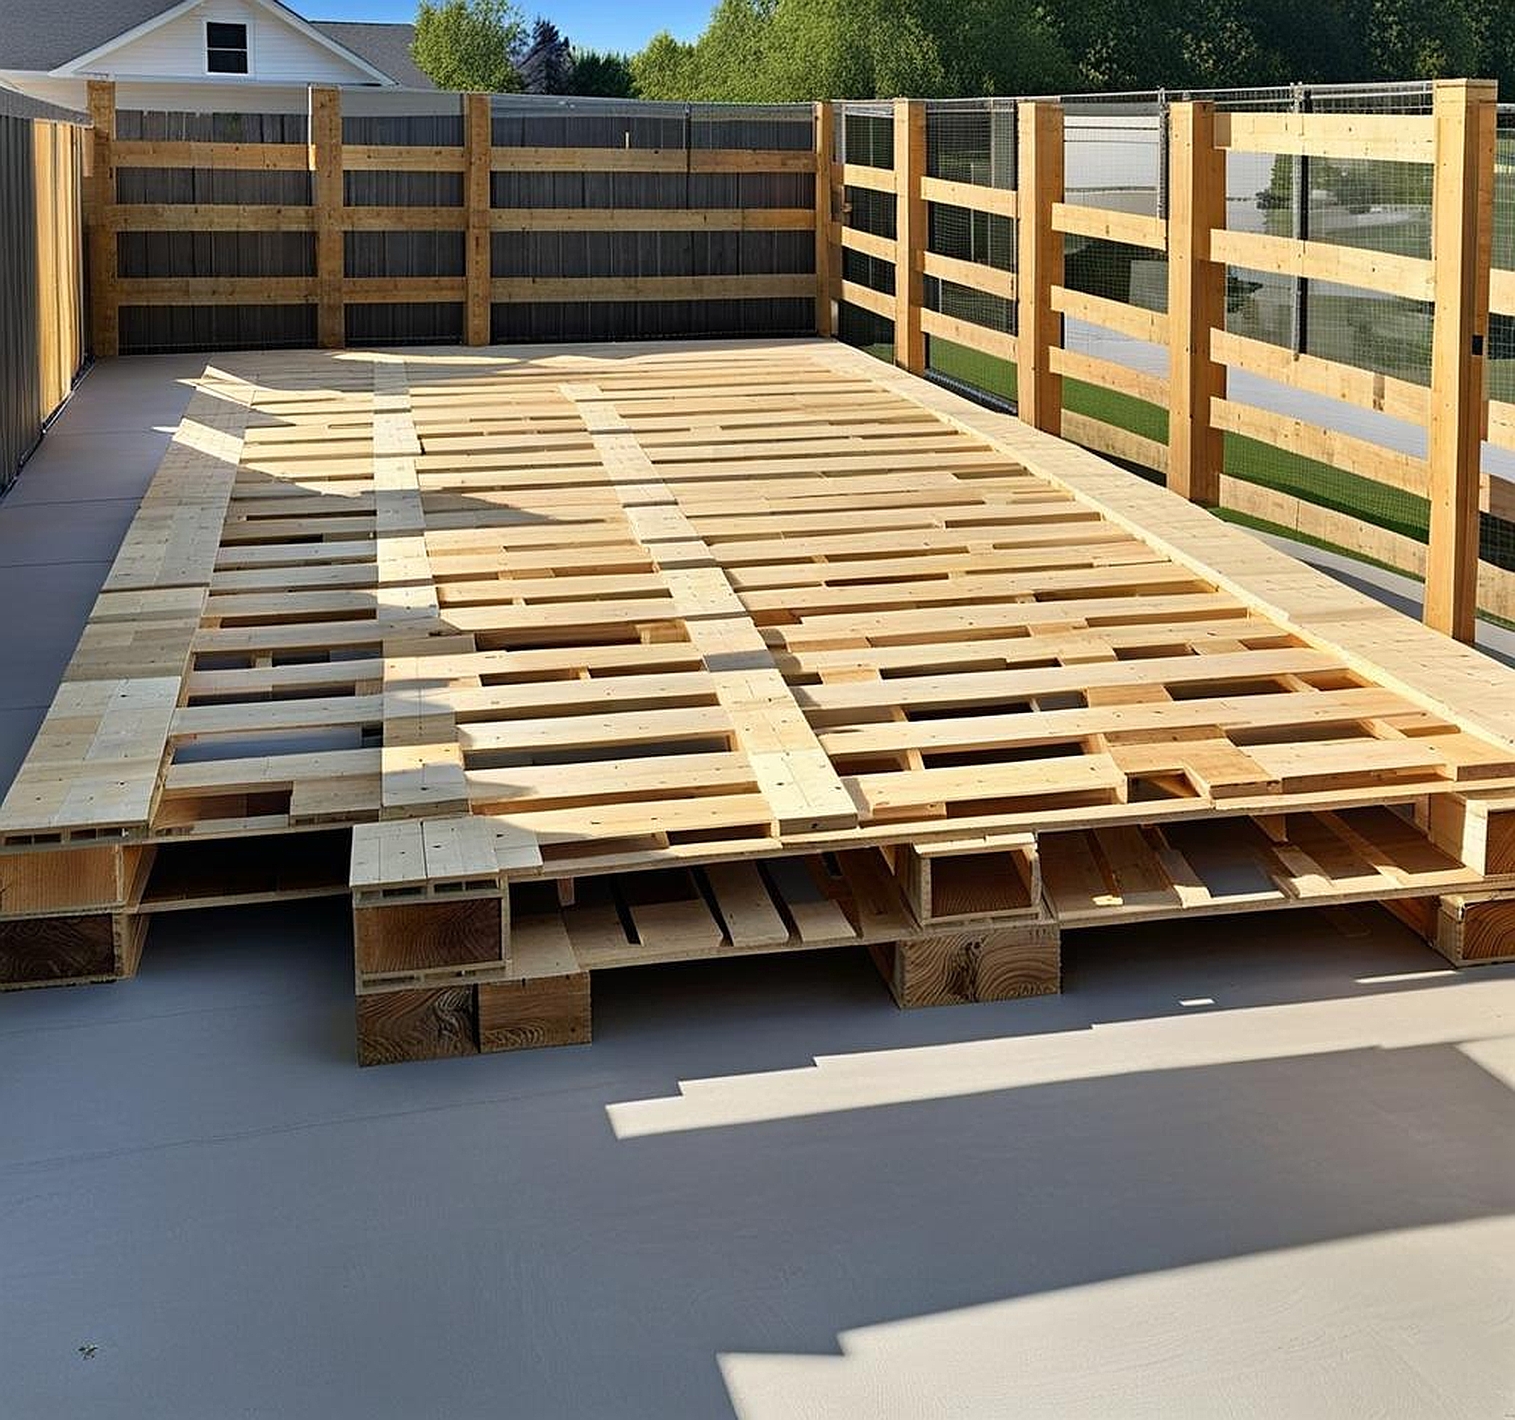
Next, we move on to framing the pallet deck structure. This step is crucial for ensuring the stability of your deck, especially on uneven ground. Start by laying out your base pallets:
- Place your first pallet in a corner of your prepared area
- Use your level to ensure it’s perfectly flat, adjusting with shims if necessary
- Continue placing pallets, checking that each one is level with the others
- Secure the pallets to each other using screws or bolts
Remember, a strong frame is the key to a sturdy deck!
Now comes the fun part – connecting and securing pallets to create a sturdy deck surface. This is where your DIY pallet deck really starts to take shape. Here’s how I like to do it:
- Start at one end and work your way across, attaching each pallet to the base frame
- Use lag bolts or heavy-duty screws to secure each pallet
- Make sure each pallet is snug against its neighbors
- Fill any gaps between pallets with additional wood planks for a smooth surface
As you work, keep checking that everything remains level. Uneven decking can be a tripping hazard, so it’s important to get this right.
Once all your pallets are in place, it’s time for the finishing touches. This is where your wood pallet deck goes from functional to fabulous:
- Sand down any rough spots or splinters
- Fill any nail holes or gaps with wood filler
- Apply a coat of wood preservative to protect against moisture
- Once dry, stain or paint your deck in your chosen color
- Finish with a clear sealant for extra protection
These steps not only make your deck look great but also help protect it from the elements, extending its lifespan.
Here’s a bonus tip: Consider adding built-in features to your pallet deck. Things like benches, planter boxes, or even a small storage area can be incorporated using additional pallets. This not only adds functionality but also gives your deck a custom, high-end look.
Building a pallet deck on uneven ground is a challenge, but it’s also incredibly rewarding. As you step back and look at your finished project, you’ll feel a sense of pride knowing that you’ve transformed a tricky space into a beautiful, functional outdoor living area. And the best part? You did it yourself, using reclaimed materials, saving money and reducing waste in the process. Now that’s something to celebrate on your new deck!
