Determining the ideal shower niche height from floor level is crucial for creating a functional and aesthetically pleasing bathroom space. This often-overlooked detail can significantly impact your daily shower experience and the overall design of your bathroom. We’ll explore the key factors to consider when measuring and installing your shower niche, ensuring it meets both practical needs and design preferences. Let’s dive into the essentials of shower niche placement and discover how to achieve the perfect balance between form and function.
Understanding Shower Niche Height: Importance and Impact on Bathroom Design
The height of your shower niche plays a pivotal role in both the functionality and visual appeal of your bathroom. A well-placed shower niche can enhance your bathing experience, while a poorly positioned one may lead to inconvenience and frustration. When considering the shower niche height from floor level, it’s essential to strike a balance between accessibility and aesthetics.
One of the primary considerations when determining shower niche height is the average height of the users. A niche that’s too high might be challenging for shorter individuals to reach, while one that’s too low could require taller users to bend uncomfortably. The goal is to find a sweet spot that accommodates most users comfortably.
Another crucial factor is the shower stall dimensions. The overall size and layout of your shower space will influence the optimal placement of your niche. In larger shower stalls, you might have the flexibility to install multiple niches at different heights, catering to various needs and preferences.
The shower niche design also plays a significant role in the overall aesthetic of your bathroom. A well-placed niche can serve as a focal point, adding visual interest to your shower area. Consider incorporating design elements that complement your bathroom’s style, such as tiling patterns or unique shapes, to make your shower niche a standout feature.
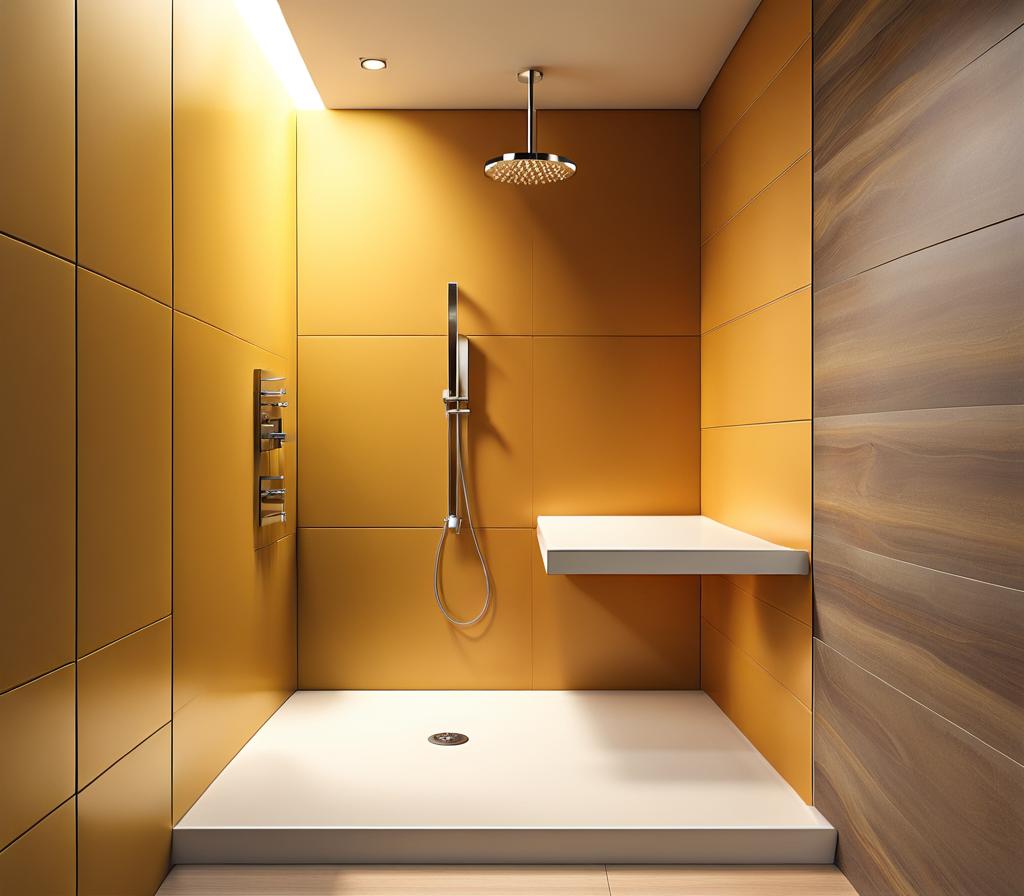
When planning your shower niche installation, it’s crucial to consider the shower watertight height. This refers to the minimum height at which water-resistant materials and waterproofing measures must be applied to prevent moisture damage. Ensuring your shower niche is installed above this height is essential for maintaining the integrity of your bathroom structure.
Optimal Shower Niche Height Measurements: Balancing Function and Aesthetics
Finding the perfect shower niche height involves careful consideration of various factors. While there’s no one-size-fits-all solution, certain guidelines can help you determine the optimal measurements for your specific needs.
The average recommended height for a shower niche ranges from 36 to 60 inches from the floor level. This range typically accommodates most users comfortably. However, the ideal height for your shower niche may vary depending on the primary users of the space.
For a standard shower stall height of about 80 inches, a good rule of thumb is to position the bottom of the shower niche around 48 inches from the floor. This placement allows for easy access without requiring excessive bending or stretching for most adults.
If you’re designing a shower alcove height with multiple niches, consider staggering their placement. For example, you might install one niche at 36 inches for easy access to frequently used items, and another at 60 inches for less commonly used products or decorative elements.
When determining the optimal measurements, it’s crucial to consider the dimensions of the items you plan to store in the niche. Standard shampoo and body wash bottles typically range from 6 to 12 inches in height. Ensure your niche is tall enough to accommodate these items with some additional clearance for easy removal and replacement.
Factors Influencing Shower Niche Height from Floor Level
Several key factors come into play when determining the ideal shower niche height from floor level. Understanding these elements will help you make an informed decision that best suits your needs and preferences.
User height is perhaps the most critical factor to consider. If the primary users of the shower are taller or shorter than average, you may want to adjust the niche height accordingly. For households with significant height variations among family members, consider installing multiple niches at different heights to accommodate everyone comfortably.
The shower stall dimensions also play a crucial role in determining the optimal niche height. In smaller shower spaces, you’ll need to be more strategic about niche placement to maximize functionality without overwhelming the area. Larger shower stalls offer more flexibility, allowing for multiple niches or even a vertical column of niches at varying heights.
Consider the types of items you plan to store in your shower niche. If you frequently use larger bottles or have specific products that require more vertical space, you may need to adjust the niche height or depth accordingly. Some users prefer to keep a small stool or shelf in the shower for additional storage, which could influence the placement of your niche.
The overall design aesthetic of your bathroom should also factor into your decision. A well-placed shower niche can serve as a design feature, adding visual interest to your shower area. Consider how the niche height will interact with other elements in your bathroom, such as tiling patterns or fixtures.
- Accessibility needs: If anyone in your household has mobility issues, lower niche placement might be necessary.
- Shower head height: Ensure the niche doesn’t interfere with the water flow from your shower head.
- Existing plumbing: The location of pipes and studs in your walls may limit where you can place your niche.
- Waterproofing considerations: Place the niche above the minimum shower watertight height to prevent moisture issues.
By carefully considering these factors, you can determine the ideal shower niche height that combines functionality with aesthetic appeal, creating a shower space that meets your specific needs and enhances your daily routine.
Step-by-Step Guide to Measuring and Installing Your Shower Niche at the Ideal Height
Installing a shower niche at the perfect height requires careful planning and precise execution. Follow this step-by-step guide to ensure your shower niche is positioned correctly for optimal functionality and visual appeal.
1. Assess Your Shower Space: Begin by measuring your shower stall dimensions. Take note of the overall height, width, and any existing features like built-in benches or windows that might influence niche placement.
2. Determine User Needs: Consider the height of primary users and any specific accessibility requirements. This will help you establish a comfortable range for your shower niche height.
3. Mark the Ideal Height: Based on your assessments, mark your preferred niche height on the wall. Remember, a good starting point is around 48 inches from the floor for most adults.
4. Check for Obstructions: Before cutting into the wall, use a stud finder to locate any pipes, electrical wiring, or studs that might interfere with your chosen location. Adjust your marked height if necessary.
5. Consider Multiple Niches: If space allows, consider installing multiple niches at different heights to cater to various needs and create visual interest.
6. Measure and Mark Niche Dimensions: Once you’ve confirmed the ideal height, measure and mark the width and depth of your desired niche. Standard dimensions often range from 12 to 16 inches wide and 3 to 4 inches deep, but adjust as needed for your specific products.
7. Cut the Opening: Carefully cut the opening for your niche, ensuring it’s level and plumb. If you’re not confident in your DIY skills, it’s best to hire a professional for this step.
8. Install a Prefabricated Niche or Build a Custom One: You can either install a pre-made shower niche or construct a custom one using water-resistant materials.
9. Waterproof the Niche: Apply a waterproof membrane to the niche and surrounding area to prevent moisture damage. This step is crucial for maintaining the integrity of your shower installation.
10. Tile the Niche: Choose tiles that complement your overall shower design. Consider using a contrasting tile pattern or color in the niche to create a focal point.
11. Seal and Finish: Once tiling is complete, apply grout and seal all edges to ensure a watertight finish.
By following these steps, you’ll be able to install a shower niche at the ideal height, enhancing both the functionality and aesthetic appeal of your shower space. Remember, precise measurements and careful installation are key to achieving the perfect shower niche height from floor level.
While general guidelines provide a solid starting point, customizing your shower niche height to suit individual needs and preferences can significantly enhance your shower experience. Let’s explore some ways to tailor your shower niche installation for optimal personalization.
For families with members of varying heights, consider installing multiple niches at different levels. A lower niche around 36 inches from the floor can cater to children or shorter adults, while a higher niche at 60 inches can serve taller family members. This approach ensures everyone has comfortable access to their shower essentials.
If you have specific items you use frequently, measure their heights and design your niche accordingly. For instance, if you use tall bottles of shampoo or body wash, ensure your niche has enough vertical clearance to accommodate them comfortably. Similarly, if you prefer to keep a razor or loofah in the niche, factor in space for these items.
Consider incorporating adjustable shelving within your shower niche design. This allows for flexibility in storage options and can adapt to changing needs over time. Removable glass or stone shelves can be repositioned as needed, providing versatility in your shower storage solution.
For those who enjoy a spa-like shower experience, consider creating a tiered niche system. This could involve a series of smaller niches stacked vertically, each serving a different purpose. The lower tiers could hold everyday items, while upper tiers showcase decorative elements like candles or small plants, enhancing the overall ambiance of your shower space.
If accessibility is a primary concern, consider installing a floor shower niche or a lower alcove. These options can be particularly beneficial for users with mobility issues or those who prefer to have easy access to items while seated on a shower bench.
For a truly custom approach, consider the specific routines and preferences of the primary users. Do you enjoy face masks or hair treatments during your shower? A niche at eye level might be ideal for these products. Do you like to keep a waterproof speaker in the shower? Factor in space and possibly even a built-in shelf for such items.
- Corner niches: Utilize corner spaces for additional storage without compromising on shower space.
- Extended vertical niches: Create a sleek, column-like niche that runs from near the floor to shoulder height, offering ample storage at various levels.
- Illuminated niches: Incorporate LED lighting to highlight your niche and create a luxurious atmosphere.
- Double-sided niches: If your shower shares a wall with another wet area, consider a niche accessible from both sides for maximum efficiency.
Remember, while customizing your shower niche height and design, always keep practical considerations in mind. Ensure that your custom solutions don’t compromise the shower watertight height or interfere with essential shower functions like water flow or drainage.
By tailoring your shower niche height and design to your specific needs and preferences, you create a truly personalized shower space. This customization not only enhances functionality but also contributes to the overall aesthetic and enjoyment of your daily shower routine. Whether you opt for multiple niches at varying heights, incorporate adjustable elements, or design a unique configuration, the key is to create a solution that works seamlessly with your lifestyle and enhances your shower experience.
