Roof rafter repairs can be daunting, especially when considering how to replace rafters without removing roof structures. This complex task requires careful planning and execution to maintain the integrity of your home while addressing critical structural issues. By employing specialized techniques and understanding the intricacies of roof construction methods, it’s possible to undertake this challenging project successfully. Let’s dive into the world of rafter replacement methods and explore how you can renovate your attic roof without the need for complete demolition.
Understanding Roof Rafters and Their Importance
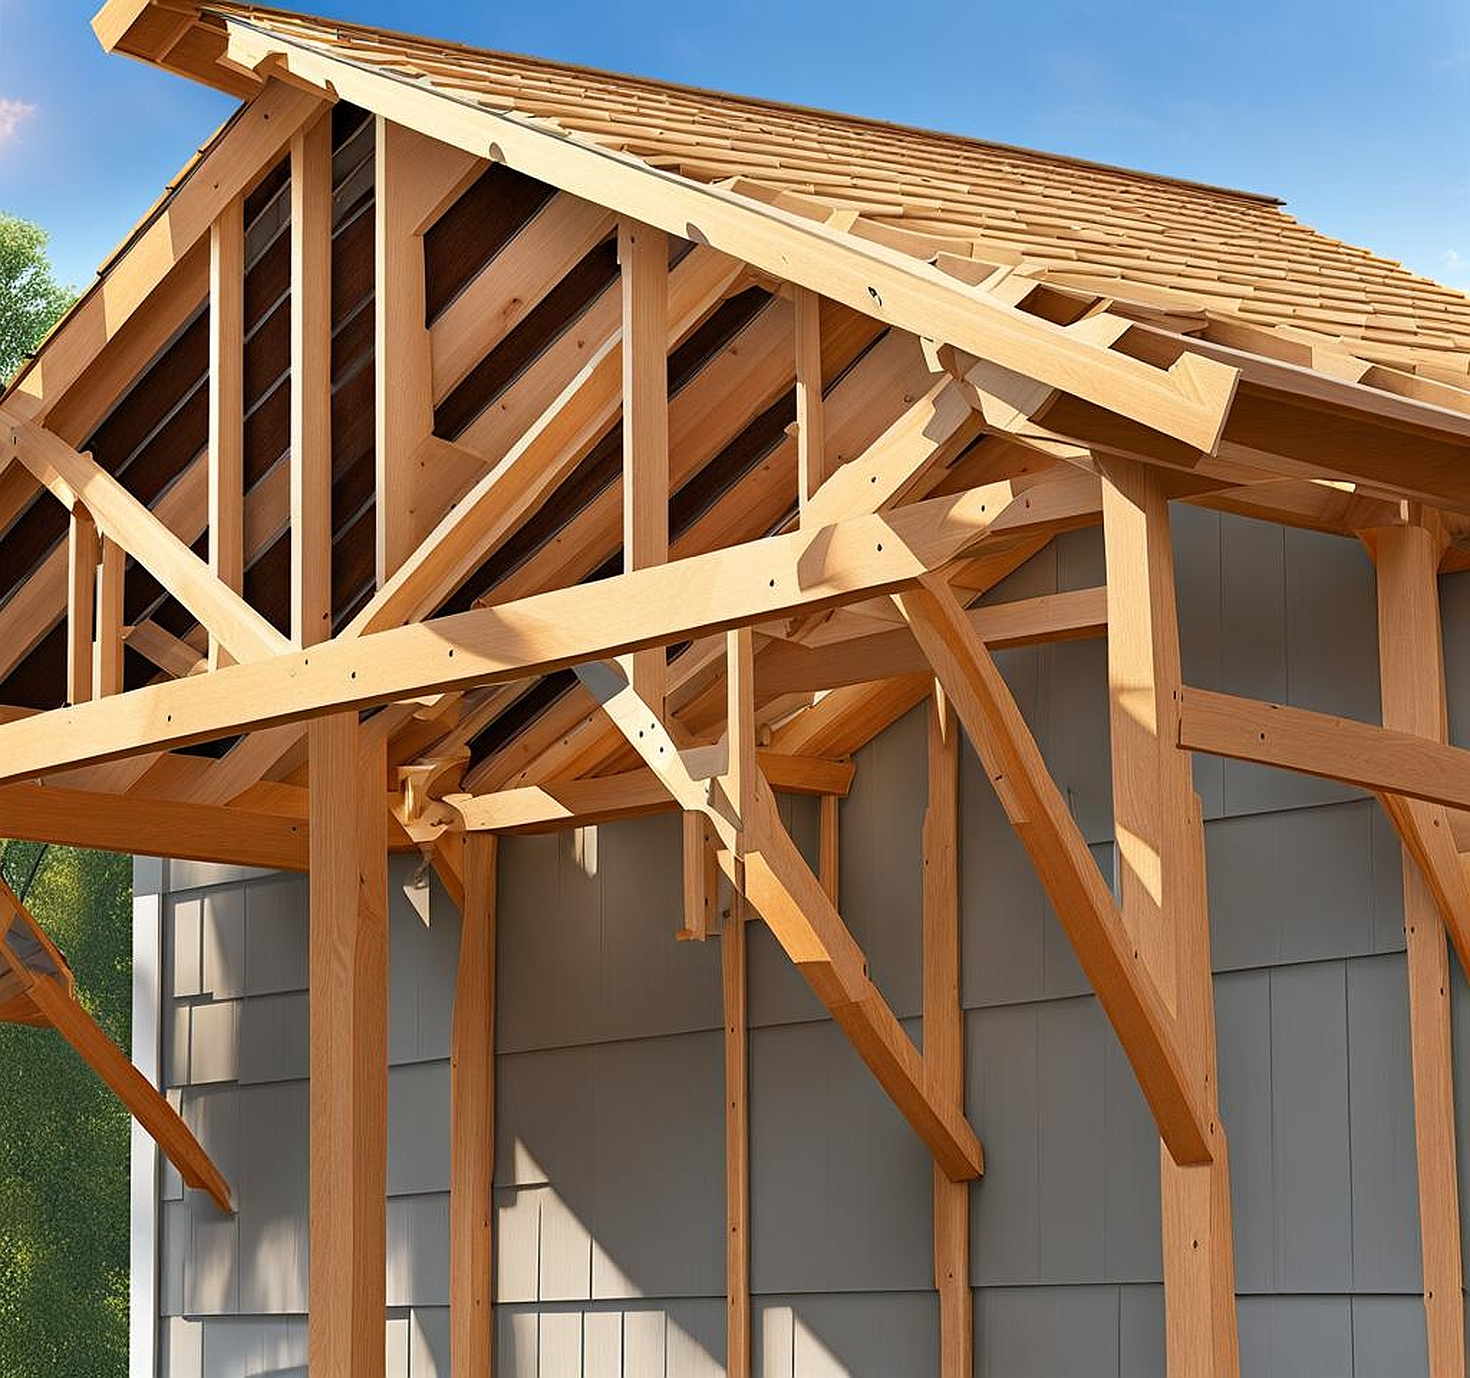
Roof rafters are the backbone of your home’s upper structure, playing a crucial role in supporting the weight of your roof and distributing it evenly to the walls. These essential components of roof construction methods are typically made of sturdy wood and run from the ridge of the roof down to the exterior walls. Over time, various factors can necessitate roof rafter repairs or even full replacement.
Recognizing the signs that indicate the need for rafter replacement is crucial for maintaining the structural integrity of your home. Common indicators include sagging rooflines, visible cracks or splits in the rafters, water stains, or even daylight peeking through your attic ceiling. These issues often stem from prolonged exposure to moisture, pest infestations, or simply the natural aging process of the wood.
The benefits of opting for rafter installation without removal of the entire roof are numerous. This approach to attic roof repair minimizes disruption to your daily life, reduces the risk of weather-related damage during the renovation process, and can significantly cut down on labor and material costs. Moreover, it allows for a more targeted approach to roof structure maintenance, addressing specific problem areas without unnecessarily disturbing intact sections.
Understanding the common causes of rafter damage is essential for both prevention and effective repair. Age is an inevitable factor, with many older homes requiring attic renovation due to the natural deterioration of wood over decades. Water damage, often resulting from leaky roofs or poor ventilation, can accelerate this deterioration process. Pest infestations, particularly from wood-boring insects like termites or carpenter ants, can also compromise the structural integrity of rafters, necessitating prompt roof rafter replacement.
Preparation for Rafter Replacement Without Roof Removal
Before diving into the rafter replacement process, thorough preparation is key to ensuring a safe and successful project. Safety considerations should be your top priority when undertaking any roof structure renovation. This includes using proper protective gear such as hard hats, safety glasses, and sturdy work gloves. Ensure that your work area is well-lit and ventilated, and always have a partner present when working in the attic or on scaffolding.
The tools and materials required for effective rafter repair techniques include:
- Reciprocating saw or handsaw for cutting damaged rafters
- Measuring tape and carpenter’s pencil for accurate measurements
- Framing square for precise angle cuts
- Hammer and nails or nail gun for securing new rafters
- Joist hangers and screws for additional support
- Lumber for new rafters and temporary supports
- Portable work lights for adequate visibility in the attic
Assessing the extent of damage is a critical step in planning your repair. This involves a thorough inspection of all visible rafters, looking for signs of rot, cracks, or pest damage. You’ll need to determine whether a full replacement is necessary or if sister rafters can provide adequate support. This evaluation will guide your approach to rafter replacement techniques and help you estimate the materials needed.
Obtaining the necessary permits is an often-overlooked but crucial step in the roof reconstruction without removal process. Check with your local building department to understand the requirements for structural modifications to your home. Failing to secure proper permits can result in fines and complications down the line, especially if you plan to sell your home in the future.
Implementing temporary support methods is essential to maintain roof integrity during repairs. This typically involves installing temporary beams or jacks to support the weight of the roof while you work on replacing the damaged rafters. Proper placement of these supports is critical to prevent any shifting or sagging of the roof structure during the renovation process.
Step-by-Step Guide to Replacing Rafters While Preserving the Roof
Now that we’ve covered the preparatory steps, let’s dive into the actual process of how to replace rafters without removing the roof. This step-by-step guide will walk you through the intricate process of rafter installation without removal of the entire roof structure.
1. Accessing the attic and creating a workspace: Begin by clearing out your attic space, ensuring you have ample room to move and work safely. Set up proper lighting and ventilation to create a comfortable working environment. Lay down plywood sheets over the joists to create a stable platform for moving around.
2. Installing temporary support beams: Before removing any damaged rafters, it’s crucial to install temporary supports. Place vertical support beams under the ridge beam and at intervals along the length of the rafters you’ll be replacing. These supports should transfer the roof’s weight to the floor joists below, ensuring the roof doesn’t sag or shift during the replacement process.
3. Removing damaged rafters: Using your reciprocating saw or handsaw, carefully cut out the damaged sections of the rafters. Make your cuts at an angle that matches the existing rafter connections at the ridge beam and wall plate. Be cautious not to damage any electrical wiring or plumbing that may be running through or near the rafters.
4. Measuring and cutting new rafters: Take precise measurements of the removed rafter sections, accounting for any angles at the connections. Transfer these measurements to your new lumber, using a framing square to ensure accurate angle cuts. It’s often helpful to use the old rafter as a template if it’s not too damaged.
5. Installing new rafters: Carefully maneuver the new rafter into place, ensuring it fits snugly against the ridge beam and wall plate. Secure the new rafter using nails or screws, making sure it’s properly aligned with the existing roof structure. Use joist hangers for additional support at the connections.
6. Ensuring proper alignment: Check that the new rafter is level and properly aligned with the surrounding rafters. Any misalignment can lead to future roofing issues, so take the time to make any necessary adjustments before finalizing the installation.
By following these steps, you can successfully replace damaged rafters without the need for extensive roof removal. This method of attic rafter installation minimizes disruption to your home while effectively addressing structural issues.
Advanced Rafter Replacement Methods and Techniques
For those facing more complex rafter repair challenges, several advanced techniques can be employed to ensure a robust and long-lasting solution. These methods often come into play when dealing with severe damage or when looking to upgrade the structural integrity of your roof.
Sister rafter installation is a popular technique used in roof rafter repairs. This method involves attaching a new rafter alongside the damaged one, effectively doubling the strength of the existing structure. To implement this technique:
- Cut a new rafter to match the length of the existing one
- Apply a generous amount of construction adhesive to the side of the old rafter
- Position the new rafter snugly against the old one
- Secure the two rafters together using bolts or lag screws at regular intervals
- Nail the ends of the new rafter to the ridge beam and wall plate
This method is particularly useful when the original rafter is weakened but not completely compromised.
Partial rafter replacement strategies can be employed when only a section of the rafter is damaged. This technique involves:
- Cutting out the damaged portion of the rafter
- Preparing a new piece of lumber to fit the removed section
- Installing the new piece using strong joint techniques such as scarf joints or butt joints reinforced with plywood gussets
This approach minimizes the amount of material that needs to be replaced while still addressing the structural issue.
Using engineered lumber for replacements is an excellent option for those looking to enhance the strength of their roof structure. Materials like laminated veneer lumber (LVL) or parallel strand lumber (PSL) offer superior strength and dimensional stability compared to traditional solid wood. While these materials may be more expensive, they can provide added peace of mind in areas prone to heavy snow loads or high winds.
Dealing with complex roof geometries during rafter replacement requires careful planning and execution. For roofs with multiple pitches or intricate designs:
- Create detailed drawings or use 3D modeling software to visualize the replacement process
- Consider using adjustable steel jacks to provide temporary support at complex intersections
- Employ the help of an experienced carpenter or structural engineer for particularly challenging sections
These strategies ensure that even the most complex roof structures can be repaired without compromising their unique design.
Integrating modern materials in attic roof renovation can significantly improve the overall performance of your roof. Consider incorporating:
- Reflective radiant barriers to improve energy efficiency
- Structural insulated panels (SIPs) for enhanced insulation
- Smart ventilation systems to regulate attic temperature and moisture levels
These upgrades can transform your attic renovation into an opportunity to enhance your home’s energy performance and comfort.
After completing the rafter replacement process, it’s crucial to conduct a thorough inspection to ensure the structural integrity of your roof. This final check should include:
- Verifying that all new rafters are securely fastened and properly aligned
- Checking for any gaps or inconsistencies in the roof sheathing
- Ensuring that all temporary supports have been safely removed
- Inspecting the roof from the exterior for any signs of unevenness or sagging
This comprehensive review helps guarantee that your roof rafter installation meets all necessary safety and quality standards.
During the replacement process, you may uncover additional issues that require attention. These could include:
- Damaged or outdated insulation that needs replacement
- Signs of pest infestation that require professional extermination
- Electrical wiring that needs updating or repairs
- Ventilation issues that could affect your roof’s longevity
Addressing these collateral issues promptly can prevent future problems and enhance the overall health of your home’s structure.
To extend the life of your new rafters and maintain the integrity of your roof structure, implement these long-term maintenance tips:
- Conduct bi-annual inspections of your attic and roof structure
- Keep your gutters clean to prevent water damage to roof edges
- Ensure proper attic ventilation to regulate temperature and moisture levels
- Address any leaks or water stains immediately to prevent wood rot
- Consider applying a protective coating to exposed wood to guard against moisture and pests
Regular maintenance is key to avoiding costly repairs and preserving the value of your home.
While many homeowners can successfully tackle rafter replacement as a DIY project, there are situations where professional rafter replacement services are advisable. Consider calling in the experts if:
- The damage is extensive or affects a large portion of your roof
- You’re uncomfortable working at heights or in confined spaces
- The project requires specialized tools or equipment you don’t have access to
- You encounter unexpected complications during the repair process
- Local building codes require professional certification for structural repairs
Professional roofers bring expertise and efficiency to complex projects, ensuring that the job is done right the first time.
