Kitchen floor renovation can be a daunting task, especially when you’re faced with the challenge of replacing the floor without removing cabinets. This process, known as “replacing kitchen floor without removing cabinets,” requires careful planning and execution. Many homeowners shy away from this project, fearing it might be too complex or costly. However, with the right approach and techniques, you can give your kitchen a fresh new look without the hassle of dismantling your entire cabinetry. Let’s dive into the nitty-gritty of this kitchen makeover strategy and explore how you can breathe new life into your culinary space while keeping your cabinets intact.
The Challenge of Replacing Kitchen Floors: Working Around Existing Cabinets
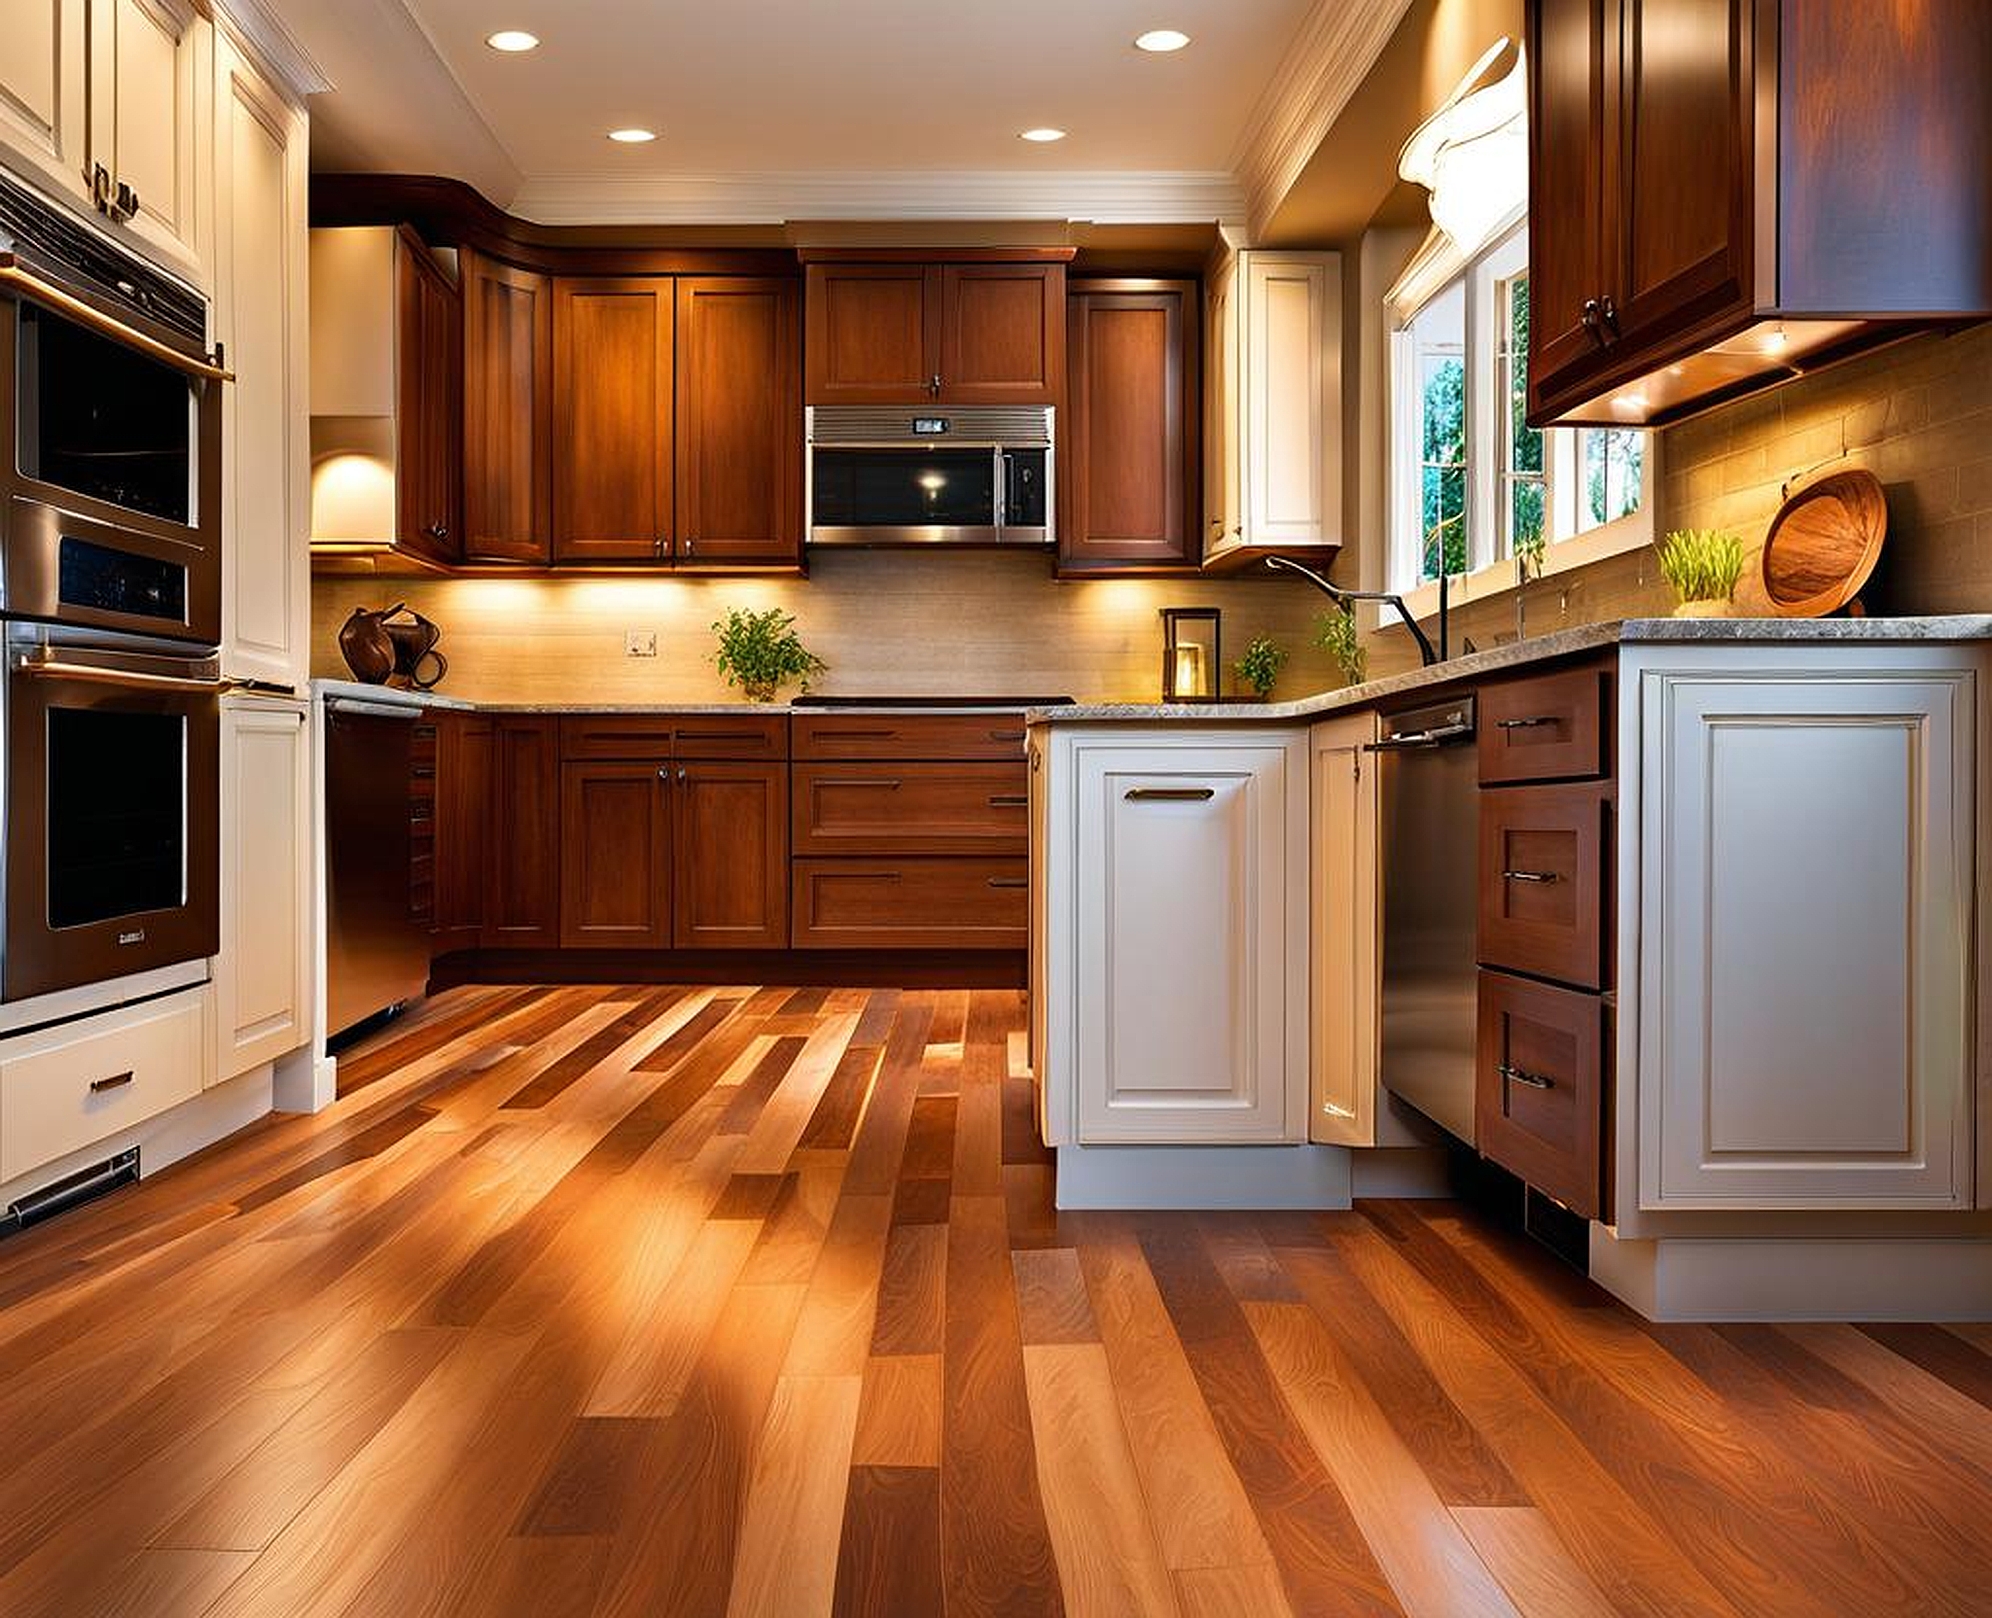
Replacing your kitchen floor while working around existing cabinets presents a unique set of challenges. The primary hurdle is navigating the tight spaces and awkward angles created by the cabinet layout. You’ll need to consider how to handle the flooring material at the edges where it meets the cabinets, ensuring a seamless and professional finish.
One of the first steps in this process is to assess your current flooring situation. Is your old kitchen floor tile, hardwood, or linoleum? The type of existing flooring can significantly impact your renovation strategy. For instance, tile floors might require more intensive removal techniques compared to vinyl or laminate.
When renovating kitchen floors without removing cabinets, you’ll need to pay special attention to the height difference between the old and new flooring. This is crucial because if the new floor is significantly thicker or thinner than the old one, it can affect how your appliances fit and potentially create gaps under your cabinets.
Another aspect to consider is the subfloor condition. In some cases, you might need to repair or replace sections of the subfloor, which can be tricky when working around cabinets. It’s essential to inspect the subfloor thoroughly before proceeding with the new flooring installation.
Dealing with moisture is another critical factor, especially in kitchens where spills are common. You’ll want to choose a flooring option that’s water-resistant and durable. Materials like luxury vinyl planks or waterproof laminate can be excellent choices for kitchen floor replacement projects.
When it comes to kitchen flooring installation without cabinet removal, precision is key. You’ll need to carefully measure and cut your new flooring materials to fit snugly around cabinet bases and other fixed elements. This requires patience and attention to detail to achieve a polished look.
Preparation and Planning: Essential Steps for a Successful Kitchen Floor Renovation
Before diving into the actual flooring installation, thorough preparation and planning are crucial for a successful kitchen renovation. Start by removing all movable items from your kitchen, including appliances, furniture, and any decorative elements. This will give you a clear workspace and protect your belongings from potential damage during the renovation process.
Next, you’ll want to take precise measurements of your kitchen floor. Pay special attention to areas around cabinets, islands, and other fixed elements. These measurements will be crucial when ordering materials and planning your installation strategy. It’s always a good idea to add a small percentage (usually about 10%) to your measurements to account for waste and mistakes.
Choosing the right flooring material is a critical decision in your kitchen makeover journey. Consider factors such as durability, water resistance, ease of cleaning, and of course, aesthetic appeal. Popular options for kitchen floor renovations include:
- Luxury Vinyl Planks (LVP): Durable, water-resistant, and available in a variety of wood-look designs
- Ceramic or Porcelain Tile: Highly durable and water-resistant, but can be cold underfoot
- Laminate Flooring: Affordable and easy to install, but ensure you choose a water-resistant variety for kitchen use
- Hardwood: Adds warmth and value, but requires more maintenance in a kitchen setting
Once you’ve selected your flooring material, it’s time to gather all necessary tools and supplies. This might include items like a pry bar for removing baseboards, a utility knife for cutting underlayment, a saw for trimming flooring planks, and adhesive if required by your chosen flooring type.
Before starting the actual flooring replacement, you’ll need to remove baseboards and trim carefully. These can usually be reinstalled after the new floor is in place. If you’re dealing with an old kitchen floor that’s particularly stubborn, you might need to rent specialized equipment like a floor scraper or tile remover.
It’s also crucial to consider the timeline for your kitchen renovation. Replacing kitchen flooring without removing cabinets can take anywhere from a couple of days to a week, depending on the size of your kitchen and the complexity of the installation. Plan accordingly, especially if you’ll need to make alternative arrangements for meal preparation during this time.
Lastly, don’t forget about proper disposal of your old flooring materials. Some materials might be recyclable, while others will need to be disposed of according to local regulations. Factor this into your planning to ensure a smooth and environmentally responsible renovation process.
Now that we’ve covered the preparation phase, let’s dive into the actual process of installing your new kitchen floor without removing cabinets. This part of the renovation requires patience, precision, and a bit of creativity.
Start by addressing any subfloor issues. If you’ve discovered any soft spots or unevenness during your inspection, now’s the time to fix them. Use a self-leveling compound to smooth out any dips or bumps in the subfloor. This will ensure a stable base for your new flooring and prevent issues down the line.
Next, lay down your underlayment if required by your chosen flooring type. This layer provides additional cushioning and can help with sound absorption. When working around cabinets, you’ll need to cut the underlayment carefully to fit snugly against the cabinet bases.
When it comes to actually laying the new flooring, start from the center of the room and work your way out towards the cabinets. This approach helps ensure that any cut pieces end up hidden under the cabinets rather than in more visible areas of the floor.
For laminate floor replacement or installing wood-look vinyl planks, you’ll use a click-lock system. These planks snap together, creating a floating floor that doesn’t need to be nailed or glued down. When you reach the cabinets, you’ll need to cut the planks to fit. Use a jigsaw or a miter saw for precise cuts, leaving a small expansion gap (usually about 1/4 inch) between the flooring and the cabinets.
If you’re opting for tile floor installation, the process is a bit more involved. You’ll need to spread mortar and lay each tile individually. When working around cabinets, use a wet saw to cut tiles to fit. Remember to maintain consistent grout lines, even in tight spaces.
For hardwood floor installation without removing cabinets, you might need to use a combination of floating floor techniques and glue-down methods. In areas where you can’t use a nail gun due to cabinet obstruction, applying adhesive can help secure the planks.
One clever trick for getting a clean edge along cabinets is to use a scribe. This tool helps you trace the exact contour of your cabinet bases onto your flooring material, allowing for a perfect fit. It’s especially useful when dealing with older homes where walls and cabinets might not be perfectly straight.
As you work your way around the kitchen, pay special attention to areas around appliances. You’ll want to ensure that your new flooring allows for easy removal and replacement of dishwashers, refrigerators, and stoves. In some cases, you might need to adjust the height of your appliances to sit flush with the new floor.
Once all the flooring is in place, it’s time to focus on the finishing touches. Reinstall your baseboards, using caulk to fill any gaps between the baseboard and the floor. If you’re installing a floating floor, you might need to use quarter-round molding to cover the expansion gap you left around the perimeter of the room.
Remember, patience is key when renovating kitchen floors without removing cabinets. Take your time, especially when making cuts around obstacles. It’s better to measure twice and cut once than to rush and make mistakes that could compromise the overall look of your new floor.
Lastly, consider applying a sealant to your new floor, particularly in areas prone to water exposure like around the sink and dishwasher. This extra step can significantly extend the life of your new kitchen flooring and protect your investment.
By following these techniques and tips, you can successfully replace your kitchen floor without the need to remove your cabinets. The result will be a fresh, updated look that breathes new life into your kitchen space. While it might seem daunting at first, with careful planning and execution, this kitchen renovation project is well within reach for many DIY enthusiasts. However, if at any point you feel overwhelmed, don’t hesitate to consult with or hire a professional. The goal is a beautiful, functional kitchen floor that you’ll enjoy for years to come.
