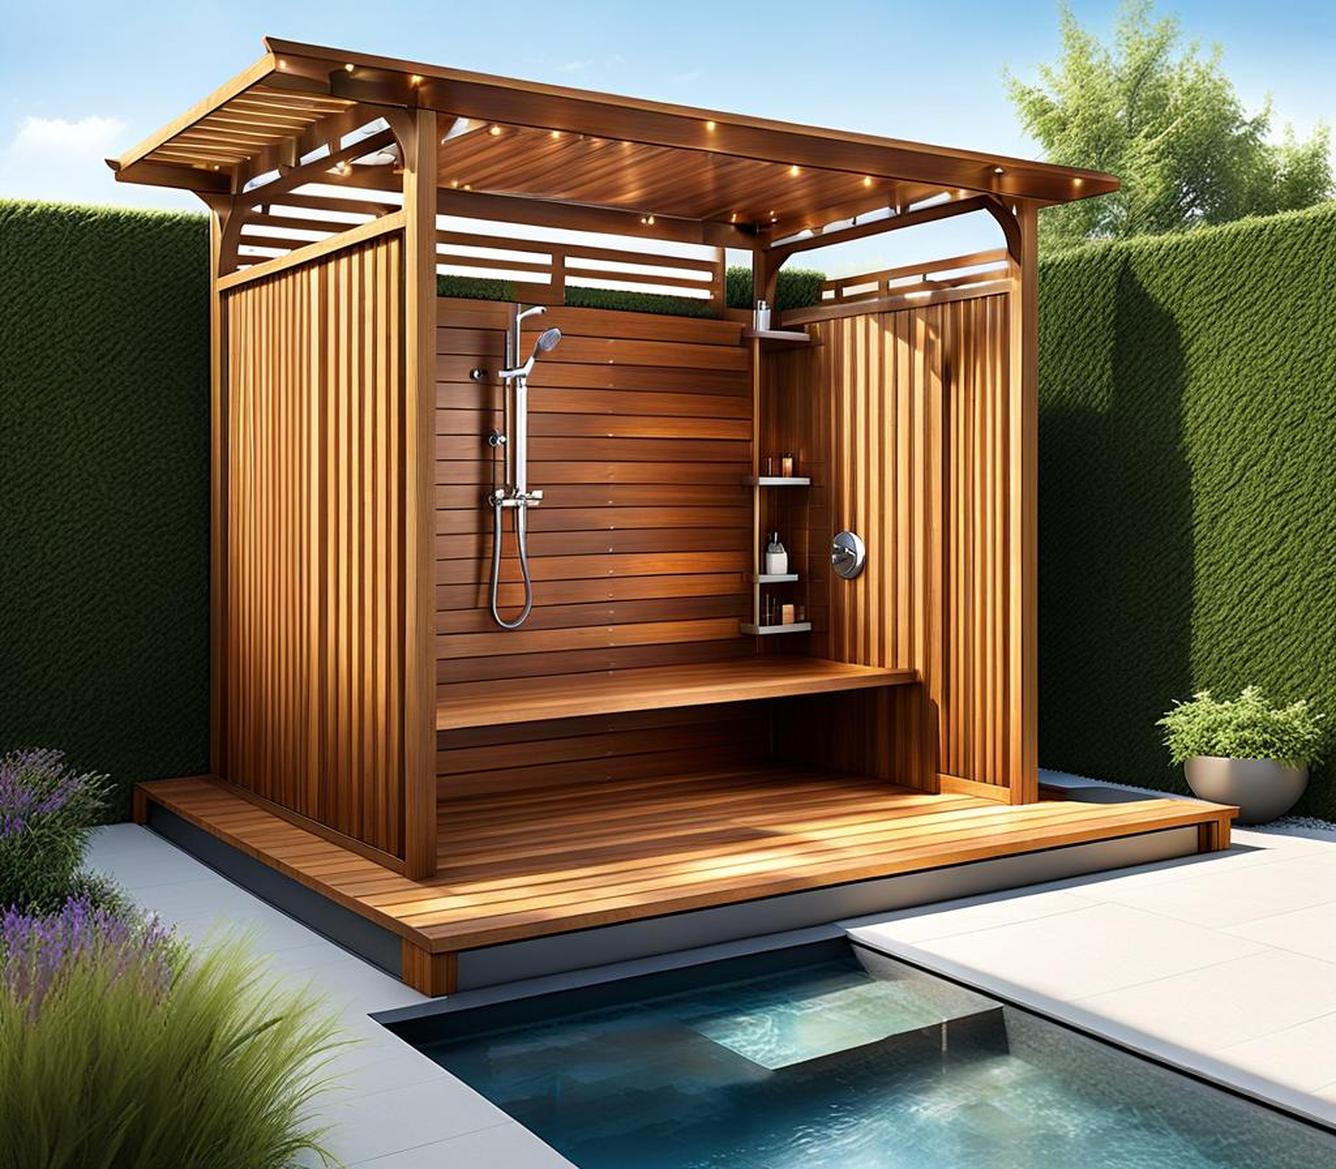
Imagine stepping outside into your backyard oasis and enjoying a warm, luxurious shower surrounded by natural wood. A custom-built outdoor wood shower enclosure can turn this daydream into a reality. With creative design, high-end materials like aromatic cedar or teak, and expert craftsmanship, you can have a spa-like retreat just steps from your home.
We’ll cover choosing the ideal wood, customizing the design, professional installation tips, creating drainage, maintenance recommendations, luxury accents to pamper yourself, costs, and important safety considerations for your backyard upgrade.
Choosing the Wood Type
One of the most important choices for your custom shower enclosure is selecting the right type of wood. You want a wood that can withstand the elements year-round while adding natural beauty to your backyard.
Here are some of the best wood species to consider:
- Cedar – A top choice due to its durability, water resistance, and appealing reddish-brown color that ages to an elegant silvery patina. Western red cedar contains oils that naturally repel water and bugs. It has good dimensional stability so it resists splintering, cupping, and twisting.
- Redwood – Another great option that is naturally resistant to insects, decay, and moisture. It contains tannins that help preserve the wood. Redwood has a striking red hue that grays gracefully over time.
- Cypress – A sturdy, durable wood that holds up to weather, insects, and rot. Cypress has an attractive grain pattern and turns a silvery gray when exposed to the elements. It’s a good sustainable choice as the trees regenerate quickly.
- Teak – One of the strongest and longest-lasting woods, with a beautiful golden-brown color, attractive grain, and natural oils that help repel water. Teak has a higher upfront cost but can last over 50 years with proper care.
Key factors like budget, appearance, and longevity can help you zero in on the best species for your outdoor shower enclosure. Cedar provides an unbeatable combo of affordability, strength, and good looks.
Customizing the Design
One of the best parts of having a custom wood shower made is tailoring every aspect to your tastes. Work closely with the carpenter or contractor to personalize these design elements:
- Size – Determine the interior space needed to comfortably wash up. Standard sizes range from 32 x 32 inches up to 48 x 48 inches or larger.
- Shape – Square or rectangular enclosures are most common but you can also do rounded or polygonal.
- Door style – Choose a sliding, hinged, or saloon-style swinging door. Add a latch for privacy.
- Benches, shelves, hooks – Consider built-ins like seating, storage, towel hooks, and caddies.
- Accent features – Incorporate reclaimed wood accents or attractive tilework.
- Staining/sealing – Use natural oils or semi-transparent stains to protect and beautify the wood.
You can also match the style of your shower enclosure to your home. For a rustic farmhouse, try a simple cedar picket enclosure with an oil finish. Spanish or Mediterranean homes may feature richly stained redwood with decorative tile and ironwork details. The possibilities are truly endless!
Hiring a Carpenter
To bring your luxury outdoor shower vision to life, it’s best to work with an experienced professional carpenter or contractor. Here’s how to choose the right person for the job:
- Search online for custom carpenters or deck builders with background in outdoor structures.
- Ask to see photos of previous outdoor shower projects.
- Request at least three quotes to compare rates.
- Check reviews and references to verify quality of work.
- Choose someone local with experience using the wood type you select.
- Look for excellent communication skills to collaborate throughout the process.
Be sure your carpenter properly grades and prepares the shower site and knows local building codes for permits. An experienced professional can skillfully handle design customizations and complex installation challenges.
DIY Installation Tips
If you’re fairly handy and want to tackle building your custom shower enclosure yourself, it can be a doable DIY project. Here are some tips to streamline the installation:
- Purchase a top-quality outdoor shower enclosure kit made with rot-resistant cedar, redwood, or treated lumber.
- Gather essential tools like a drill, circular saw, level, tape measure, and caulk gun.
- Select a flat, level area away from power lines and trees to prevent debris.
- Lay gravel, concrete pavers, or patio blocks to create a stable base.
- Assemble panels, braces, and hardware according to instructions.
- Take your time and don’t force pieces to fit; adjust as needed.
- Make sure the structure is completely plumb, level, square, and secure.
A DIY cedar or redwood shower enclosure kit can save on labor costs while letting you flex your building skills. Just avoid shortcuts – good preparation is key for a long-lasting finished product.
Creating Proper Drainage
Outdoor showers require proper drainage to keep water from pooling at the base and edges. Standing water can become a breeding ground for mosquitoes, cause undesirable moisture issues, and lead to premature wood rotting.
To ensure adequate drainage for your custom wood shower enclosure:
- Install a gravel base of pebbles, rocks, or crushed stones that allow water to quickly filter through.
- Elevate the floor with treated outdoor shower floor panels spaced slightly apart for drainage in between.
- Always slope the shower floor away from the walls and toward the corner/front opening to direct water runoff.
- A dry creek bed or French drain around the perimeter can also help divert excess water away from the enclosure.
Don’t forget to factor drainage needs into your initial planning. Your carpenter or contractor can ensure the shower site and flooring are properly graded for effective water runoff.
Ongoing Maintenance
Like any outdoor structure, your wood shower enclosure will require some periodic maintenance to maximize its longevity and keep it looking pristine. Follow these upkeep tips:
- Rinse soap residue after each use and clean occasionally with mild detergent and brightener.
- Inspect wood for any warping, cracking or rot. Sand down or replace damaged planks immediately.
- Apply a fresh sealant once or twice per year to protect from moisture damage.
- Check hardware and fasteners for rust; replace as needed.
- Clean out drain rock or any debris that could impede drainage.
- Consider recaulking joints every few years as needed.
Don’t let small issues progress. Proper care and maintenance will allow your wood to gracefully weather and patina over decades of use.
Adding Luxury Touches
Once your framework is complete, it’s time for the fun part – decking out your shower space with indulgent accessories for the ultimate luxury experience.
Pamper yourself with these special touches:
- Plush bathmats, robes, slippers
- Spa-quality soaps, scrubs, loofahs
- Scented candles, essential oils
- Mirror, towel racks, robe hooks
- Decorative planters, vases
- Upscale fixtures like an adjustable shower head
- Built-in or portable Bluetooth speaker for music
- Rattan mats and potted plants for a tropical vibe
Add a bench or shelving unit for storing all your pampering accessories right in the shower. By customizing both the structure and interior design, you can craft your personal backyard oasis.
Safety Considerations
A wood shower enclosure introduces more moisture outside your home, so proper installation is key for safety. Discuss these factors with your contractor upfront:
- Ventilation – Unvented outdoor showers can create humidity and moisture issues indoors. Proper roof ventilation is ideal.
- Non-slip surfaces – Use textured floor panels and mats to prevent falls on wet surfaces. Stainless steel or composite wall panels add grip.
- Waterproofing – Choose naturally moisture-resistant wood species and use appropriate sealants. Weather stripping around doors prevents leaks.
- Electrical – Do not install outlets or lights inside the wet enclosure area. Use remote LED spotlights instead.
- Privacy – Strategic fence or plant placement prevents passersby from peering in.
Your contractor should know the code requirements and follow all safety best practices during installation. This ensures your custom shower is built to last safely for years of enjoyment.
Cost Breakdown
Constructing a bespoke luxury shower enclosure is a significant investment that adds lasting value and enjoyment to your backyard. Here are the main cost factors to consider:
- Materials – More expensive wood species like ipe or teak will drive up costs substantially. Opt for affordable cedar for the biggest bang for your buck.
- Size – The larger and more complex the design, the higher the price tag.
- Custom features – Upgrades like built-in seating, tile, or reclaimed wood accents add cost.
- Labor – Hiring a professional carpenter is ideal for a quality build but adds expense.
All said, you can expect to spend anywhere from $2,000 to $4,000+ for a custom wood shower enclosure depending on the above factors. View this as a long-term investment in your home’s relaxing outdoor living space.
Creating your own luxurious wood shower enclosure enables you to shower surrounded by nature, while adding beauty and value to your backyard. With strategic planning and design, high-quality materials, and skillful installation, you can have a spa-like sanctuary just footsteps away any time you desire. Just dream up your perfect oasis and bring it to life with the help of this comprehensive guide. Happy relaxing and showering in your private backyard spa!
