Outdoor wall murals are an increasingly popular way to add personality and vibrancy to backyards, patios, and outdoor living areas. With some planning, creativity, and a few key tips, DIYers can successfully paint stunning murals even without prior artistic experience. This achievable weekend project results in gorgeous, unique spaces that wow guests and enhance your enjoyment of the outdoors.
Whether your style is more geometric and modern or loose and tropical, creating simple outdoor wall art is enjoyable, budget-friendly, and easier than it looks. Adapt your theme, color scheme, and complexity level to match your goals for stylish, weather-resistant artwork that makes a statement.
Choose an Outdoor Wall Location
Carefully consider where to display your artistic efforts for maximum impact. Opt for areas with heavy foot traffic or lots of visibility where your eye-catching mural can spark smiles and conversation.
Wall Condition and Appropriateness
Evaluate the current state of your potential wall canvas to determine needed preparation. Clean surface free of damaged areas or peeling paint provide the ideal base. Also confirm the location allows adequate workspace and your planned imagery fits appropriately.
Prep by Cleaning and Removing
Power wash siding or stucco walls to eliminate built-up dirt and grime so the paint adheres well. Take down unused hooks, fixtures, lighting or other elements that could get in the way during the creative process. Now you have an empty slate for your DIY masterpiece!
Select a Theme and Style
Consider both aesthetics and skill level as you contemplate mural designs, themes, colors, and complexity appropriate for you. While geometric patterns take precision, tropical motifs allow loose, forgiving brush strokes on large freeform shapes. Some themes to spark your creativity:
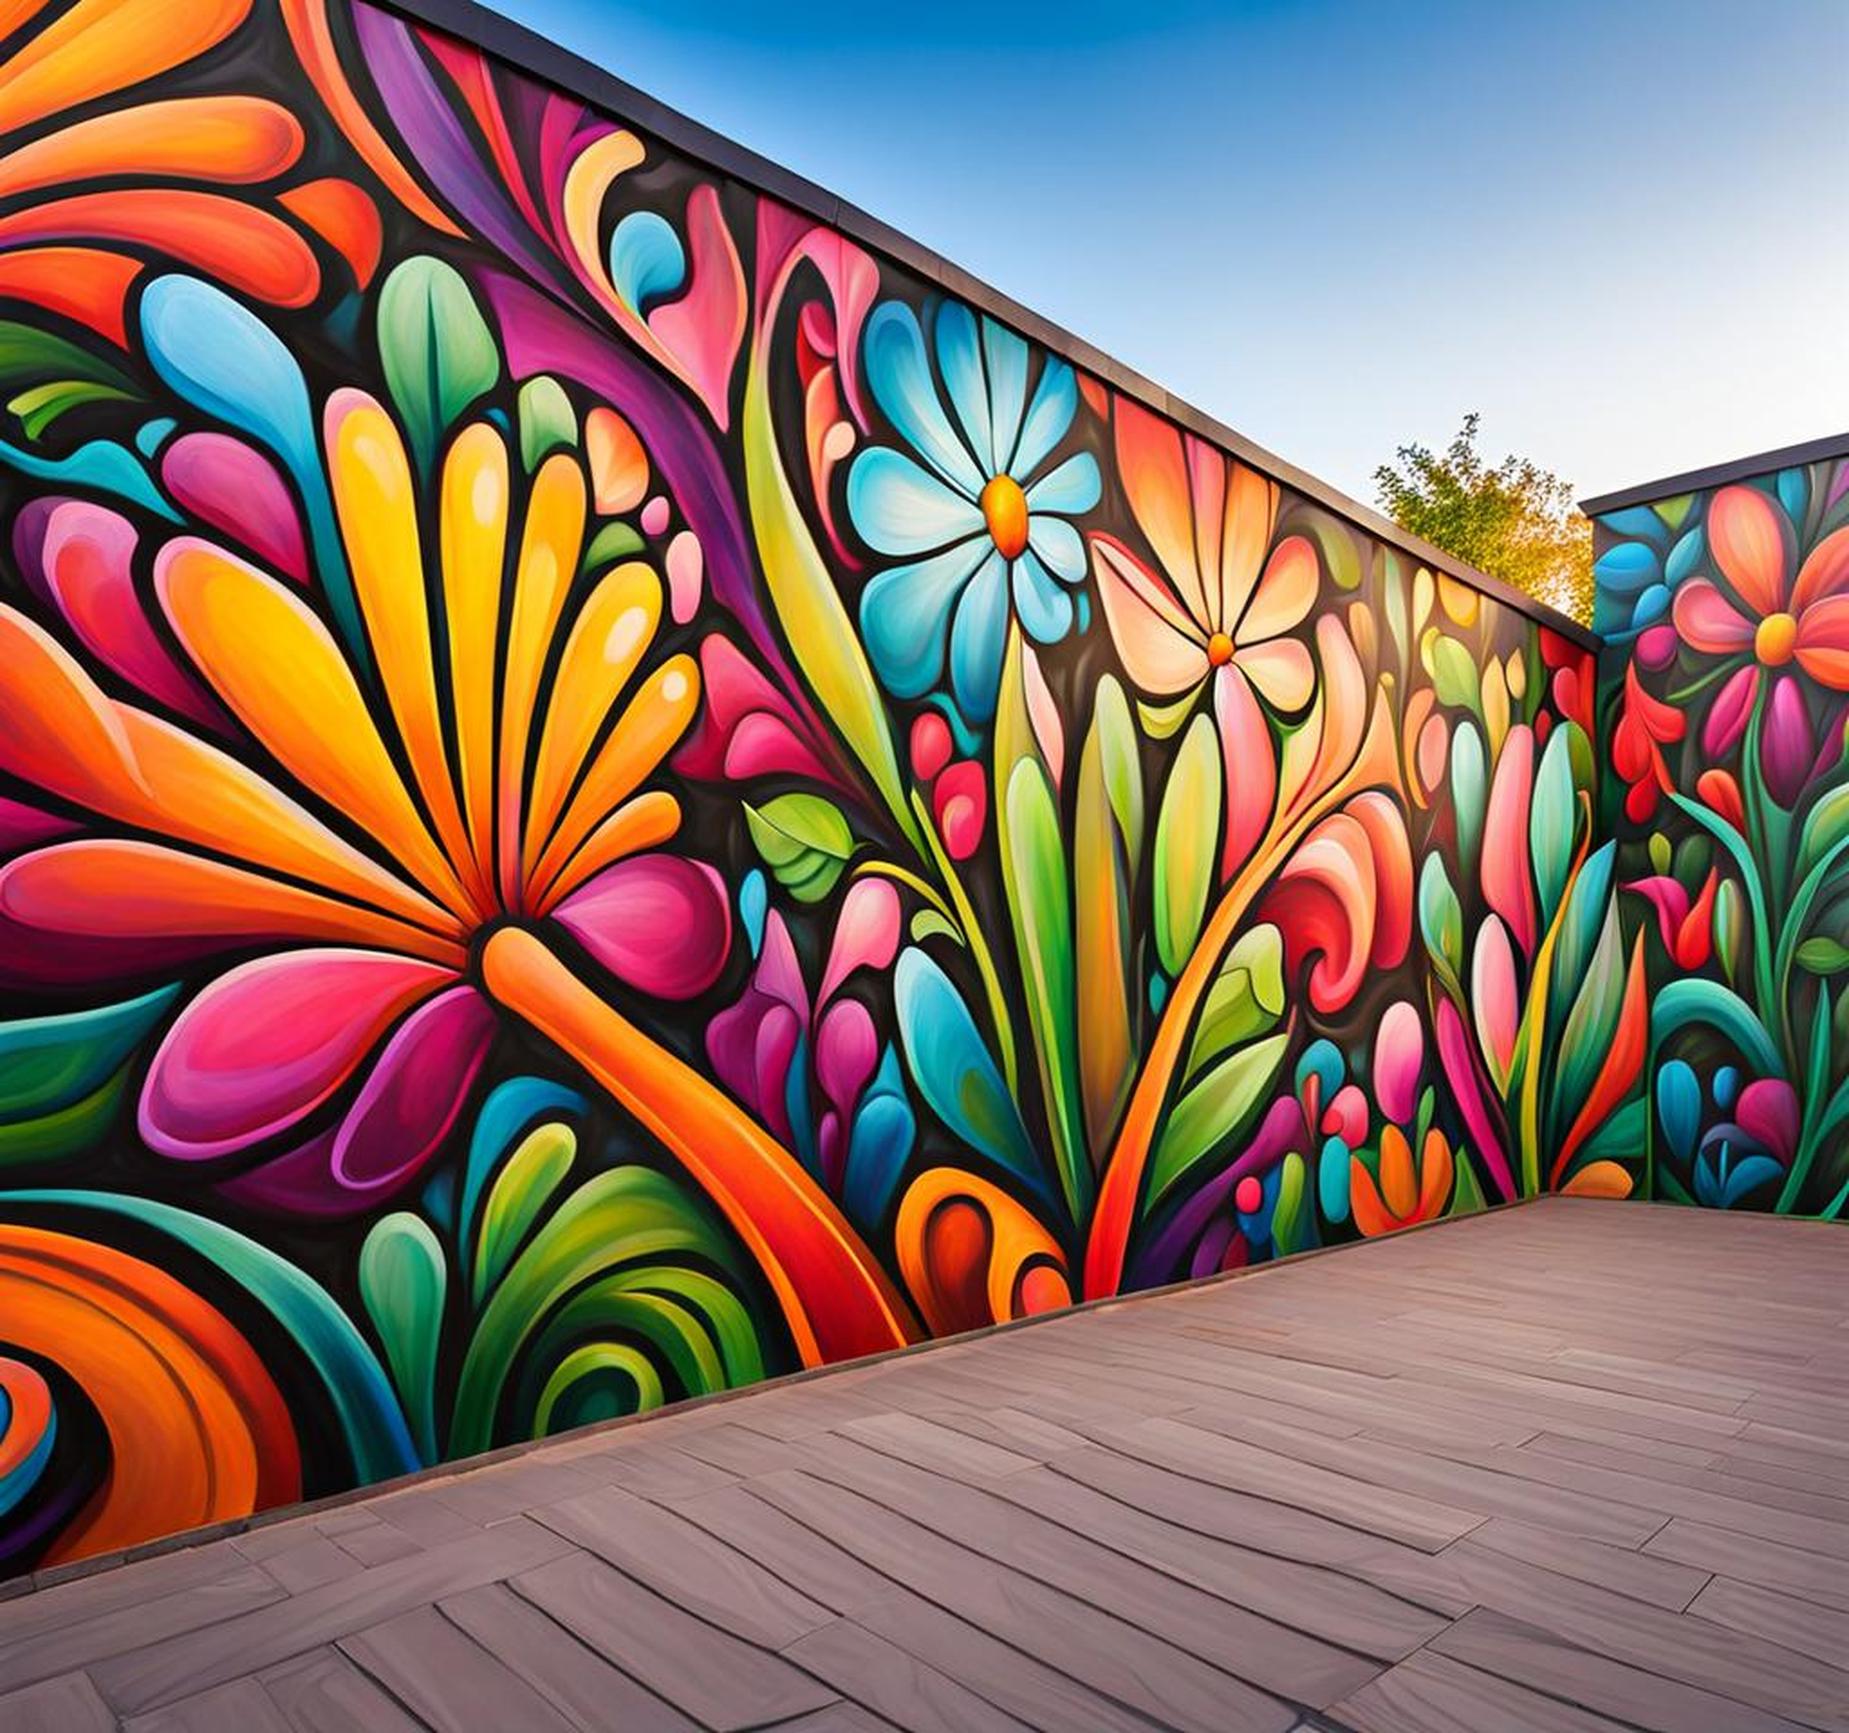
- Tropical leaves, greenery, bright flowers
- Geometric patterns, lines, bold shapes
- Minimalist solid blocks of color
- Incorporate natural tree and landscape elements
Pick Color Palette and Overall Aesthetic
Are you drawn to vibrant, saturated tones or prefer muted earthy shades? Cool greens and blues or warm sunset colors? Define the look conveying the style or mood suited for you. Remember bold colors make the biggest impact for exterior murals clearly visible even from a distance.
Gather Your DIY Mural Materials
These essentials allow bringing imaginative designs to life on your blank outdoor wall canvas:
| Paint | Opt for heavy-duty exterior house paint offering UV resistance to withstand sun and rain. |
| Brushes and Rollers | Gather multiple sizes ideal for detail work or quickly covering large areas. |
| Painter’s Tape | Mask off edges or divide mural sections with this removable tape. |
Drop cloths, paint trays, primer, stencils or a projector can also come in handy for those looking to elevate their mural game!
Map Out the Mural Design
Carefully planning your image or pattern placement ensures you utilize the wall space effectively. First measure area dimensions then use pencil to loosely sketch concepts directly on the surface or wall. Print templates or project inspiring photos to trace as well. Use yardstick and level to plot vertical and horizontal guidelines indicating boundaries.
Divide Sections with Tape
Mask off elements planned to stand out in different colors. This keeps paintings tasks organized and shapes crisp with clean edges.
Prime Wall and Prepare Surface
So you have your epic mural visualized and materials on hand. But wait! Proper prep work makes all the difference for successful adhesion and avoiding eventual peeled edges or patches.
Clean and Fill Wall Imperfections
Remove any flaking paint or old residue still clinging to exterior walls even after washing. Fill small cracks and dents for a smooth finish less likely to show flaws later when your masterful brushwork deserves to shine.
Apply Exterior Primer
Taking this important step helps paint grab firmly onto the surface below and builds added protection from sun and moisture over time. Priming ensures your artistic efforts withstand the elements.
Begin Painting Your Outdoor Masterpiece
With your design mapped out and prep complete, the truly fun part begins! Have your color palette and materials ready to go. Then start wielding brush, roller or spray paint using broad, loose strokes for a tropical look or careful, precise lines on geometric patterns.
Outline First or Start Painting Inside Out
Lightly sketch all elements with pencil before adding color, or begin painting central areas then edges for best results. Allow sections to dry between colors to avoid smearing or bleeding.
Use Painter’s Tape for Sharp Edges
Crisp shapes impress more than wobbly lines, so utilize tape tricks fortriangles, diamonds or chevrons requiring symmetry. Remove before dry for clean results or touch up freehand where needed.
Mistakes happen; don’t obsess over perfection. Layer vibrant colors conveying your personal vision for this enjoyable beautification project. Outdoor paint allows easy fixes by simply painting over and redoing sections!
Enhance Depth with Shadows and Dimension
Elevate your mural from flat to fabulous by incorporating visual techniques creating the illusion of depth and real life dimension. Strategically apply darker shades of paint to add natural-looking shadows and highlights.
Use Darker Paint Colors for Depth
Brush deeper hues along one edge of a leaf, flower petal, or other element to define shape and form with shading. Paint the background or distant objects in lighter, muted tones to push visually forward in space.
Highlight Focal Points
Make key objects like a bird, butterfly or central flower stand out using sharper contrasts, richer colors, crisp edges or strategic shadows. These become striking focal points for emphasis.
Soon you’ll have family and friends doing double takes and moving in close to admire fine details showcasing newly discovered artistic talents!
Protect Your Finished Piece
Guard your DIY glory from sun damage, moisture and other threats by adding a protective top layer as the finishing touch.
Apply Sealant for Added Protection
Use exterior grade polyurethane or specialized paint sealants to lock in colors and create a damage-resistant barrier. Reapply every few years or when you notice fading to help your creation last.
Touch Up Paint Flaws Quickly
Check periodically for scrapes or scratches appearing in high traffic zones. Spot fix minor imperfections right away with matching paint so they don’t spread into bigger headaches later!
Consider graffiti resistant or anti-vandal coatings if placement makes your painted canvas an appealing target for less artistic folks!
Maintaining and Preserving Your Mural
Put effort into properly caring for your artistic addition so it continues gracing your outdoor space with visual wonders for years of joy.
Wash Every Year to Remove Grime
Use a gentle outdoor cleaner and low pressure rinse to prevent buildup of dirt, mildew or environmental gunk over your masterpiece. Check for damage needing paint touch ups while cleaning.
Reapply Paint and Sealants as Needed
Don’t let cracks, thinning color or peeled edges undermine your curb appeal and backyard vibes. Renew paint and protection regularly to avoid costly repairs restoring extremely weathered or damaged murals.
With reasonable maintenance your artwork weaves itself beautifully into surroundings for the long haul, evolving along with gardens and exterior styles over time.
Achieve a Professional-Looking Result
If wondering whether you possess the skill to pull off an eye catching mural, rest assured nearly anyone can with simple shapes and techniques! Focus more on fun over perfection during this enjoyable beautification process.
Simple Shapes Work Best for Beginners
Paint freehand images like leaves, flowers, butterflies or abstract shapes. Their irregular forms hide imperfections. Grid out geometrics or use yardstick and level for symmetry. Tracing templates or projected designs simplifies intricate themes.
Don’t obsess when attempting challenging murals for the first time! Outdoor paint allows fixes by painting over smears, wobbly lines, or unsatisfactory sections. Relax knowing vibrant artwork readily replaces any undesirable outcome!
With creativity, patience and these key tips, soon stylish, artistic flair will come from walls. Admiring your handcrafted creation against the backdrop of green gardens or blue skies fills free time with feelings of pride and accomplishment.
