Oak kitchen cabinets can provide a sense of solidity and durability, their beautiful wood grain lending visual warmth. But overtime, those golden oak cabinets can start to seem tired or dated. Instead of embarking on an expensive kitchen remodel, you may wish to give those oak cabinets new life with a fresh coat of paint.
However, painting oak does come with some unique challenges. Oak has an open wood grain that can leave noticeable texture issues after painting. And you may worry that painting over that beloved oak wood grain means losing what you originally cherished about the cabinets. Thankfully with the right prep work, paint selection, and application techniques, you can give your oak cabinets an updated painted look while still retaining some natural wood grain charm.
Assessing Your Existing Oak Cabinets
Before deciding on painting your oak kitchen cabinets, start by carefully evaluating their current condition. Examine them closely for any existing damage, general wear and tear issues, or problem spots needing repair.
Taking Stock of Condition
Look at each cabinet door and drawer front, as well as the cabinet boxes. Are there areas of warped wood or cracks that should be filled? Do doors or drawers not open and close properly due to loose hinges or sticking? Are edges and corners chipped or surfaces scratched requiring sanding?
While total perfection may not be needed for a painted finish, making any necessary repairs ensures the paint will adhere well and gives you the smoothest possible finish. Take notes and budget to replace hardware like loose handles or pulls while you have everything dismantled for painting. Small fixes beforehand pay off down the road.
Evaluating Wood Grain
A signature characteristic of oak wood is its noticeable grain patterns. The more porous spring and summer oak growth layers create indented wood pores, while dense winter layers appear as lighter grain lines. This pronounced grain texture can sometimes be visible even after painting oak cabinets.
Examine your oak cabinet doors and drawers to determine your ideal amount of grain visibility after painting. One approach is to highlight the beauty of the wood by allowing some of the grain to show through. Filling the wood pores with opaque paint while letting the most dramatic grain lines shine creates visual interest.
Alternatively, you may wish to conceal the oak grain entirely under coats of paint for a ultra-smooth finish. Products like Sherwin-Williams Grain Filler completely fill the porous oak grain so that painted surfaces appear more level. Just know that completely eliminating visible grain takes more effort and material costs.
Determining Paint Goals
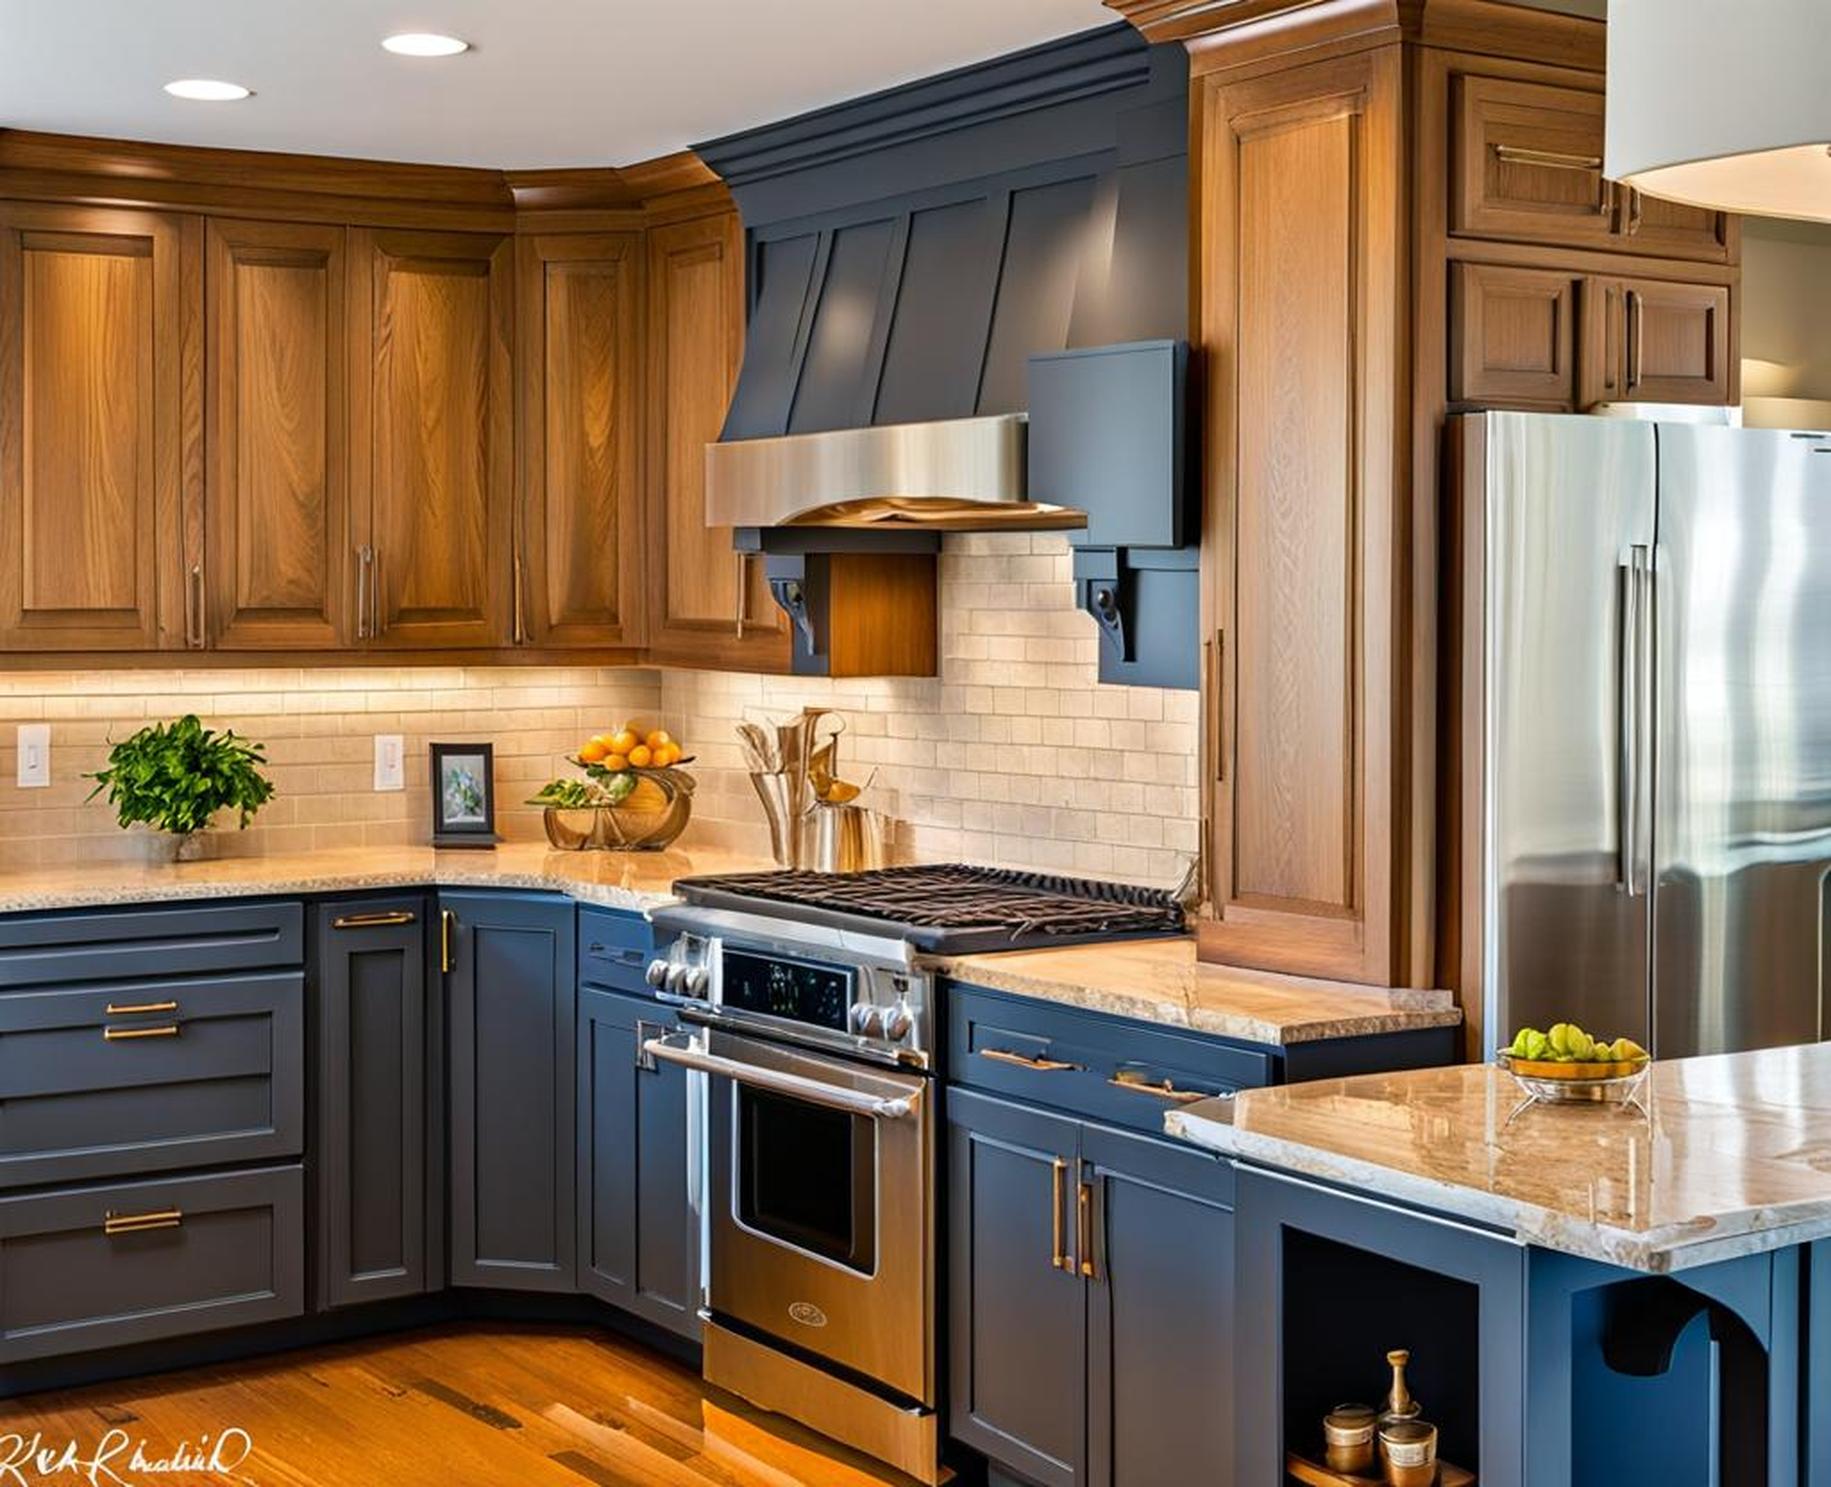
Consider what style and overall visual impact you wish your newly painted oak cabinets to provide before finalizing paint color choices. Do you desire a brighter, lighter kitchen or gravitate towards richer, moodier hues? Is your aesthetic modern and sleek or comfortable and farmhouse?
White painted oak cabinets can open up a small, dark kitchen in an instant, especially if choosing a crisp true white without yellow undertones. Soft tints like pale blue-gray create a timeless appeal. Deep navy blue makes for striking pop of color. Just be sure your paint goals align with your overall kitchen design and architecture.
Preparing Oak Cabinets for Painting
Proper prep work makes all the difference for oak cabinets to achieve professional painting results. Thorough cleaning, sanding, patching holes, and potentially using wood filler allows paint to adhere correctly with minimal grain visibility. Don’t skip corners here!
Cleaning and Deglossing
The first step is thoroughly cleaning oak cabinet surfaces using an ammonia-based cleaner or degreasing agent to remove all grease, grime or residues. Pay special attention to areas around knobs and pulls where oils from hands accumulate. Rinse surfaces well and allow them to fully dry.
Next, sand cabinet fronts lightly using 220 grit sandpaper to degloss and abrade surfaces. This allows paint to properly cling, especially on harder oak wood. Fully deglossing also prevents the unsightly issue of shiny spots bleeding through new paint. Be sure to address areas around knobs and pulls where prior clear coats may still be intact.
Filling Holes and Imperfections
Examine cabinets closely for any small holes and dents to fill for smoothest painting results. Use painters putty or wood filler to patch holes left from removing old hardware pulls or filling warped spots. Allow adequate drying time for fillers before sanding seams smooth.
Check drawer fronts and cabinet corners for additional cracks or gaps needing filler. Proper patching prevents uneven paint absorption which shows through painted finishes. Don’t neglect this important step!
Applying Grain Filler (Optional)
Using a wood grain filler product can help reduce the open pores of oak prior to painting. These fillers contain minute particles that build up in the wood grain valleys, creating a more uniformly smooth surface. Common options include Sherwin-Williams Interior Wood Grain Filler or Minwax Wood Finish Wood Filler.
Grain fillers should be applied using a plastic applicator or rubber glove, working well into the grain crevices. Once dry, sand surfaces lightly to remove any excess filler from non-grain areas. Finish by vacuuming thoroughly before painting.
While effective at hiding oak pores, proper application of wood grain fillers requires precision. They also add cost and time to your cabinet painting project. Evaluate whether attempting to eliminate visible grain texture aligns with your painting goals before taking this intensive step.
Choosing Paint for Oak Surfaces
Not all paints are created equal when it comes to properly adhering to oak cabinetry and covering wood grain. Investing in a high quality cabinet paint formulated for dense surfaces results in most seamless finish.
Paint Types and Finishes
Look for cabinet paints that offer harder resins and binding agents made to grip wood grain, like Benjamin Moore’s Advance Waterborne Interior Alkyd Paint. Similarly, Sherwin-Williams ProClassic Interior Waterbased Acrylic-Alkyd can flex within oak wood pores for smoother texture.
In terms of sheen, semi-gloss offers a nice balance point. The subtle sheen adds depth without being overly shiny like gloss finishes. Satin sheens also work well for cabinets by providing protection and wipe-ability while retaining a classic matte look.
Color Considerations
If planning white oak cabinets, carefully test different white swatch samples on doors to view undertones. Some whites pull yellow or beige, which may accentuate wood grain rather than conceal it. Choose ultra-bright whites like Benjamin Moore Chantilly Lace to avoid any yellowish cast.
Also sample darker paint colors to ensure tones complement your kitchen. View color swatches on cabinet doors at different times of day when kitchen lighting conditions change to confirm shades appear as envisioned before fully committing.
Addressing Grain Texture
Using specialty primers and sealers can also produce smoother, consistent paint application on textured oak grain. Zinsser’s seal coat shellac-based primer seals in wood pores and equalizes absorption variances.
Alternatively, water-based acrylic primers like Zinsser Smart Prime minimize tannin bleed-through from oak. Apply two coats per manufacturer instructions, then lightly sand before painting for flawless adhesion and grain concealment.
Painting Oak Cabinets
Once properly prepped and primed, oak cabinet fronts can be painted using brush techniques optimized for achieving professional, seamless coverage.
Removing Doors and Hardware
Detaching hardware pulls, knobs and handles allows for easiest access while painting cabinet fronts and doors. Carefully number doors and drawers to ensure accurate reinstallation in original openings once painting finishes. Use caution when removing door hinges to avoid damaging cabinets.
Set doors on sawhorses face side up and remove hardware. Scrape away any debris around screw holes and fill deeper ones with putty so new paint can form a smooth, consistent coat across the entire door.
Applying Primer and Paint
Using high quality primer designed for wood cabinetry, apply two coats according to manufacturer guidelines. Allow proper drying times between coats, sanding lightly if needed. Then paint doors using fine-bristle angled sash brushes, flowing with the wood grain direction.
Apply paint in thin, even coats watching for drips which become very noticeable on oak grain. Allow proper drying times between finish coats, gently sanding any rough spots for a glass-smooth feel. Two to three finish coats often provides fullest coverage and color richness on oak.
Reinstalling Doors and Hardware
Once doors are fully cured, reattach using original hardware if desired. Take care not to overtighten new screws into previous holes to avoid cracking paint. If desired, replace old handles and pulls with updated knobs or handles for a brand new custom kitchen look.
Painting oak cabinets presents unique challenges but also unique opportunities. With the right planning and products, visible wood grain can be minimized without eliminating it fully from the conversation. The resulting lighter, brighter kitchen space feels gracefully updated while still celebrating touches of original oak charm.
Strategically allowing some buttery grain lines to shine pays homage to beloved oak cabinets of the past. Crisp lines of white paint salute the clean new future. With oak cabinet painting done well, you can indeed have the best of both worlds!
