Selecting the perfect curtain top style can elevate your home’s decor and functionality. But to achieve the desired look, you need to know how to properly hang pinch pleats, pencil pleats, rod pockets and other elegant headers. Follow this comprehensive guide to professionally install beautiful drapery tops that frame windows flawlessly.
Introduction to Popular Curtain Top Styles
When choosing new curtains or drapes, one of the most important decisions is the top treatment or “header” style. The curvature, shape and fullness of the tops greatly impact the aesthetic, light control and ease of hanging.
Here’s an overview of the most popular curtain headers:
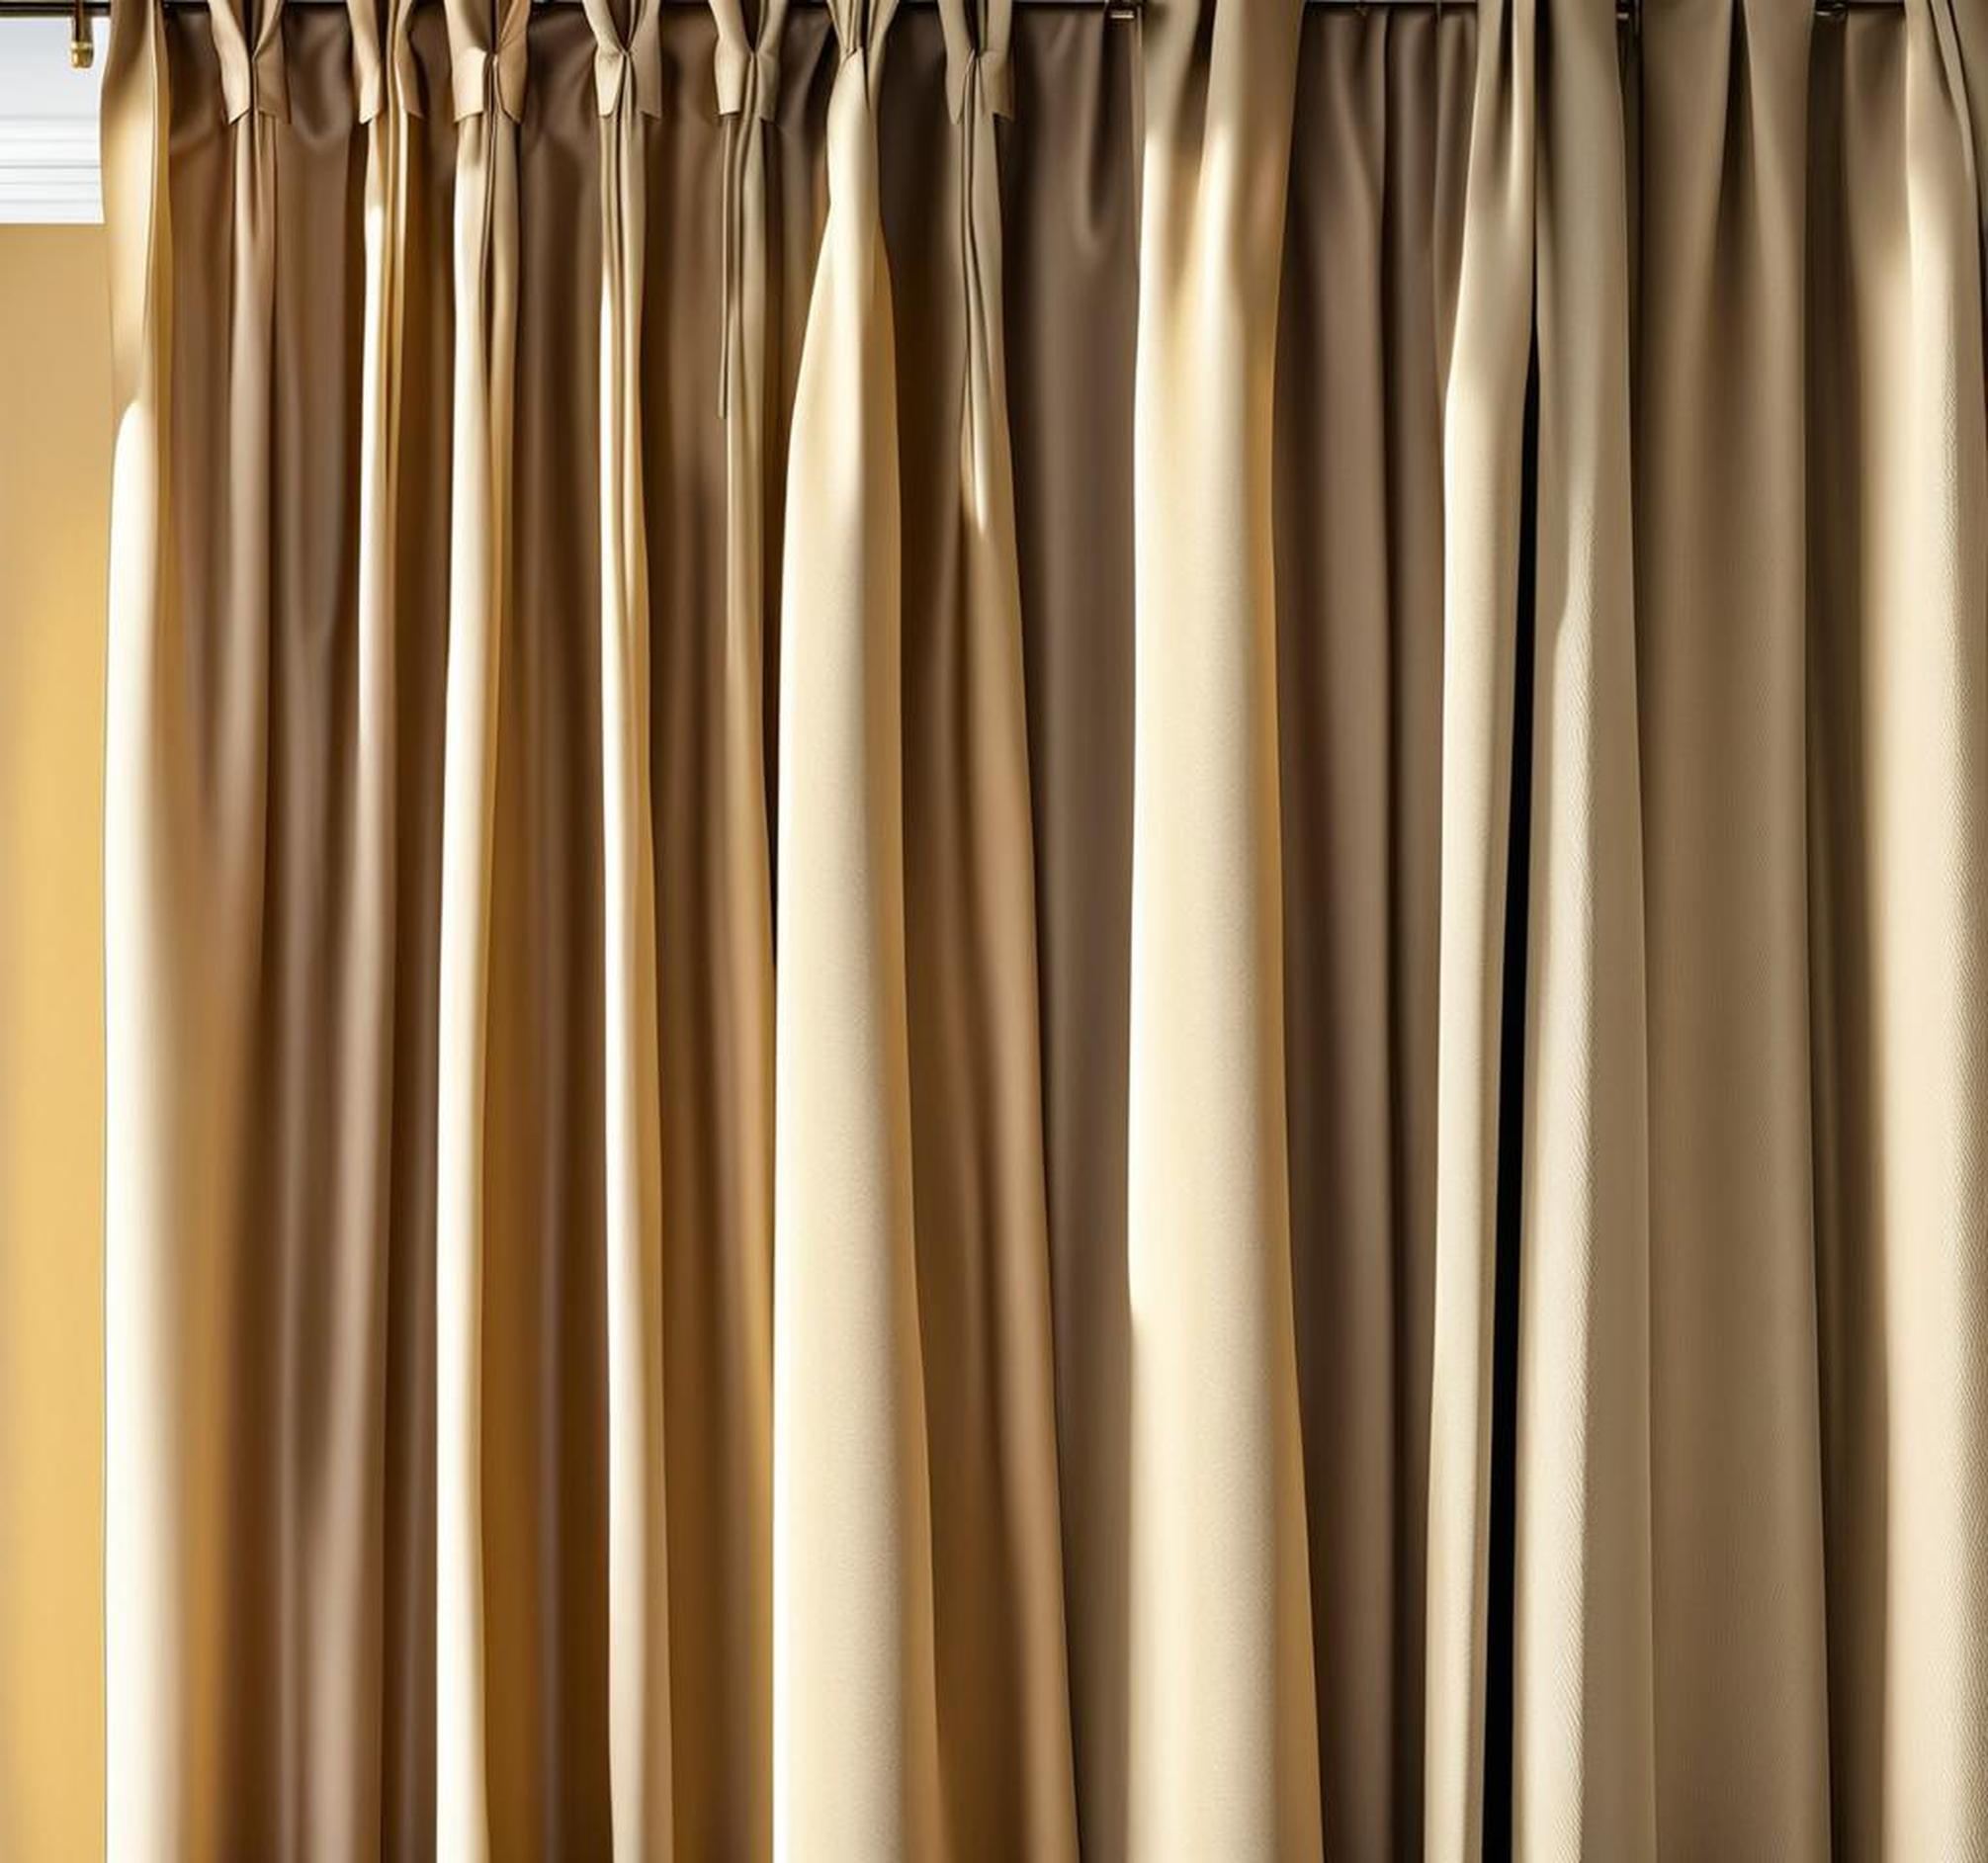
- Pinch Pleats: Timeless folded style requiring ample fabric for formal, luxurious look.
- Pencil Pleats: Casual vertical ribs resembling pencils, needing less fullness.
- Rod Pockets: Simple channel pockets to thread drapes onto rods.
- Tab Tops: Ties, tabs or button holes to mount panels.
- Grommets: Reinforced holes for modern, clean style with rings/poles.
- Back Tabs: Reverse tabs neatly conceal workings of drapes.
Assess Your Window Size and Shape
Before purchasing any drapery, first carefully measure your windows. Note the exact height from the top of the frame to the sill. Then width from inside edge to inside edge. For outside mount panels, add 3-4 inches to overall height and width for optimal light blocking and an elegant look.
Also scrutinize any special architectural elements. Does the window have a rounded top? Unusual inset shapes? Account for these when planning layout and pleat placement so tops align properly.
Consider Room Size and Ceiling Height
A bay window alcove with high ceilings calls for longer, more formal drapery panels. Whereas a small, oddly shaped window up near the ceiling is better suited for above sill-length treatments. Scale curtain dimensions appropriately.
Determine Inside vs. Outside Mounting
Inside mounted curtains attach directly over the window frame for a streamlined appearance. Outside mounted drapes extend past the moldings onto the surrounding wall space for a luxurious aesthetic. Most pinch and pencil pleat styles look best outside mounted. Sheers and casual headers can work either way.
Select Appropriate Curtain Rod or Track
Choosing suitable hardware is imperative for properly hanging drapery tops. Incorrect width or unstable supports lead to uneven pleats, sagging and a sloppy look. Consider the desired style, weight of fabric and your budget:
- Modern : Sleek metal rods in finishes like brass, black or nickel for clean lines.
- Classic : Elegant wood poles coordinate with traditional architecture.
- Casual : Tension rods quickly mount without drilling for apartments/rentals.
Measure for correct length and diameter. Clip-on rings, glider rings or U-clips should slide smoothly without catching. Wall mounts provide the most secure support for heavy pleated panels without sagging over time.
Match Metal Finishes Seamlessly
Mixing mismatched metals looks disjointed. Antique brass rods should pair with antique brass ring hooks, end caps and finials. Ensure all hardware coordinates elegantly. The devil’s in the details.
Determine Appropriate Curtain Length
Hanging drapery too short looks skimpy and accentuates low ceilings. Too long causes unsafe puddling tripping hazards. To select the optimal vertical drop, first factor in your ceiling height. Standard floor length curtains should just kiss the floor. For above window lengths, add 2-3 inches below the sill.
Account for Proper Stack Height
When opened, pleated curtains stack up as fabric gathers off the floor. To prevent bulky wads topping windows, allow at least 3 inches of stack per foot of curtain width. Pinch pleats require more than narrow pencil pleats. Sheers need very little clearance.
Keep stacking and puddling in mind when installing hardware. Position rods to maximize height while preventing ceiling or floor scraping.
Calculate Curtain Width and Fullness
Curtains not wide enough to cover windows look incompetent and sloppy. But overkill widths strain rods and budget. To determine ideal width for your space:
- Sheers: 2 to 2.5 times width of window
- Casual Single Panel: 2.5 to 3 times width
- Formal, Luxurious Drapes: 3 to 4 times width
Additionally, some pleated styles need more generous fullness than others. Refer to this pleat fullness guide when purchasing:
- Pinch Pleats: 4 to 6 times width
- Cartridge Pleats: 3 to 4 times width
- Pencil Pleats: 2.5 to 3 times width
Utilize a Curtain Width Chart
Manufacturers provide exact product dimensions to simplify ordering. Or reference a curtain width chart indicating ideal widths for various window sizes. This eliminates guesswork and costly mistakes.
Choose Suitable Curtain Fabrics
Fabric type determines the drape, weight and fullness needed for different curtain header applications. Consider these common textiles based on room function and decor:
- Sheers : Flowy, lightweight filtration of light.
- Linens/Cottons : Casually diffuse and soften incoming light.
- Velvets/Faux Silks : Elegant blackout fabrics blocking all light.
- Polyester Blends : Budget-friendly, durable and versatile.
Then match durability to usage. Delicate silks work over seldom-opened formal windows. Sturdy canvas suits kitchens or kids’ rooms with frequent activity and moisture.
Coordinate Color and Patterns Seamlessly
Continuity creates upscale interiors. If existing drapes are staying, select matching tones and textures for new panels. Solid sheers overlay busy florals nicely without competing. Coordinate all window elements harmoniously.
Iron Pleats and Headers Before Hanging
For perfectly crisp pleats, use fabric pleat tape with adhesive activated by a hot iron. Center tapes along the header top, then fold precise pleats pressing firmly. This sets the spacing and depth evenly. Let cool completely before handling so pleats don’t shift out of place.
Inspect tabs or grommets across the top, ensuring symmetrical placement and no puckering seams. Iron flat if needed so rings/poles feed on smoothly.
Steam Away Wrinkles and Creases
Wrinkled curtain tops look unkempt and amateurish. Refold yardage as needed pre-installation to remove creases. Steam press flat when working drapes onto rods. Crisp precision takes finesse but guarantees flawless flow.
Hang Curtains Onto Rods Correctly
Once perfectly prepped, it’s go time for hanging. Feed rod pocket curtains directly onto poles by twisting fabric to compress pleats down to clearance size. Or slide grommets overtraverse rods, aligning centered over windows.
Clip ring tops onto rings methodically, spacing pleats equidistant from one another across. Pull panels evenly taut but not stretched. Billowy fullness should stack near edges to beautifully frame windows when opened.
Use a Helper for Wide or Bulky Drapes
Attempting wide drapes solo leads to uneven disaster. Recruit an assistant to align pleats across while you adjust alternating sides to prevent drifting askew. Four hands expertly conquer what two fumble.
Adjust Tiebacks and Weights Evenly
Strategic tiebacks create different opacity options when privacy or light control are needed part time. Attach slim Discrete Magnetic Weights high at back edges instead for permanent light blockage. Distribution impacts hang evenly.
Always grip bases of both panels to pull curtains wider symmetrically. Centers should stack identically on either side of windows. Uneven treatment screams amateur.
Carefully Conceal Unsightly Workings
For back tab curtains with reverse ties, take care to align perfectly to hide inner mechanics from exterior room view. Measure precisely equal spacing for uniform beauty from all angles.
Never leave visible side hems, uneven cuts or sloppy end seams exposed outward. Meticulous finishing separates the pros from the novices.
Installing beautiful, professional looking curtain tops requires careful calculations, measurements and installations. But with the right hardware, fabrics and some finesse, your pinch pleats and pencil pleats can elevate room decor to stunning new heights. No more uneven amateur aesthetics! Properly showcasing drapery headers demonstrates decor prowess.
