The metal deck railings can transform your outdoor living area. This do-it-yourself project not only adds value to your home but also allows you to customize your space to reflect your personal taste. Whether you’re a seasoned DIY enthusiast or a first-time handyman, installing metal deck railings yourself is an achievable goal with the right tools, materials, and know-how. Let’s dive into the world of DIY metal deck railings and explore how you can create a stunning outdoor oasis that’s both safe and aesthetically pleasing.
Understanding Metal Deck Railings: Benefits and Design Considerations
Metal deck railings are a popular choice for homeowners looking to enhance their outdoor spaces. These sturdy structures not only provide essential safety but also contribute significantly to the overall aesthetic of your deck. When we talk about metal deck railings, we’re referring to a range of options including steel deck railings, aluminum railing systems, and various metal railing styles that can complement any deck design.
One of the primary advantages of choosing metal for your DIY deck railing project is durability. Unlike wood, metal railings resist rot, warping, and insect damage, making them a long-lasting investment. They’re also low-maintenance, often requiring just a simple cleaning to keep them looking pristine. Moreover, metal deck railings offer unparalleled strength, ensuring the safety of your family and guests.
When considering design factors for your metal deck railings, safety should be your top priority. It’s crucial to adhere to local building codes, which typically specify the required height and spacing of balusters. Most residential deck railings need to be at least 36 inches high, with balusters spaced no more than 4 inches apart to prevent children from slipping through.
Aesthetically, metal railings offer a sleek, modern look that can enhance various architectural styles. From minimalist designs with clean lines to more ornate patterns, the versatility of metal allows for endless customization. You can choose from a variety of metal railing styles, such as cable railings for an unobstructed view, glass panel inserts for a contemporary feel, or decorative balusters for a traditional touch.
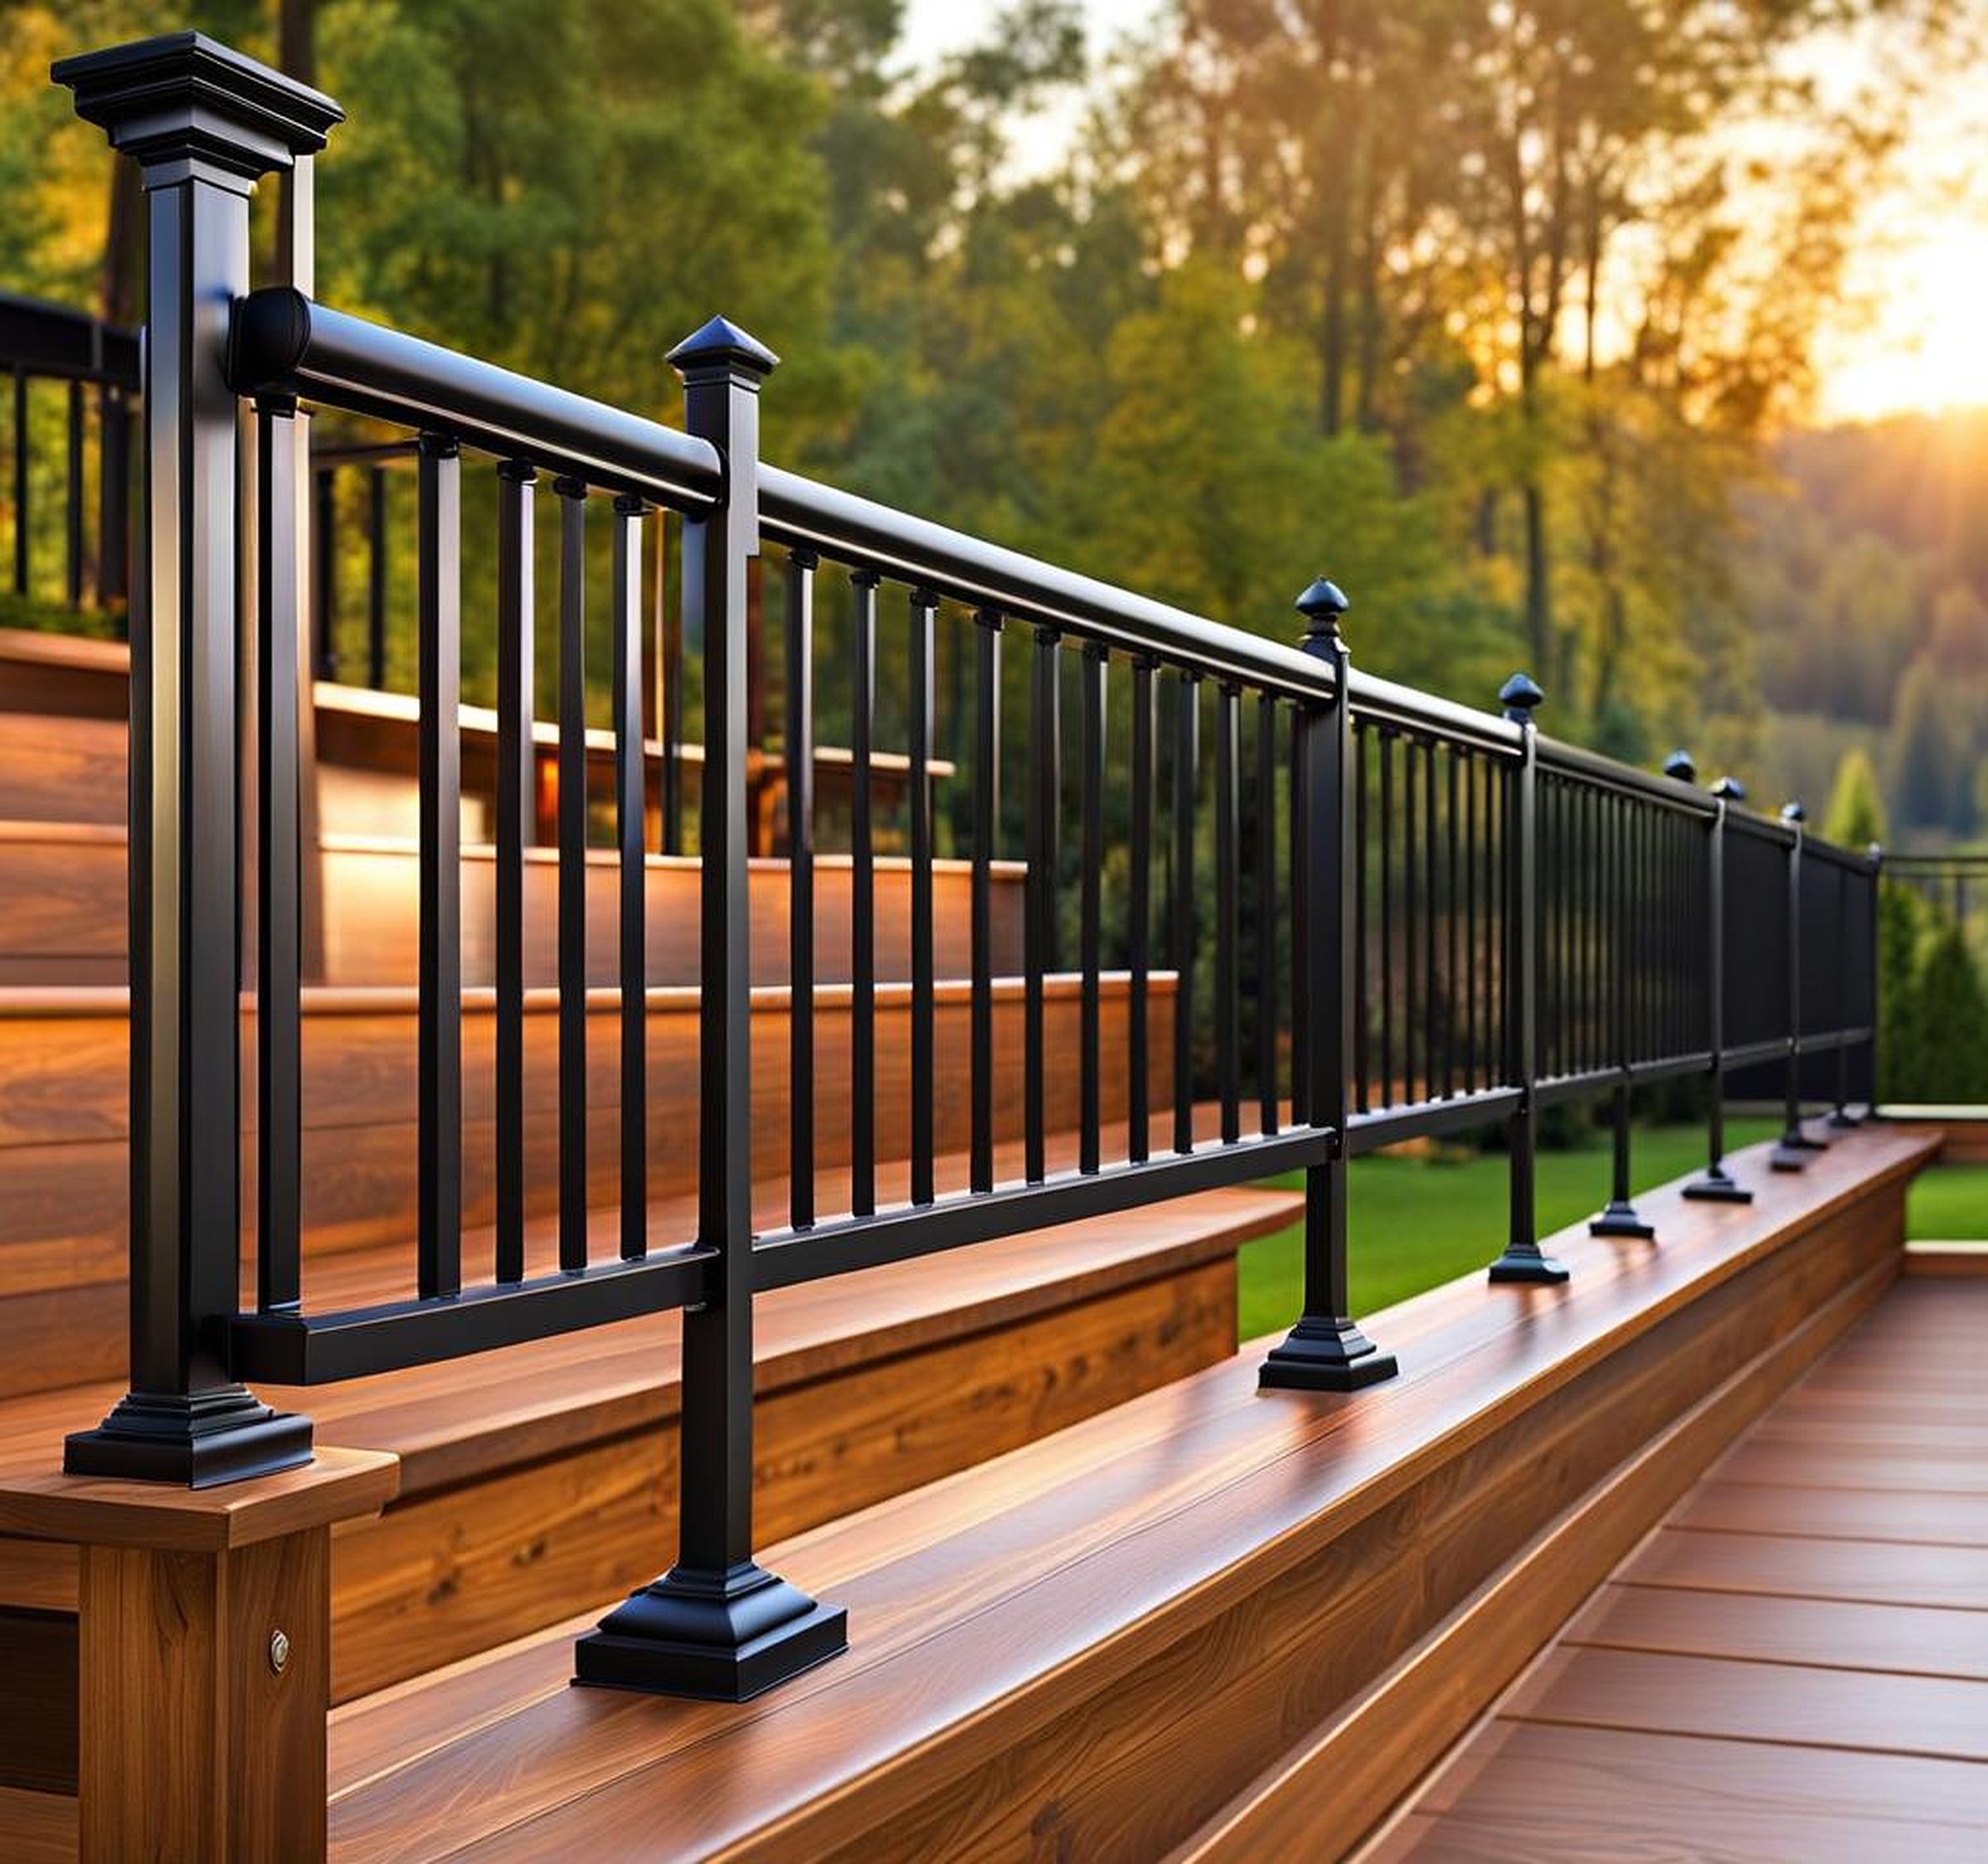
When selecting materials for your DIY metal deck project, you’ll primarily be choosing between aluminum and steel. Aluminum deck railings are lightweight, corrosion-resistant, and often come in pre-fabricated sections, making them ideal for DIY installation. Steel deck railings, on the other hand, offer superior strength and a more substantial feel. They’re perfect if you’re after a more industrial or rustic look.
Planning Your DIY Metal Deck Railing Project
Embarking on a DIY metal deck railing project requires careful planning and preparation. The first step is to assess your deck’s structure and take accurate measurements. You’ll need to know the exact dimensions of your deck, including the length of each side where railings will be installed, as well as the height from the deck surface to the top of the railing.
Once you have your measurements, it’s time to choose your materials. As mentioned earlier, aluminum and steel are the most common choices for metal deck railings. Aluminum is lightweight and resistant to corrosion, making it an excellent choice for coastal areas or regions with high humidity. Steel, while heavier, offers unmatched strength and a more substantial feel. Your choice will depend on your personal preferences, budget, and the specific requirements of your deck.
Calculating the materials needed for your metal deck railing installation is crucial to avoid costly mistakes or delays. You’ll need to determine the number of posts, rails, and balusters required. Most metal railing systems come with detailed instructions that can help you calculate these quantities based on your deck’s measurements. Don’t forget to factor in additional materials like deck railing caps, which not only provide a finished look but also protect the ends of your posts from water damage.
When budgeting for your project, consider all aspects of the deck railings cost. This includes not just the metal components, but also the necessary hardware deck railings require, such as screws, bolts, and anchors. Deck railing prices can vary significantly depending on the material and style you choose, so it’s worth shopping around and comparing options.
Essential tools for your DIY metal deck railing project include:
- A cordless drill with various drill bits
- A level
- A tape measure
- A saw suitable for cutting metal (such as a reciprocating saw or angle grinder)
- Safety equipment (goggles, gloves, and hearing protection)
- A socket wrench set
- A rubber mallet
Having the right deck railing hardware is crucial for a successful installation. This typically includes post anchors, rail connectors, and baluster fasteners. Many DIY deck railing kits come with the necessary hardware, but it’s always a good idea to double-check and have extra on hand.
Step-by-Step Guide to Installing Metal Deck Railings
Now that you’ve got your materials and tools ready, let’s dive into the nitty-gritty of installing your metal deck railings. This process can be broken down into several key steps, each crucial for ensuring a safe and sturdy railing system.
First, prepare your deck surface. This involves cleaning the area where you’ll be installing the railings and marking the locations for your posts. Use a chalk line to ensure your markings are straight and aligned. If you’re working with a wooden deck, you may need to reinforce the areas where posts will be attached to ensure they can support the weight of the metal railings.
Next comes the installation of the metal railing posts. This is perhaps the most critical step in the entire process, as the posts form the foundation of your railing system. Begin by drilling pilot holes at your marked locations. If you’re using surface-mounted posts, you’ll need to secure them to the deck using lag bolts or through-bolts, depending on your deck’s construction. For deck-edge mounted posts, you’ll typically bolt them to the outer joist of your deck.
Once your posts are securely in place, it’s time to attach the top and bottom rails. Most metal railing systems come with brackets that attach to the posts and hold the rails in place. Start with the bottom rail, ensuring it’s level before securing it. Then, move on to the top rail, again checking for level as you go. This creates the basic framework of your railing system.
With your framework in place, you can now insert the balusters. The method for this will depend on the specific metal railing system you’ve chosen. Some systems use pre-drilled holes in the rails, while others might require you to attach individual baluster connectors. Make sure your balusters are plumb (perfectly vertical) as you install them.
The final touch is installing the deck railing caps. These not only provide a finished look but also protect the ends of your posts from water infiltration. Most caps can be secured with a simple adhesive or screws.
Throughout this process, it’s crucial to regularly check that everything is level, plumb, and secure. Taking the time to do this as you go will save you headaches down the line and ensure a professional-looking result.
Customizing Your Metal Deck Railing: Styles and Finishes
One of the joys of a DIY metal deck railing project is the ability to customize your railings to perfectly suit your home and personal style. The world of metal railing designs is vast and varied, offering options to complement any architectural style, from sleek and modern to rustic and traditional.
For a contemporary look, consider clean lines and minimalist designs. Horizontal cable railings, for instance, offer a modern aesthetic while maintaining an open view. If you’re after a more industrial vibe, consider using raw steel with visible welds and bolts. For a traditional touch, ornate metal railing balusters can add a touch of elegance to your deck.
When it comes to metal railing styles, don’t be afraid to mix materials. Glass panels inserted between metal posts can create a stunning visual effect while maintaining safety. Wood top rails paired with metal balusters offer a warm, organic touch to the overall metal construction.
The finish of your metal railings plays a crucial role in both aesthetics and durability. For aluminum railings, powder coating is a popular choice. It’s available in a wide range of colors and provides excellent protection against the elements. Steel railings can be painted, powder-coated, or left to develop a natural patina, depending on the look you’re after.
Consider the following options for customizing your metal deck railings:
- Decorative post caps or finials
- Integrated LED lighting for ambiance and safety
- Textured or patterned metal panels
- Custom-designed metal art panels
- Contrasting colors for posts and rails
Remember, your deck railing is not just a safety feature; it’s an integral part of your outdoor living space’s design. Take the time to explore different metal railing designs and find one that truly speaks to your personal style while complementing your home’s architecture.
Congratulations! You’ve successfully installed your DIY metal deck railings. Now, let’s talk about keeping them looking great for years to come. While metal railings are generally low-maintenance, a little care goes a long way in preserving their appearance and structural integrity.
Regular cleaning is the cornerstone of metal railing maintenance. For most metal railings, a simple wash with mild soap and water, followed by a thorough rinse, is sufficient. Use a soft cloth or sponge to avoid scratching the surface. If you live in a coastal area or somewhere with high pollution, you might need to clean your railings more frequently to prevent salt or grime buildup.
Inspection is another crucial aspect of maintenance. At least once a year, take a close look at your railings. Check for any loose screws or bolts and tighten them as needed. Look for signs of rust, especially at joints or where the metal meets the deck. Catching these issues early can prevent more significant problems down the line.
For aluminum railings, which are naturally rust-resistant, your main concern will be maintaining the finish. If you notice any chips in the powder coating, touch them up promptly to prevent corrosion. Steel railings require a bit more vigilance when it comes to rust prevention. If you spot any rust, sand it down to bare metal and apply a rust-inhibiting primer before repainting.
Seasonal care is also important for metal deck railings. Before winter, make sure all drainage holes in the bottom rails are clear to prevent water from freezing inside and causing damage. In spring, give your railings a thorough cleaning to remove any winter grime.
While DIY maintenance can keep your railings in good shape, there may be times when professional help is needed. If you notice significant rust, loose posts, or any structural issues, it’s best to consult with a professional. They can assess the damage and recommend repairs or, if necessary, replacement.
By following these maintenance tips, your DIY metal deck railings can remain a beautiful and safe part of your outdoor space for many years to come. Regular care not only preserves the appearance of your railings but also ensures they continue to provide the safety and security you and your family rely on.
