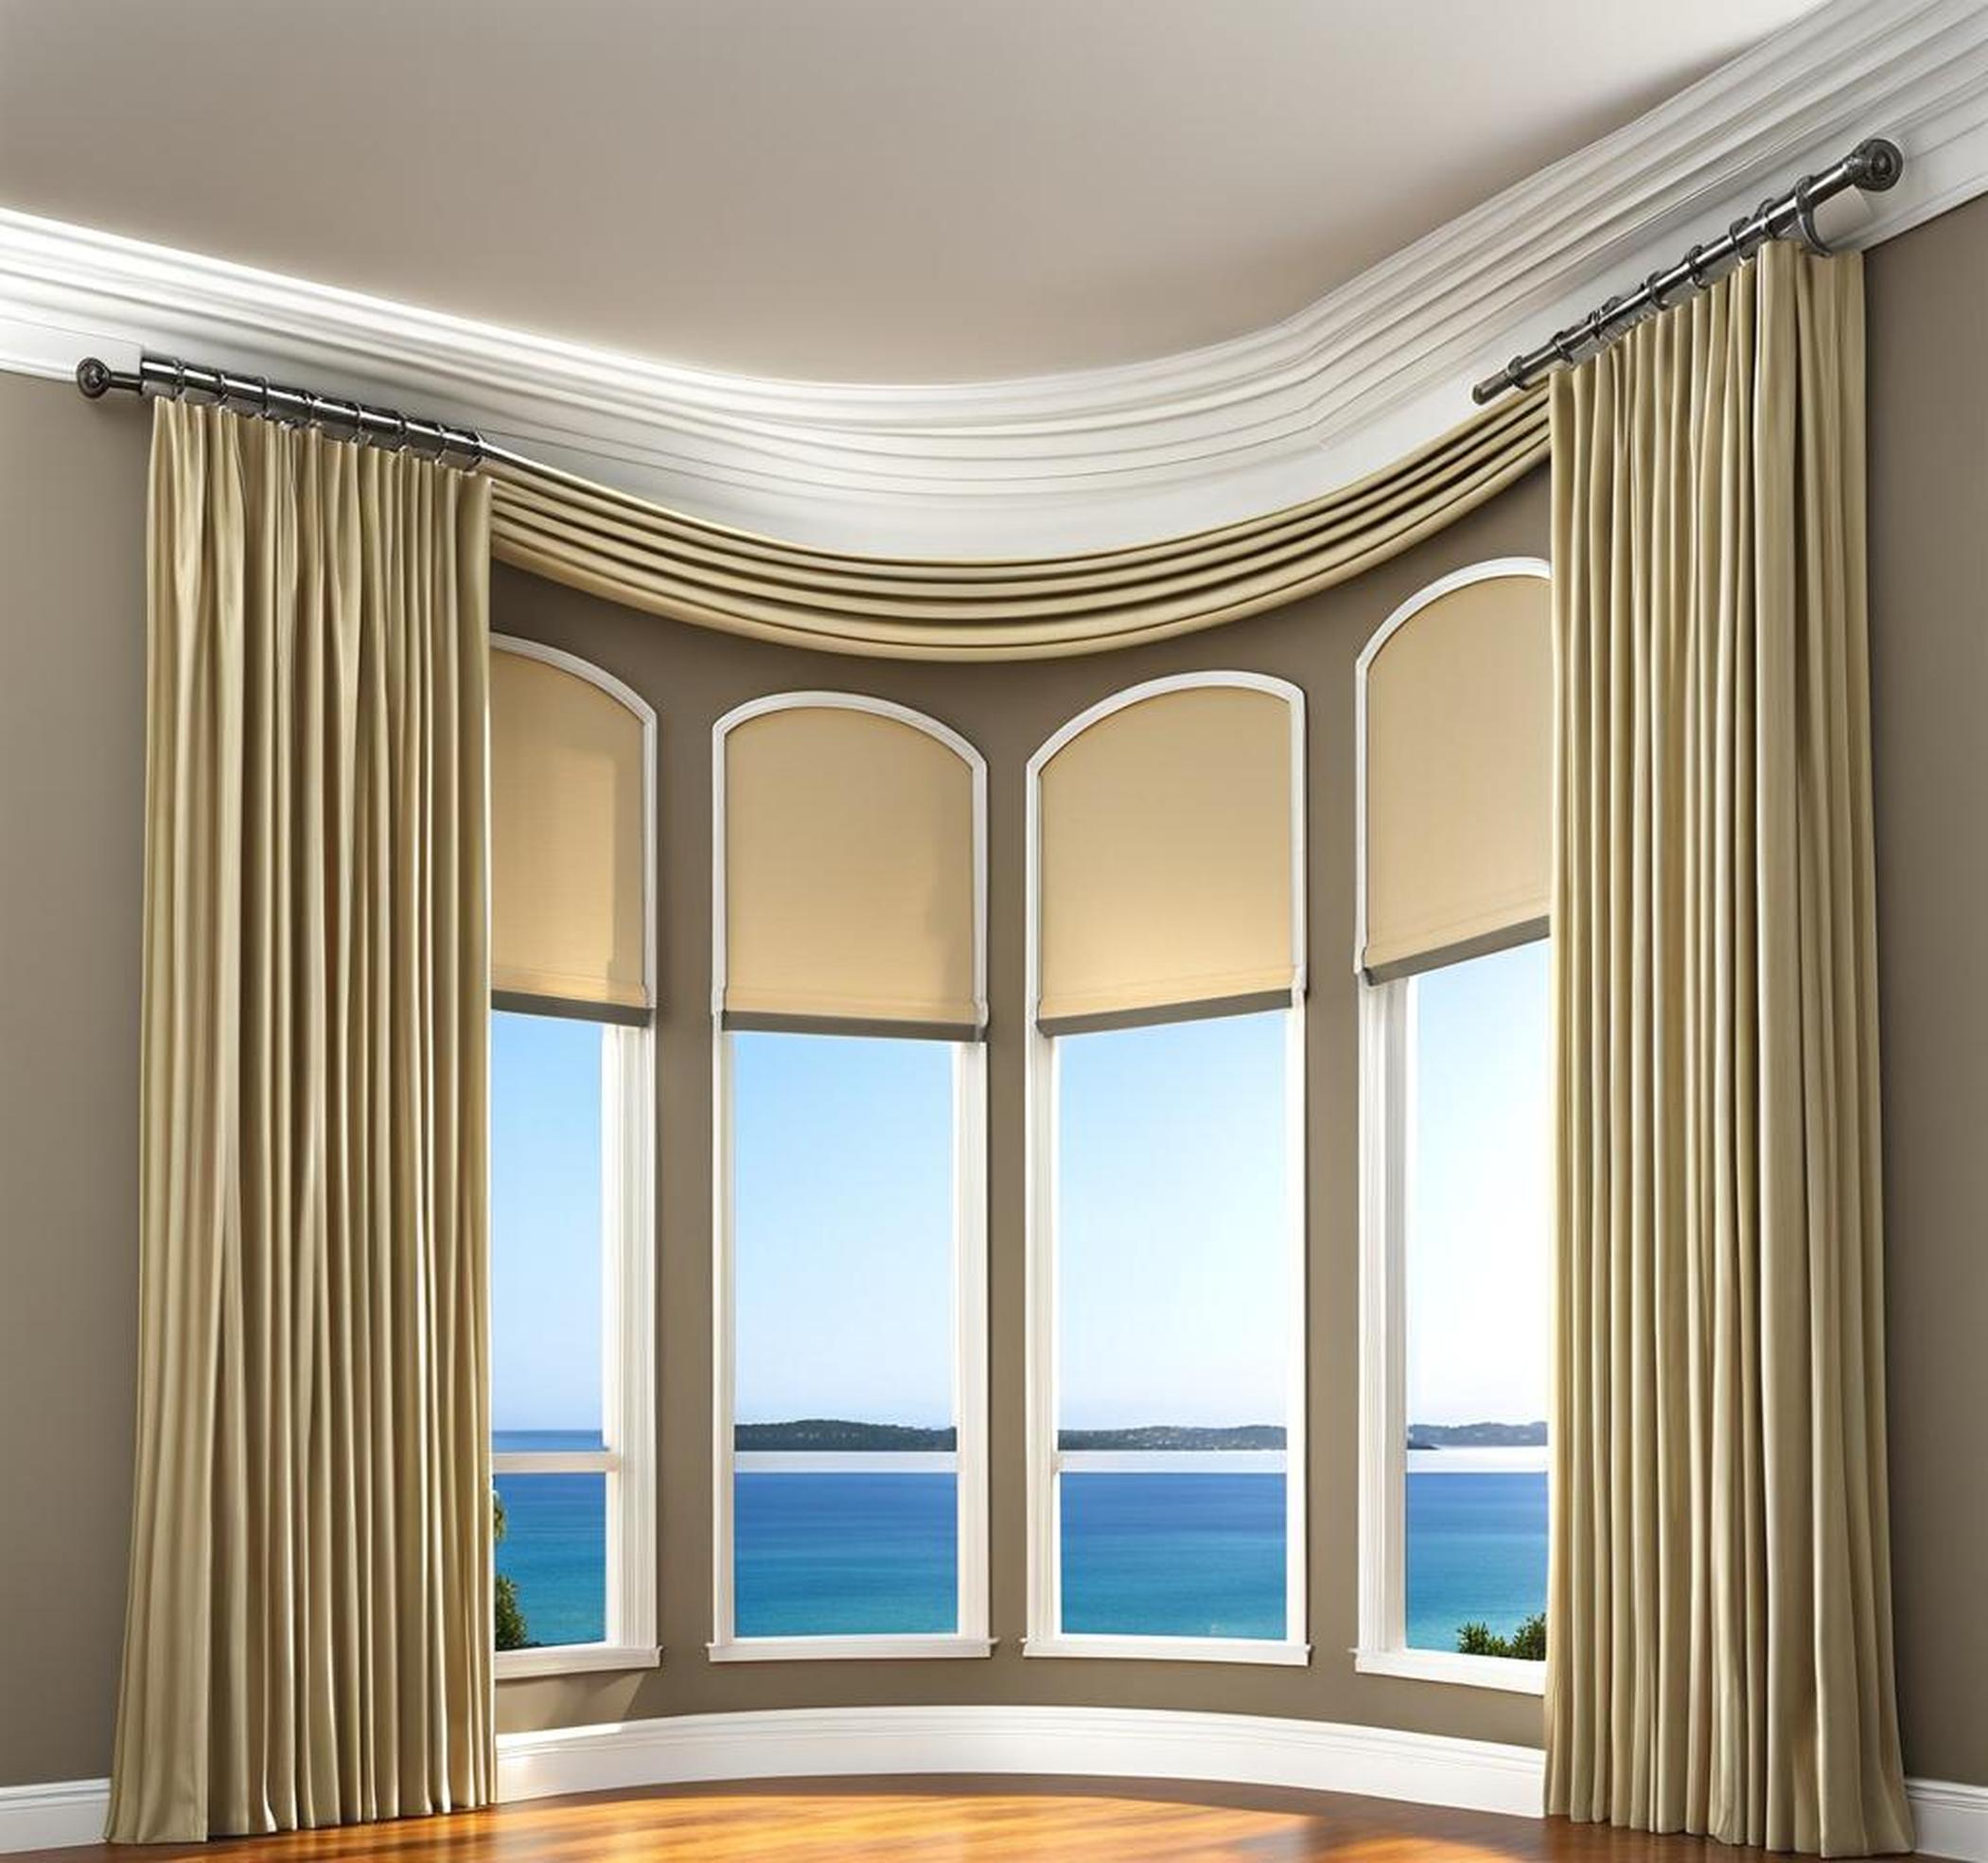
Bay windows are charming architectural features that add space, light, and style to a room. But their unique angles and alcoves often make mounting curtain rods an exercise in frustration. Standard straight rods leave annoying gaps, don’t provide full coverage, and lack room for overlap. Fear not! By utilizing ceiling mounts instead of wall mounts, you can conquer even the trickiest bay window rod installs.
From assessing your window’s specifications to troubleshooting snags, you’ll be able to master the art of custom ceiling bay rods with confidence.
Measure Your Unique Bay Window Carefully
Like snowflakes, no two bay windows are exactly alike. Their dimensions vary in terms of width across, height from ceiling to window top, and of course – the signature angles that give them charm. You’ll need to bust out your tape measure and capture all the quirks of your specific bay window in order to select compatible curtain rods and mounting hardware.
Assess The Precise Angles
Standard windows with straight-on views only require width and height measurements. But the complexity of bay window angles requires a closer analysis both inside and out. Consider sketching a diagram of the full triangular or trapezoid shape from an aerial viewpoint. Note any tight acute or wide obtuse corners. Also account for differences between the inner and outer edges based on your wall thickness. Precision is key for properly bent rods to hug the nuances of your bay window’s silhouette.
Consider The Exact Window Height
While it may seem obvious, many neglect to measure the vertical height from their bay window top edge up to the ceiling. This distance determines the clearance you’ll need between the top of your curtains and ceiling for the rods to mount properly. As a general rule of thumb, you’ll want 10-12 inches of space from the window header to the ceiling. But careful measurement rather than estimates will give you the real figure to work with.
Calculate The Total Width
You’ll need to determine the full straight-line width from end point to end point around the bay window. This may require multiple smaller measurements that you add together based on the angles and corners. Provide some extra width as a buffer if your bay window has unusually tight bends. The total width will tell you minimum rod length needed, but go longer if possible to allow adjusting slide overlap for smooth corner transitions.
Shop For Compatible Bay Window Rod Kits
Armed with your custom bay window measurements, it’s time to find the perfect ceiling rod solution. While you can mix and match separate bracket and pole components, opting for an all-in-one bay window rod kit takes the guesswork out. Consider the following compatibility factors as you browse options:
Bracket Style For Your Bay
You’ll need at least two brackets – one for each end. But bay windows often benefit from center ceiling brackets as well for added support along extra-long spans. Consider the bracket arm length and adjustability to work with your measurement numbers. Low-profile mountain styles hug ceilings in tight spaces. Extended bracket arms allow positioning rods further from the wall.
Rods Designed For Bends
Check that the rods contained in the kit are suitable for corner angles of your particular bay window. Straight rods won’t adapt. Telescoping designs with overlapping pieces that slide for adjustment make customizing easier. Look for terms like bent, adjustable, or 90-degree angle capacity for bay compatibility assurance.
Weight-Bearing Hardware
Ensure the ceiling brace hardware, anchors, screws and integrated rod hangers are rated to bear heavy curtain loads without sagging over time. Ideally the kit’s load capacity will accommodate medium-weight lined drapes or blackout curtains. Prepare to supplement with additional hardware if you anticipate loading multiple heavier curtain panels per rod.
Prep And Mark Meticulous Mounting Locations
You have your tailored bay window rod kit in hand…but where precisely to install? Dedicate time to studying your ceiling area above the bay window before drilling to determine optimal placement. Account for architectural elements, lighting fixtures, and of course – the hidden structural supports within the ceiling itself:
Map The Inside Of Your Ceiling
Whether you have an unfinished basement with ceiling joists exposed ordecorative crown molding concealing the infrastructure, inspect closely. Locate the wooden frame joists or metal beam rafters. These are the strongest mounting surfaces for ceiling braces. Make note of their exact locations above the window relative to your measurements.
Mark Exact Bracket Locations
Based on ceiling support positions and your aesthetic vision, map out precise ceiling bracket placements. Double-check clearance height as well as bracket arm length reach to windows. For regular angles, equal spacing across the width is fine. But customize bracket distance intervals if dealing with irregular bay window geometry to support properly. Use a projector laser level to trace accurate mounting marking guides before drilling.
Install Ceiling Brackets Securely
Unlike tension-based wall mounts, gravity alone places intense load forces on ceiling brace hardware. Take time to anchor brackets strongly enough to confidently sustain curtains long-term without failure:
Secure To Wood Framing Whenever Possible
When brackets align to ceiling joists or rafters, use long wood screws (at least 2 inches) to bite deeply into the lumber substructure. Pre-drilling holes prevents cracking dense wood. Consider cross-strengthening additional perpendicular screws across ceilings joists connections.
Use Specialty Drywall Anchors If No Framing Access
For decorative plaster or drywall ceilings without accessible wooden bracing, use specialized anchored screw fasteners. Unlike hollow wall molly bolts, solid anchored ceiling studs grip tightly. The SnapToggle or Toggle Bolt support up to 161 lbs in 1/2″ drywall alone – plenty for most bay curtains.
Check Bracket Level & Adjust as Needed
Use a bubble level across mounted ceiling brackets to identify any skewed placements. Fix minor discrepancies immediately by shimming behind uneven brackets to pull them into perfect horizontal alignment.
Insert Rods and Drape Dreamy Curtains
The tedious prep work pays off the moment you slide in polished rods and hang beautifully draped window dressings. We’re in the home stretch! Follow this sequence for a wrinkle-free professional finish:
Connect Telescoping Rod Pieces
Assemble bay window rod sections according to kit instructions, extending integrated telescoping portions to your custom window width measurement. Align metal pin holes Ainto slots B and twist connector collar to lock in place. Add mid-point ceiling support brackets if dealing with extra wide spans before proceeding.
Check Rod Straightness
Before hanging curtains, visually assess mounted rods across the entire bay window from multiple sightline angles. Adjust ceiling brackets to tweak angles if rods appear skewed. Recheck level. The goal is smooth graduated bend transitions – not awkward kinks.
Drape Dreamy Window Curtains!
With perfectly straight ceiling-mounted rods in place, installing curtains is a breeze. Glide drapery onto rods using simple clip rings or velcro tabs rather than fiddly individual hooks. We recommend a lightweight linen or lace sheers for billowing allure. Hang tie-backs or hold-backs to keep fabrics out of pathways when opened. Then stand back and admire your work!
Troubleshooting Tricky Ceiling Situations
What if your bay window ceilings present unique challenges beyond basic drywall or exposed beams? Before abandoning ceiling rods altogether, consider these common workarounds:
Sloped And Vaulted Ceilings
Angle adjustable extension rods off top edges ofajimmy-rigged wooden beam installed horizontally across slope plane angles. Anchor vertically into studs on either end.
Low Clearance Between Window & Ceiling
Use low-profile mountain brackets. Cut ceiling drywall above window to embed horizontal hat channel metal plates across joists – then mount brackets directly into channels.
Toggle Bolts grip between ceiling drywall layers without needing plywood backing. Or use spreading steel molly bolts for added tension strength.
Even the most architecture challenged bay windows can support perfectly mounted ceiling curtain rods. No more awkward gaps, sagging fabrics, or incomplete window coverage fails. You’ve officially mastered the art of custom ceiling bay curtain rods – now enjoy a lifetime of beautiful, unobstructed views!
