Compact kitchens present unique challenges, but hanging shelves from ceiling offer an ingenious solution. These suspended storage units transform unused vertical space into functional areas, revolutionizing kitchen organization. By leveraging the often-overlooked ceiling real estate, you’re not just adding storage – you’re redefining your kitchen’s layout and efficiency. Let’s dive into the world of ceiling-mounted shelves and discover how they can breathe new life into your cramped culinary space, making every inch count in your kitchen makeover journey.
Transforming Kitchens with Ceiling-Mounted Shelves: A Space-Saving Solution
Kitchen ceiling storage is a game-changer for those of us grappling with limited space. I’ve seen firsthand how these innovative fixtures can completely alter the functionality and feel of a compact kitchen. By utilizing the vertical space above, you’re essentially creating a new dimension of storage without encroaching on valuable floor area.
One of the most striking benefits of hanging shelves from the ceiling is the visual impact. These suspended units give the illusion of a larger, more open space. It’s almost magical how they draw the eye upward, making even the tiniest kitchen feel more spacious and airy. I remember walking into a friend’s newly renovated apartment kitchen and being amazed at how much bigger it looked, all thanks to some cleverly placed ceiling-mounted shelves.
But it’s not just about aesthetics. The practicality of ceiling-mounted kitchen storage is unparalleled. Think about all those seldom-used items that clutter your countertops or take up precious cabinet space. Now, imagine them neatly arranged on overhead shelves, easily accessible when needed but out of the way during your daily cooking routines. It’s a revelation!
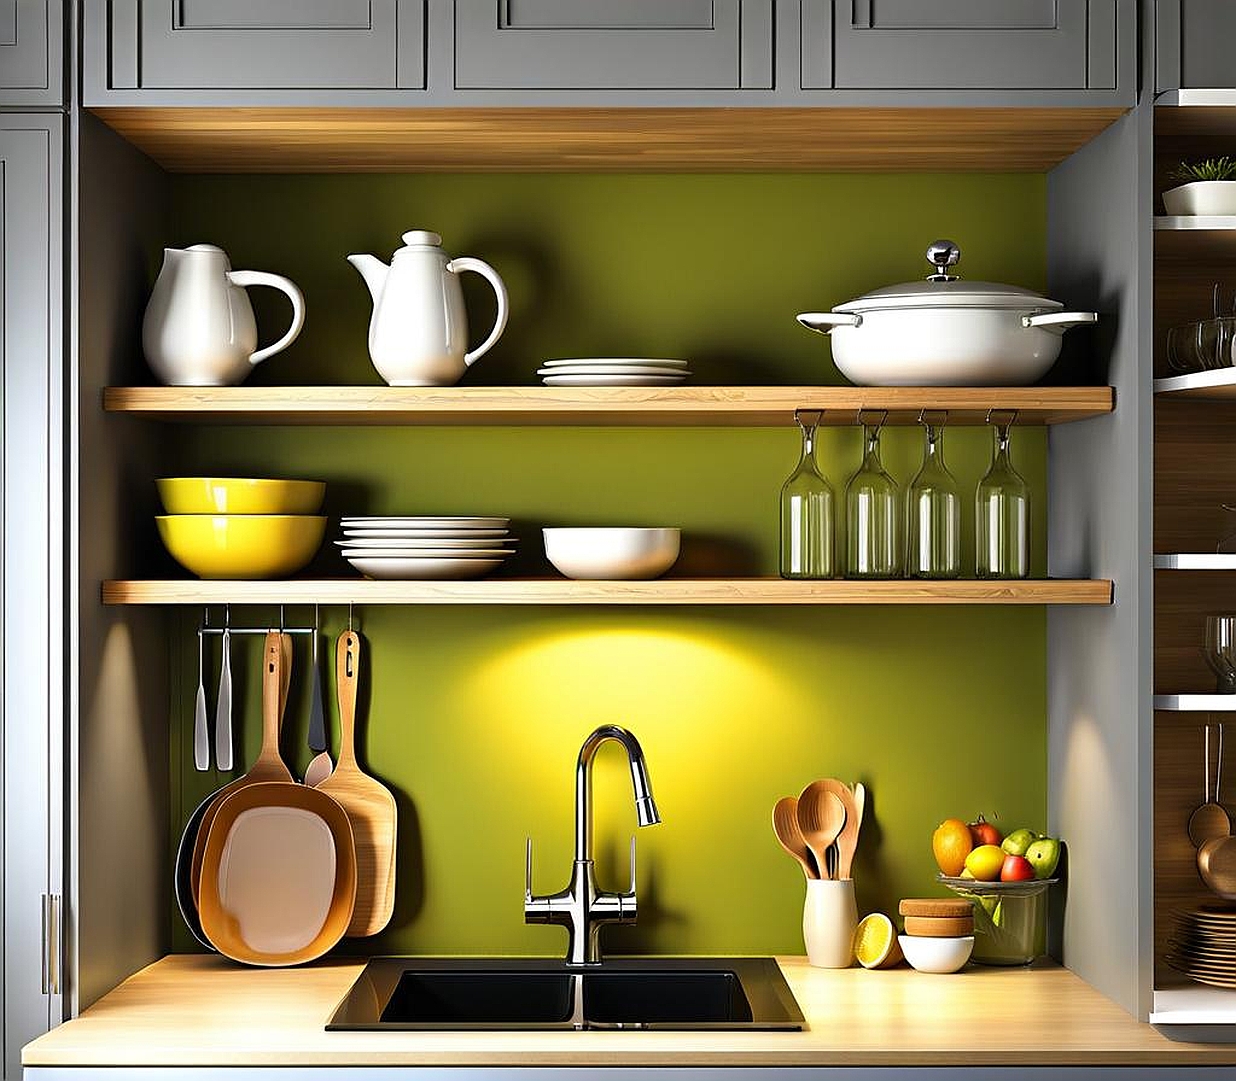
Kitchen ceiling fixtures like these are particularly beneficial for items you don’t use every day but still want within reach. Specialty cookware, seasonal dinnerware, or even your prized collection of vintage teapots can find a new home up high. This arrangement not only frees up your lower cabinets and drawers for everyday essentials but also adds a layer of personalization to your kitchen decor.
Moreover, hanging kitchen cabinets or shelves can be a lifesaver in rental properties where permanent modifications might not be an option. These removable solutions offer flexibility without compromising on storage capacity. You can take them with you when you move, making them a smart investment for renters and homeowners alike.
Designing Your Ceiling-Hung Kitchen Storage System
When it comes to designing your ceiling-hung kitchen storage system, the possibilities are nearly endless. The key is to create a setup that not only maximizes space but also complements your kitchen’s aesthetic and meets your specific storage needs. Let’s explore some exciting design options and considerations.
First, consider the material of your hanging shelves. Wood offers a warm, rustic charm that can soften the industrial look often associated with ceiling-mounted fixtures. I once helped a friend install beautiful oak shelves in her kitchen, and the transformation was stunning. The natural grain of the wood added texture and depth to the space, creating a cozy atmosphere despite the modern hanging mechanism.
On the other hand, metal shelving units can provide a sleek, contemporary look. Stainless steel or brushed nickel finishes are particularly popular for their durability and ease of cleaning. These materials are perfect for a minimalist or industrial-chic kitchen design. Plus, they’re incredibly sturdy, capable of holding heavier items without worry.
The shape and size of your ceiling mounted shelves should be carefully considered. Long, narrow shelves work well above kitchen islands or peninsulas, providing ample storage without overwhelming the space. For corners, consider L-shaped or curved designs that maximize those often-underutilized areas. I’ve even seen clever circular designs that rotate, offering easy access to items stored at the back.
Lighting is another crucial aspect of ceiling shelf installation. Integrating LED strips under the shelves not only illuminates your workspace but also adds a dramatic flair to your kitchen. This dual-purpose design element can transform your kitchen ceiling solutions from purely functional to strikingly beautiful.
Don’t forget about adjustability. Some hanging kitchen shelves come with mechanisms that allow you to raise or lower them as needed. This feature is incredibly useful, especially if you’re storing seasonal items or if your storage needs change frequently.
Lastly, consider how your ceiling-mounted storage will interact with other kitchen elements. Ensure that hanging cabinets or shelves don’t interfere with the opening of upper cabinet doors or the operation of range hoods. The goal is to create harmony between all components of your kitchen overhead storage system.
Step-by-Step Guide: Installing Hanging Shelves from Your Kitchen Ceiling
Installing hanging shelves from your kitchen ceiling might seem daunting, but with the right approach, it’s a project you can tackle with confidence. Here’s a step-by-step guide to help you through the process of ceiling shelf installation.
1. Plan and Measure: Start by deciding exactly where you want your shelves. Use a stud finder to locate ceiling joists – these will be crucial for secure mounting. Measure the space carefully, considering the height of the shelves and any items you plan to store.
2. Choose Your Hardware: Select sturdy brackets and cables or rods that can support the weight of your shelves and their contents. I always recommend going for hardware rated for more weight than you think you’ll need, just to be on the safe side.
3. Mark and Drill: Using a level and pencil, mark where you’ll be drilling into the ceiling. Ensure these marks align with the ceiling joists. Drill pilot holes at your marked spots.
4. Install Ceiling Mounts: Screw the ceiling mounts into the pilot holes. If you’re using toggle bolts for additional support between joists, install these now.
5. Attach Cables or Rods: Connect your chosen suspension system to the ceiling mounts. For cable systems, you might need to cut the cables to the right length.
6. Prepare the Shelves: If you’re using wood shelves, now’s the time to sand, stain, or paint them. For pre-made shelves, ensure they’re clean and ready for installation.
7. Mount the Shelves: Attach the shelves to your suspension system. This might involve drilling holes in the shelves for cables to pass through or securing them to brackets.
8. Level and Adjust: Use a level to ensure your shelves are perfectly horizontal. Most systems allow for some adjustment, so take your time to get this right.
9. Secure and Test: Double-check all connections and give the shelves a gentle tug to ensure they’re secure. Gradually add weight to test their strength before fully loading them.
Remember, safety is paramount when installing kitchen ceiling fixtures. If you’re not confident in your DIY skills, particularly when it comes to load-bearing installations, it’s always wise to consult a professional. They can ensure your hanging kitchen shelves are not only beautiful but also securely installed.
Now that you’ve successfully installed your hanging shelves, it’s time to explore the myriad ways you can use this newfound space. Overhead kitchen storage isn’t just about stashing away rarely used items; it’s an opportunity to reimagine your entire kitchen workflow and showcase your personality.
One of my favorite uses for ceiling mounted shelves is creating a suspended herb garden. By hanging small pots or mason jars from the bottom of the shelves, you can grow fresh herbs right in your kitchen. Not only does this add a vibrant touch of green to your space, but it also ensures you always have fresh herbs at arm’s reach when cooking.
For those who love to entertain, consider using your hanging kitchen cabinets as a display for your finest glassware or china. The height adds drama, and with the right lighting, your prized possessions can become a stunning visual feature. I once saw a kitchen where vintage wine glasses hung from the underside of the shelves, creating a beautiful, functional art piece.
Ceiling mounted shelves are also perfect for storing those bulky, awkward items that never seem to fit anywhere else. Large serving platters, oversized pots, or even that fancy stand mixer you only use on special occasions can find a home up high, freeing up valuable counter and cabinet space below.
For a more industrial look, consider using your overhead storage for hanging pots and pans. This not only saves space but also adds a professional chef’s kitchen vibe to your home. Plus, having your cookware easily accessible can make meal prep a breeze.
Don’t overlook the potential for organizational bliss. Use baskets or bins on your hanging shelves to create designated spaces for different categories of items. You could have a breakfast basket with cereals and granola, a baking bin with all your flour and sugar, or even a snack station for easy access to healthy treats.
For those working with extremely limited space, ceiling shelf installation can even provide a solution for appliance storage. A microwave shelf or a dedicated space for that rarely-used ice cream maker can free up critical counter space without sacrificing functionality.
Lastly, consider the decorative potential of your kitchen ceiling storage. Intersperse potted plants, cookbooks, or decorative objects among your functional items to create a dynamic, layered look. This approach turns your storage solution into a key design element, adding personality and charm to your kitchen.
Remember, the key to maximizing your overhead kitchen storage is to think creatively and personally. What works best will depend on your specific needs, cooking habits, and aesthetic preferences. Don’t be afraid to experiment and rearrange until you find the perfect setup for your unique space.
