Revolutionizing bedroom aesthetics, headboards attached to wall have become a game-changer in modern interior design. This innovative approach not only saves valuable floor space but also creates a sleek, floating illusion that instantly elevates the room’s ambiance. By seamlessly integrating form and function, wall-mounted headboards offer a practical solution for those seeking to maximize their bedroom’s potential while maintaining a stylish edge. Let’s dive into the world of wall-attached headboards and discover how this trend can transform your sleeping sanctuary into a contemporary haven of comfort and style.
The Rise of Wall-Mounted Headboards: A Modern Bedroom Trend
The evolution of bedroom design has witnessed a significant shift from traditional bulky furniture to more streamlined, space-efficient solutions. Wall-mounted headboards have emerged as a frontrunner in this transformation, offering a perfect blend of aesthetics and practicality. The appeal of headboards attached to wall lies in their ability to create a focal point without overwhelming the room’s layout.
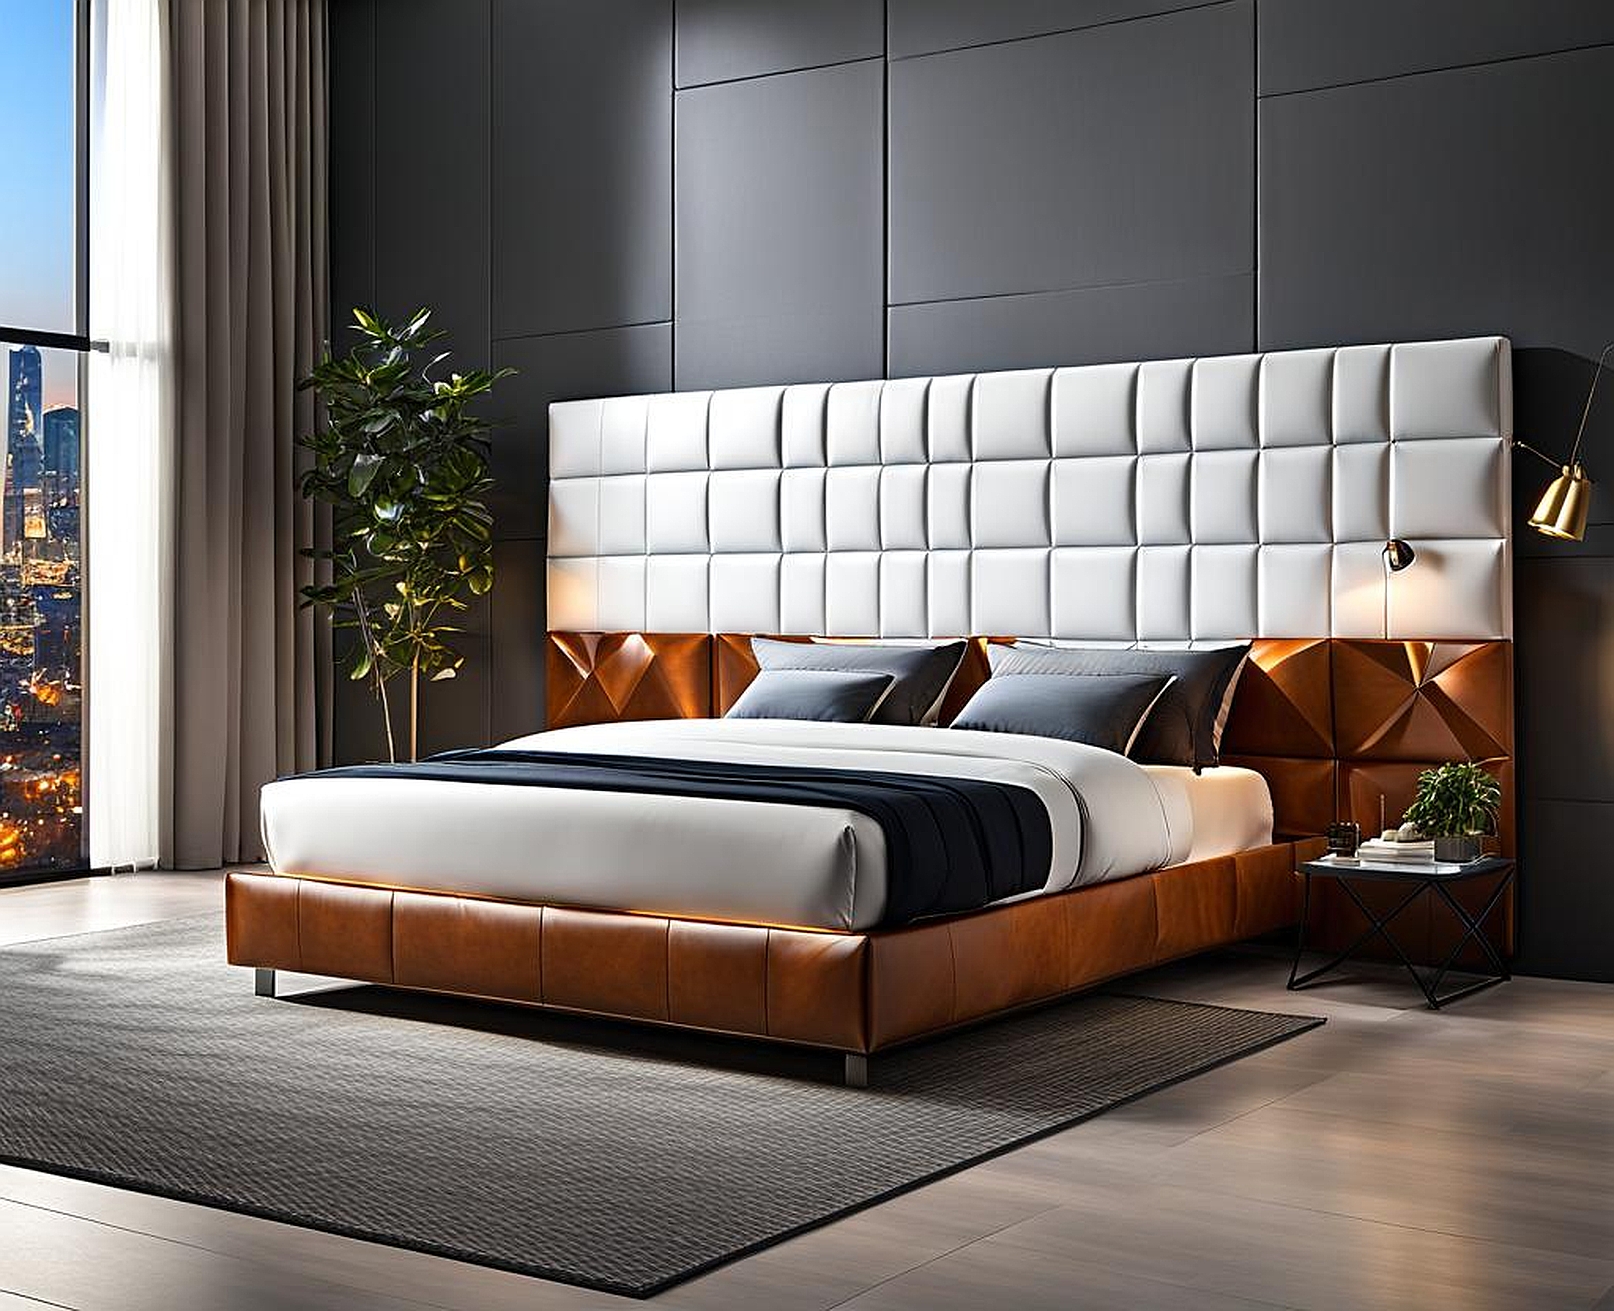
One of the primary benefits of wall-attached headboards is their space-saving nature. By eliminating the need for a full bed frame, these headboards free up valuable floor space, making them ideal for smaller bedrooms or apartments. Additionally, wall-mounted headboards contribute to a cleaner, more organized look, as they eliminate the gap between the bed and the wall where dust and small objects often accumulate.
The versatility of wall-mounted headboards is another factor driving their popularity. From luxurious upholstered panels to sleek wooden designs, the options are endless. Homeowners can choose from a variety of materials, including:
- Plush fabrics for a cozy, inviting feel
- Leather for a sophisticated, modern touch
- Wood for a warm, natural aesthetic
- Metal for an industrial, contemporary vibe
To attach headboard wall mounting systems, manufacturers have developed innovative solutions that ensure stability and ease of installation. These mounting mechanisms often include adjustable brackets, allowing for perfect alignment and secure attachment to various wall types.
The trend of wall-mounted headboards has also given rise to creative DIY projects. Crafty individuals are exploring unique ways to attach a headboard to the wall using repurposed materials or custom designs. This personalization aspect has further fueled the popularity of wall-attached headboards among design enthusiasts and homeowners alike.
Preparing Your Wall for Headboard Attachment
Before you dive into the exciting process of attaching your headboard to the wall, proper preparation is crucial. This ensures a secure and long-lasting installation that will withstand the test of time. Let’s walk through the essential steps to prepare your wall for a headboard attachment.
First and foremost, assess your wall structure. Different wall types require different approaches when it comes to attaching a headboard. Drywall, plaster, brick, or concrete walls each have their unique characteristics and weight-bearing capacities. For drywall, it’s crucial to locate the studs, as they provide the most secure anchor points. Use a stud finder to identify these solid support structures behind your wall.
Once you’ve identified the wall type and potential mounting points, it’s time to gather the necessary tools and materials. Here’s a list of items you’ll typically need:
- Drill with appropriate drill bits
- Screwdriver
- Level
- Pencil for marking
- Tape measure
- Wall anchors suitable for your wall type
- Screws
- Mounting brackets (if not included with your headboard)
For those planning to attach headboard mounting systems to drywall, it’s essential to use wall anchors in areas where studs aren’t available. These anchors distribute the weight and prevent the screws from pulling out of the wall. For brick or concrete walls, you’ll need specialized masonry anchors and a hammer drill to create pilot holes.
Wall preparation techniques vary depending on the surface. For drywall, ensure the area is clean and free from any existing damage. If there are any holes or cracks, patch them up before proceeding. For textured walls, you might need to create a smooth surface where the mounting brackets will sit to ensure a secure fit.
If you’re dealing with a particularly weak or thin wall, consider reinforcing the area. This might involve adding a wooden backing board behind the drywall, which can be attached to the studs to provide extra support for your wall-mounted headboard.
Remember, the key to a successful headboard wall attachment lies in thorough preparation. Take your time during this stage to ensure a stable and secure foundation for your new bedroom centerpiece. By investing effort in proper wall preparation, you’ll create a headboard to wall attachment that not only looks great but also stands the test of time.
Step-by-Step Guide: How to Attach Headboard to Wall
Now that your wall is prepped and ready, it’s time to dive into the exciting process of attaching your headboard. This step-by-step guide will walk you through the process, ensuring a secure and professional-looking installation. Let’s get started with transforming your bedroom!
1. Measure and Mark: Begin by determining the ideal height for your headboard. Generally, headboards are positioned about 3-4 inches above the top of the mattress. Use a tape measure to mark this height on the wall. Next, measure the width of your headboard and mark the center point on the wall. Use a level to draw a horizontal line at your desired height, ensuring it’s perfectly straight.
2. Locate Mounting Points: Hold your headboard against the wall at the marked height and center point. Use a pencil to mark where the mounting brackets or holes on the headboard align with the wall. If your headboard doesn’t have pre-drilled holes, decide where you want to place the mounting brackets and mark these spots.
3. Drill Pilot Holes: Using a drill bit slightly smaller than your screws, carefully drill pilot holes at each marked point. If you’re drilling into studs, you’re good to go. If not, you’ll need to install wall anchors.
4. Install Wall Anchors: For areas without studs, insert appropriate wall anchors into the pilot holes. Tap them gently with a hammer until they’re flush with the wall surface. These anchors will provide crucial support for your wall-attached headboard.
5. Attach Mounting Brackets: If your headboard comes with mounting brackets, now’s the time to attach them to the wall. Align the brackets with the pilot holes or anchors and secure them using screws. Make sure they’re level and tightly fastened.
6. Hang the Headboard: With help from a friend, carefully lift the headboard and align it with the mounted brackets or screws. Slowly lower it into place, ensuring it’s level and centered. If your headboard has pre-drilled holes, these should line up with the wall-mounted screws or brackets.
7. Secure the Headboard: Once positioned correctly, secure the headboard to the mounting brackets or insert screws through the headboard’s pre-drilled holes into the wall. Tighten everything carefully, but avoid over-tightening, which could damage the headboard or wall.
8. Final Adjustments: Step back and assess the headboard’s position. Make any necessary adjustments to ensure it’s level and centered. Some mounting systems allow for slight adjustments even after installation, which can be helpful for achieving perfect alignment.
By following these steps, you’ll successfully attach your headboard to the wall, creating a stunning focal point in your bedroom. Remember, the key to a flawless wall-mounted headboard lies in careful measurement, proper use of tools, and patience throughout the process. With your new headboard securely in place, you’ll enjoy a sleek, space-saving design that elevates your entire bedroom aesthetic.
DIY Wall-Mounted Headboard Ideas for Every Style
Creating your own wall-mounted headboard offers a unique opportunity to express your personal style while saving money. Whether you’re a seasoned DIY enthusiast or a beginner looking to tackle your first project, there’s a wall-attached headboard idea perfect for you. Let’s explore some inspiring DIY options that cater to various tastes and skill levels.
Upholstered Wall-Mounted Headboards: Upholstered headboards add a touch of luxury and comfort to any bedroom. To create one:
- Cut a piece of plywood to your desired headboard size
- Cover it with a layer of foam for padding
- Wrap the foam-covered board with your chosen fabric
- Secure the fabric on the back with a staple gun
- Attach mounting brackets to the back of the board
- Hang it on the wall using the method described earlier
For added flair, consider using button tufting or creating a unique shape for your upholstered headboard.
Wooden Headboard Designs: Wooden headboards offer versatility, ranging from rustic charm to modern sophistication. Here are a few ideas:
- Reclaimed Wood Planks: Arrange and attach weathered wood planks to create a rustic, farmhouse-style headboard
- Geometric Patterns: Cut wood pieces into various shapes and arrange them in a modern geometric pattern
- Floating Shelves: Install wooden floating shelves that double as a headboard and storage space
Remember to sand and finish your wooden headboard to protect it and enhance its natural beauty.
Creative Alternatives: Think outside the box with these unique wall-mounted headboard ideas:
- Oversized Art: Hang a large piece of artwork or a tapestry above your bed to serve as a headboard
- Woven Masterpiece: Create a macrame or woven wall hanging for a boho-chic headboard alternative
- Repurposed Materials: Transform old doors, window frames, or even musical instruments into one-of-a-kind headboards
When planning your DIY wall-mounted headboard, consider the following tips:
- Choose materials that complement your existing decor
- Ensure your chosen design can be securely attached to the wall
- Factor in the weight of your materials when selecting mounting hardware
- Consider incorporating built-in lighting for added functionality
By creating your own wall-attached headboard, you’re not just saving money; you’re infusing your bedroom with a personal touch that reflects your unique style. Whether you opt for a plush upholstered design, a sleek wooden creation, or an artistic alternative, your DIY headboard will undoubtedly become the centerpiece of your bedroom, transforming it into a truly personalized retreat.
Once you’ve successfully installed your wall-mounted headboard, proper maintenance and occasional updates will ensure it remains a stunning focal point in your bedroom for years to come. Let’s explore some essential tips for caring for your headboard and ideas to keep its look fresh and exciting.
Cleaning and Care Tips: Different materials require specific cleaning approaches to maintain their appearance and integrity:
- Fabric Headboards: Vacuum regularly using a soft brush attachment. For stains, use a mild fabric cleaner and blot gently. Avoid saturating the fabric.
- Leather Headboards: Dust with a soft, dry cloth weekly. For deeper cleaning, use a leather cleaner and conditioner to maintain the material’s suppleness.
- Wooden Headboards: Dust regularly with a microfiber cloth. Periodically apply a wood cleaner and polish to protect the finish and enhance the natural grain.
- Metal Headboards: Wipe with a damp cloth and dry immediately to prevent rust. For tougher grime, use a mild soap solution.
Always test any cleaning product on a small, inconspicuous area first to ensure it doesn’t damage the material.
Updating the Look: Keep your bedroom fresh and exciting by periodically updating your wall-attached headboard:
- Reupholstering: For fabric headboards, consider changing the upholstery to match new bedding or a room redesign.
- Refinishing: Wooden headboards can be sanded and restained or painted for a completely new look.
- Accessorizing: Add decorative elements like throw pillows, artwork, or hanging plants around your headboard to change its appearance without altering the headboard itself.
When updating your headboard, ensure any changes don’t compromise its structural integrity or attachment to the wall. If you’re unsure, consult a professional to help with major alterations.
Enhancing Your Wall-Mounted Headboard: Take your headboard to the next level with these creative ideas:
- Integrated Lighting: Install LED strips behind the headboard for a soft, ambient glow.
- Floating Shelves: Add small floating shelves on either side of the headboard for books, plants, or decorative items.
- Textured Panels: Attach textured panels or 3D wall art around the headboard to create a more expansive visual impact.
Remember, your wall-attached headboard is more than just a functional piece; it’s a design element that can evolve with your style. By maintaining it properly and periodically refreshing its look, you’ll ensure your headboard remains a cherished part of your bedroom for years to come. Whether you’re attaching a new headboard to wall mounts or updating an existing one, these tips will help you make the most of this stylish bedroom feature.
