The world of kitchen faucet hole sizes can be daunting for homeowners. The kitchen faucet hole size plays a pivotal role in determining the compatibility and functionality of your new fixture. Understanding the nuances of these measurements ensures a seamless installation process and prevents costly mistakes. From standard configurations to custom solutions, we’ll explore everything you need to know about selecting the perfect faucet for your kitchen sink’s unique setup.
Understanding Kitchen Faucet Hole Sizes
Kitchen faucet hole size refers to the diameter of the openings in your sink or countertop where the faucet and its components are installed. These holes are crucial for both the functional and aesthetic aspects of your kitchen. Standard sizes typically range from 1-3/8 inches for single-hole faucets to 1-1/4 inches for three-hole setups, and 1-1/2 inches for widespread installations. However, it’s essential to note that these measurements can vary depending on the manufacturer and specific faucet model.
The importance of correct hole size cannot be overstated. A mismatch between your faucet’s base and the sink’s holes can lead to installation nightmares, potential leaks, and an unstable fixture. Moreover, an improperly sized hole can compromise the overall look of your kitchen, creating an unpolished appearance that detracts from your design vision.
While standard sizes are common, custom faucet hole sizes exist to accommodate unique designs or specific manufacturer requirements. These non-standard sizes often necessitate specialized installation techniques or additional components to ensure a proper fit. Understanding the difference between standard and custom sizes empowers you to make informed decisions when selecting a new faucet or planning a kitchen remodel.
Common kitchen faucet mounting configurations include:
- Single-hole: Ideal for minimalist designs and pull-down faucets
- Three-hole: Accommodates traditional faucets with separate handles
- Widespread: Features separate spout and handles for a luxurious look
- Bridge: A vintage-inspired design with exposed piping
Each configuration requires specific hole sizes and spacing, highlighting the importance of accurate measurements before making a purchase.
Measuring Your Kitchen Sink’s Faucet Holes
Accurate measurement of your kitchen sink faucet holes is crucial for selecting the right faucet. To ensure precision, you’ll need a few basic tools:
- Flexible tape measure or ruler
- Caliper (for more precise measurements)
- Pencil and paper for recording measurements
- Flashlight for better visibility
Follow these steps to measure your faucet hole size accurately:
- Clean the area around the faucet holes to ensure accurate measurements.
- If you have an existing faucet, remove it carefully to expose the holes.
- Measure the diameter of each hole using your tape measure or caliper.
- For multiple-hole configurations, measure the distance between the centers of the outermost holes.
- Record all measurements, including the thickness of the sink or countertop.
When measuring existing faucet holes, pay attention to any irregularities or damage that might affect the installation of a new faucet. If the holes are not perfectly round or have slight variations in size, note these discrepancies as they may influence your faucet choice or require additional preparation during installation.
A faucet hole size chart can be an invaluable tool when comparing your measurements to standard sizes. Many manufacturers provide these charts, which typically include common configurations and their corresponding measurements. By referencing a chart, you can quickly identify whether your sink’s configuration aligns with standard sizes or if you’ll need to consider custom options.
Standard Kitchen Faucet Hole Sizes and Configurations
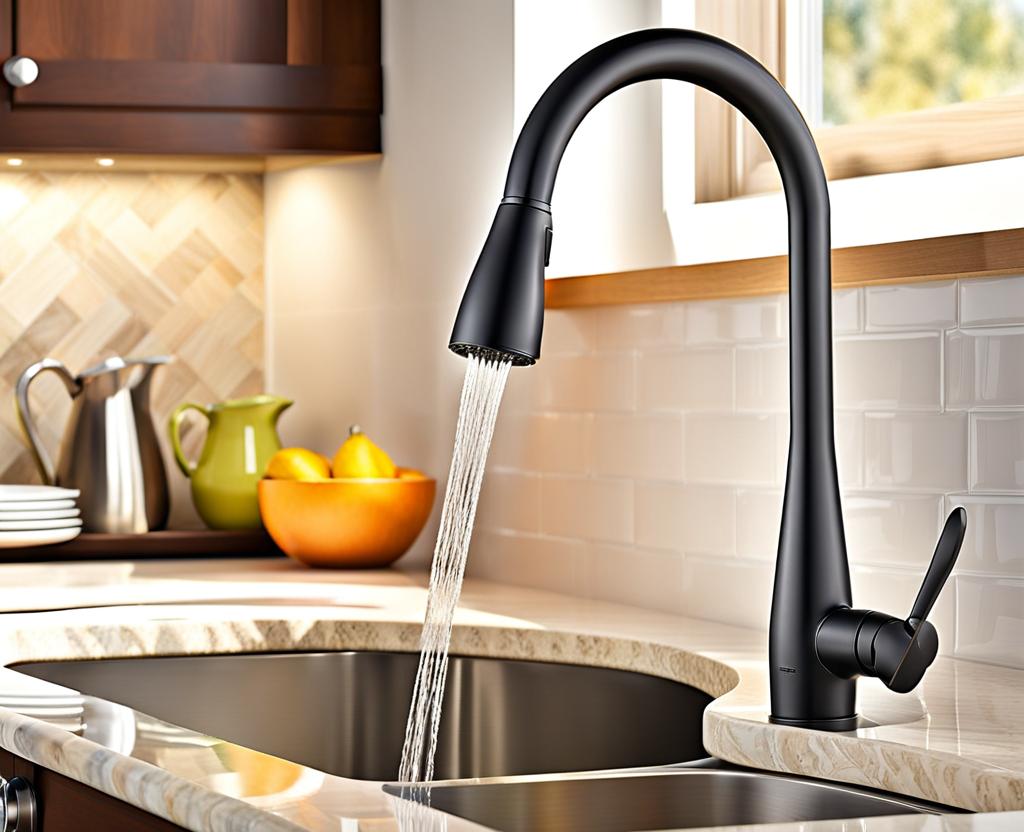
Single-hole faucets have gained popularity due to their sleek, modern appearance and versatility. These faucets typically require a hole size of 1-3/8 inches in diameter. The simplicity of a single-hole setup makes it ideal for minimalist kitchen designs or for sinks with limited space. When installing a single-hole faucet, ensure that the base plate or escutcheon (if included) is large enough to cover any existing unused holes in your sink.
Three-hole faucet configurations are a classic choice, accommodating traditional faucet designs with separate hot and cold handles. The standard layout for a three-hole sink includes a center hole measuring 1-3/8 inches for the spout, flanked by two 1-1/4 inch holes for the handles. These holes are typically spaced 4 inches apart on center, though some configurations may have 8-inch spacing. When selecting a three-hole faucet, verify that the spread of your sink’s holes matches the faucet’s specifications.
Widespread faucets offer a luxurious and customizable look, with separate mountings for the spout and handles. The typical hole size for widespread faucets is 1-1/2 inches, with spacing between the outermost holes ranging from 8 to 16 inches. This configuration allows for greater flexibility in handle placement and can create a striking visual impact in your kitchen.
Bridge faucets present a unique mounting challenge due to their distinctive design. These faucets typically require two holes, each measuring 1-3/8 inches in diameter, spaced 8 inches apart. The bridge component connects the hot and cold water supplies above the sink’s surface, creating a vintage-inspired look. When considering a bridge faucet, ensure that your sink not only has the correct hole size but also adequate clearance for the elevated bridge component.
Adapting Faucets to Different Hole Sizes
Deck plates, also known as escutcheons, are versatile solutions for adapting faucets to sinks with multiple holes. These plates come in various sizes and finishes, allowing you to cover unused holes while maintaining a cohesive look. When selecting a deck plate, ensure it’s large enough to cover all existing holes and matches your faucet’s finish for a seamless appearance.
Installing a single-hole faucet in a three-hole sink is a common adaptation. Here’s how to approach this:
- Choose a single-hole faucet with a deck plate option.
- Measure the spread of your existing holes to ensure the deck plate will cover them.
- Install the faucet in the center hole, using the deck plate to conceal the outer holes.
- Secure the deck plate and faucet according to the manufacturer’s instructions.
Converting widespread faucets to fit smaller configurations can be challenging but not impossible. Some manufacturers offer conversion kits that allow you to adapt a widespread faucet to a smaller spread. These kits typically include special mounting hardware and instructions for modifying the faucet’s connections. However, it’s crucial to consult with the manufacturer or a professional plumber before attempting such conversions to ensure compatibility and proper function.
For non-standard faucet hole sizes, custom solutions may be necessary. These can include:
- Using hole adapters or reducers to fit smaller faucets into larger holes
- Custom-fabricated mounting plates to accommodate unique configurations
- Professional modification of the sink or countertop to create the correct hole size
When dealing with custom solutions, it’s advisable to consult with a professional to ensure the adaptation is safe, functional, and aesthetically pleasing.
Choosing the Right Faucet for Your Sink’s Hole Size
Matching your faucet’s mounting size to your sink’s specifications is crucial for a successful installation. Begin by carefully measuring your sink’s hole size and configuration, as discussed earlier. Armed with these measurements, you can narrow down your faucet options to those that are compatible with your sink’s setup. Remember to consider not just the hole size, but also the spacing between holes for multiple-hole configurations.
Kitchen sink faucet hole compatibility goes beyond just size matching. Consider these factors:
- Sink material: Some materials may require specific mounting techniques or hardware.
- Sink depth: Ensure the faucet’s spout height and reach are appropriate for your sink’s dimensions.
- Under-sink space: Check that there’s adequate room for the faucet’s mounting hardware and water connections.
- Water pressure: Verify that your home’s water pressure meets the faucet’s requirements for optimal performance.
Different faucet mounting styles offer various advantages and considerations:
| Mounting Style | Pros | Cons |
|---|---|---|
| Deck-mounted | Versatile, easy to install | May require multiple holes |
| Wall-mounted | Saves counter space, unique look | Complex installation, potential plumbing changes |
| Single-hole | Clean appearance, simple installation | Limited design options |
| Widespread | Customizable, luxurious appearance | Requires precise hole spacing |
When selecting a faucet that complements your sink’s design, consider these tips:
- Match the faucet’s finish to other kitchen hardware for a cohesive look.
- Choose a spout height and reach that’s proportional to your sink’s size.
- Consider the overall kitchen style – modern, traditional, or transitional – to ensure the faucet fits aesthetically.
- Think about additional features like pull-down sprayers or touchless operation that might enhance functionality.
While many homeowners are capable of installing a kitchen faucet, there are situations where professional installation is advisable. Consider calling a professional when:
- You’re dealing with non-standard hole sizes or configurations
- The installation requires modifications to plumbing or countertops
- You’re installing a complex faucet system with multiple components
- Your home has older plumbing that may require updates
- You lack the necessary tools or experience for a confident installation
For those comfortable with DIY installation, here are some tips for various faucet hole sizes:
- Single-hole faucets: Ensure the base gasket is properly seated to prevent leaks.
- Three-hole faucets: Use a deck plate if your faucet doesn’t cover all holes.
- Widespread faucets: Take extra care to align handles and spout correctly.
- Bridge faucets: Ensure adequate support for the elevated bridge component.
Common mistakes to avoid when installing kitchen faucets include:
- Overtightening connections, which can lead to damage or leaks
- Neglecting to use plumber’s tape on threaded connections
- Forgetting to flush the lines before connecting the new faucet
- Misaligning the faucet, resulting in an improper seal or uneven appearance
- Failing to test for leaks thoroughly after installation
To ensure a successful faucet installation, gather these essential tools and materials:
- Adjustable wrench and basin wrench
- Plumber’s tape and putty
- Silicone sealant
- Screwdriver set
- Bucket and towels for water management
- Flashlight for better visibility in tight spaces
Remember, patience is key when installing a kitchen faucet. Take your time to ensure each step is completed correctly, and don’t hesitate to consult the manufacturer’s instructions or seek professional help if you encounter any difficulties. A properly installed faucet not only functions flawlessly but also enhances the overall aesthetics and value of your kitchen.
