A garden tub can be a luxurious addition to any bathroom. With its contoured, freestanding design often set into a customized tile surround, it resembles a miniature spa tucked into the comfort of home.
Yet as aesthetically pleasing as these tubs may be, one essential accessory is still required to complete the experience: a shower curtain. Without one, obtrusive water splashes outside the tub and privacy goes out the window.
Introduction
Selecting the optimal garden tub shower curtain setup involves careful measurements, coordinating shapes, and proper installation. With an array of options for mounting types, sizes, materials and more, it can definitely feel overwhelming.
Not to worry – this guide breaks the process down into four straightforward steps:
- Choose a Quality Garden Tub Shower Curtain Rod
- Precisely Measure Your Garden Tub Area
- Match Shower Curtains to Rod Shape and Size
- Install Your Shower Curtain Rod Securely
Follow these simple actions, and you’ll have a fully functioning shower curtain around your garden tub in no time. No frustration or confusion required!
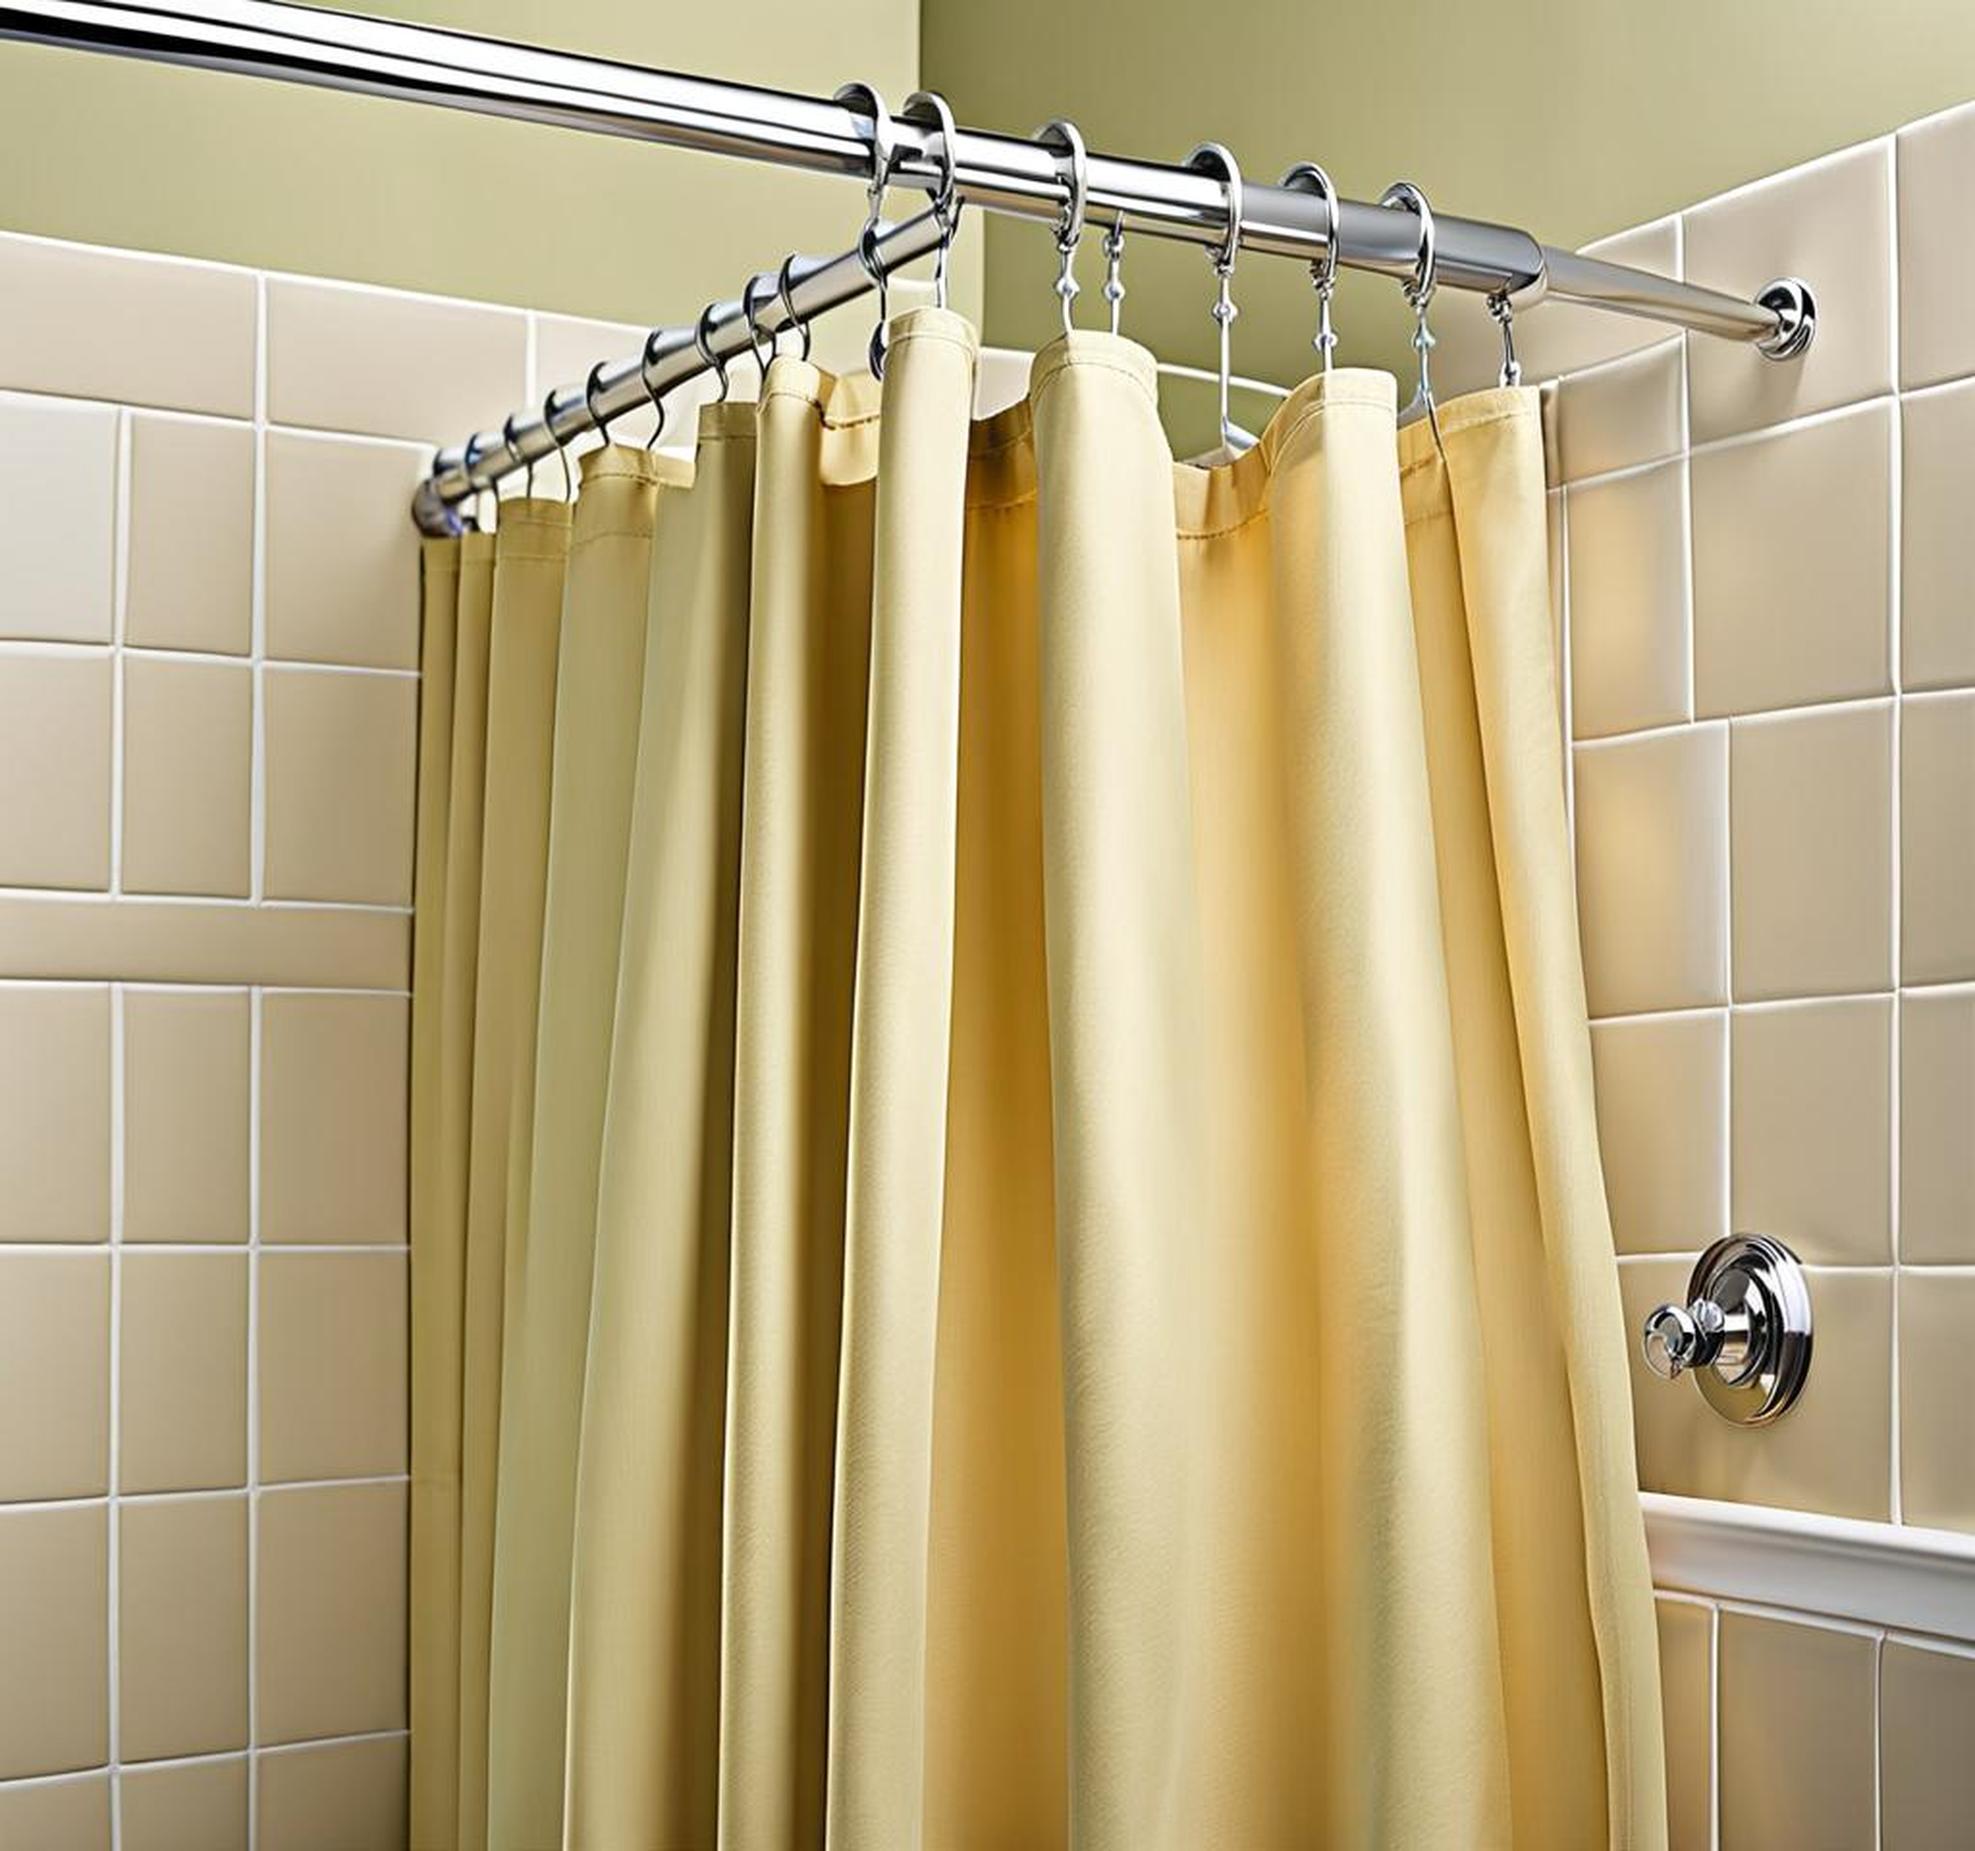
Step 1: Choose a Quality Garden Tub Shower Curtain Rod
The first step involves selecting the actual rod that will hold up your future shower curtain. As the foundation of the entire setup, durability and dimensions are critical factors.
When browsing the many rod styles available, keep the following aspects in mind:
Consider Mounting Type: Wall, Tension, or Ceiling
Shower curtain rods come in three main installation types:
- Wall-Mounted – Installed into wall studs with screws drilled directly into drywall or tile.
- Tension – Spring-loaded rods that push against walls without needing actual affixing into the wall.
- Ceiling-Mounted – Attached to ceiling rafters and hang down over the tub area.
Wall mounts offer the greatest stability but require some construction work to set up. Tension rods are convenient since they don’t necessitate drilling and can be shifted to other locations.
Meanwhile, ceiling mounts stay completely out of the way and work especially well if your garden tub is not actually backed up against any walls. Assess your bathroom layout and tub proximity to surfaces when deciding on mounting style.
Select Optimal Length and Shape
Next, determine the particular length and shape requirements based on your tub:
- Round Tubs – Circular diameter size needed. Measure across the center of the basin.
- Oval Tubs – Two measurements required: width at widest endpoint and length at longest.
- Rectangle Tubs – Simply measure along the length and width of tub edges.
- Square Tubs – All sides are equal, so measure just one edge’s length.
Carefully quantify the exact dimensions of your unique garden tub style, accounting for any curves or irregular angles.
Determine Necessary Adjustability
Does your shower curtain rod need to extend or contract to properly hug the contours of your garden tub?
If installing into a finished alcove, then a standard stationary rod may suffice. But for the typical freestanding garden tub design, go for an adjustable tension rod that can custom-fit to the exact proportions.
Measure how much the rod must stretch from the minimum size to maximum expanded length. This ensures it can lock into proper position across your tub width when set up.
Compare Different Rod Materials
Shower rods come in a spectrum of materials like aluminum, stainless steel, and plastic. Consider aspects like:
- Aluminum – Affordable, lightweight, and rust-resistant.
- Stainless Steel – Sleek shine but costs more and still may corrode over time.
- Plastic – Cheap but feels flimsy and lacks durability.
Look for aluminum shower rods with protective anti-rust treatments or coatings to prevent corrosion from moisture and humidity. Plastic telescopic rods often succumb to mildew and cracks.
Step 2: Precisely Measure Your Garden Tub Area
Selecting a properly sized shower rod is meaningless if you don’t first quantify the exact spatial parameters it must fit within.
Grab a tape measure, pad and pencil to carefully gauge the following:
Gather Appropriate Measuring Tools
To record the shower area dimensions accurately, gather these supplies:
- Measuring tape
- Pencil and paper
- Measuring square and/or level
This equipment ensures you capture precise linear measurements along with properly checking right angles on walls and ceiling.
Measure Exact Garden Tub Dimensions
Refer back to the shape considerations from Step 1. Quantify the particular length, width, diameter or circumference metrics unique to your tub style.
Note the vertical height from the tub lip to ceiling as well. For oval or rounded structures, consider taking multiple measurements at different points to average overall proportions if the curvature varies.
Map Out Rod Mounting Locations
Whether drilling wall anchors or positioning tension spring ends, mark the exact spots for installing rod hardware with pencil.
Accounting for ceiling beams or tiles around the area prevents encountering obstacles once you begin mounting.
Add Additional Inches for Curtain Slack
When taking tub measurements, record the precise distance needed to just reach from end to end. But shower curtains require extra overlapping slack so they can slide smoothly and fully enclose.
For standard 60-inch tub lengths, plan for roughly 70-72 inch curtains. The surplus 12 inches of width provides sufficient overlap past the tub edges.
Step 3: Match Shower Curtains to Rod Shape and Size
With accurate spatial metrics and mounting locations defined, now select cosmetic details like color and pattern to complement your garden tub style.
Select Same Shape Curtain as Rod
First and foremost – make sure to choose a shower curtain with identical contours and orientation as the rod shape from Step 1:
- Round Rod = Round Shower Curtain
- Straight Rod = Straight Shower Curtain
If installing a curved rod around an oval garden tub, for example, the shower curtain must feature corresponding oval dimensions to fully enclose the space.
Choose Proper Curtain Dimensions
Use thenumbered measurements recorded earlier to pick shower curtain lengths and widths accommodating enough slack as described.
Standard sizes like 70-72 inches wide work for most 60 inch rectangular tubs. Or select custom alternatives like an 80-inch diameter circle curtain for larger round hot tubs.
Consider Designs, Fabrics and Other Features
With the critical size and shape criteria met, can explore additional options:
- Colors/Patterns : Solid white, striking floral prints, calming blues
- Fabrics : Cotton, polyester, microfiber, blends
- Technology : Anti-mold, stain guard, water repellent nano coatings, etc.
Narrow down preferences based on decorative taste, ease of maintenance, durability and functionality.
Step 4: Install Your Shower Curtain Rod Securely
You have selected the perfect shower curtain rod and coordinating curtain dimensions. Now focus on proper installation.
Prepare Your Mounting Locations
Use the premarked pencil lines from Step 2 to prepare rod anchor points. Drill pilot holes if screwing directly into tiles or walls. Or thoroughly clean and dry tension rod contact locations.
Follow Precise Step-by-Step Instructions
Methodically mount individual hardware pieces by correctly securing into studs or adhering to ceiling beams.
Refer to manufacturer guidelines for tension spring alignment procedures or weight capacities.
Check Rod Stability and Curtain Functionality
Before declaring project completion, validate effectiveness by:
- Gently applying pressure along entire rod length checking for looseness.
- Gliding shower curtain side to side ensuring smooth operation without snags.
Adjust tension or re-mount any wobbly sections right away to prevent future instability issues leading to collapsing rods and gravity failures.
With the heavy lifting complete, enjoying a rejuvenating shower or bath inside your garden tub sanctuary becomes pure bliss. No more awkwardly angling around the curved basin or enduring drafts of cold air.
Follow this comprehensive 4-step process to design a custom shower curtain installation catered to your unique garden tub.
By dedicating time to precise measurements, durable product selection and secure mounting tactics, you’ll have a cohesive setup enhancing comfort and aesthetics for years of consistent performance.
