Discovering how to build a floating dock with PVC pipe can revolutionize your waterfront experience. This innovative approach combines affordability with durability, making it an ideal DIY project for lakeside property owners or water enthusiasts. PVC floating docks offer a versatile solution that adapts to changing water levels while providing a stable platform for various activities. By following this comprehensive guide, you’ll learn the ins and outs of PVC pipe dock construction, from initial planning to final installation, ensuring a successful and satisfying build.
Understanding PVC Floating Docks: Benefits and Materials
PVC floating docks have gained popularity due to their numerous advantages over traditional fixed docks. The primary benefit lies in their ability to rise and fall with water levels, eliminating the need for constant adjustments. This feature is particularly valuable in areas with significant water level fluctuations or tidal changes.
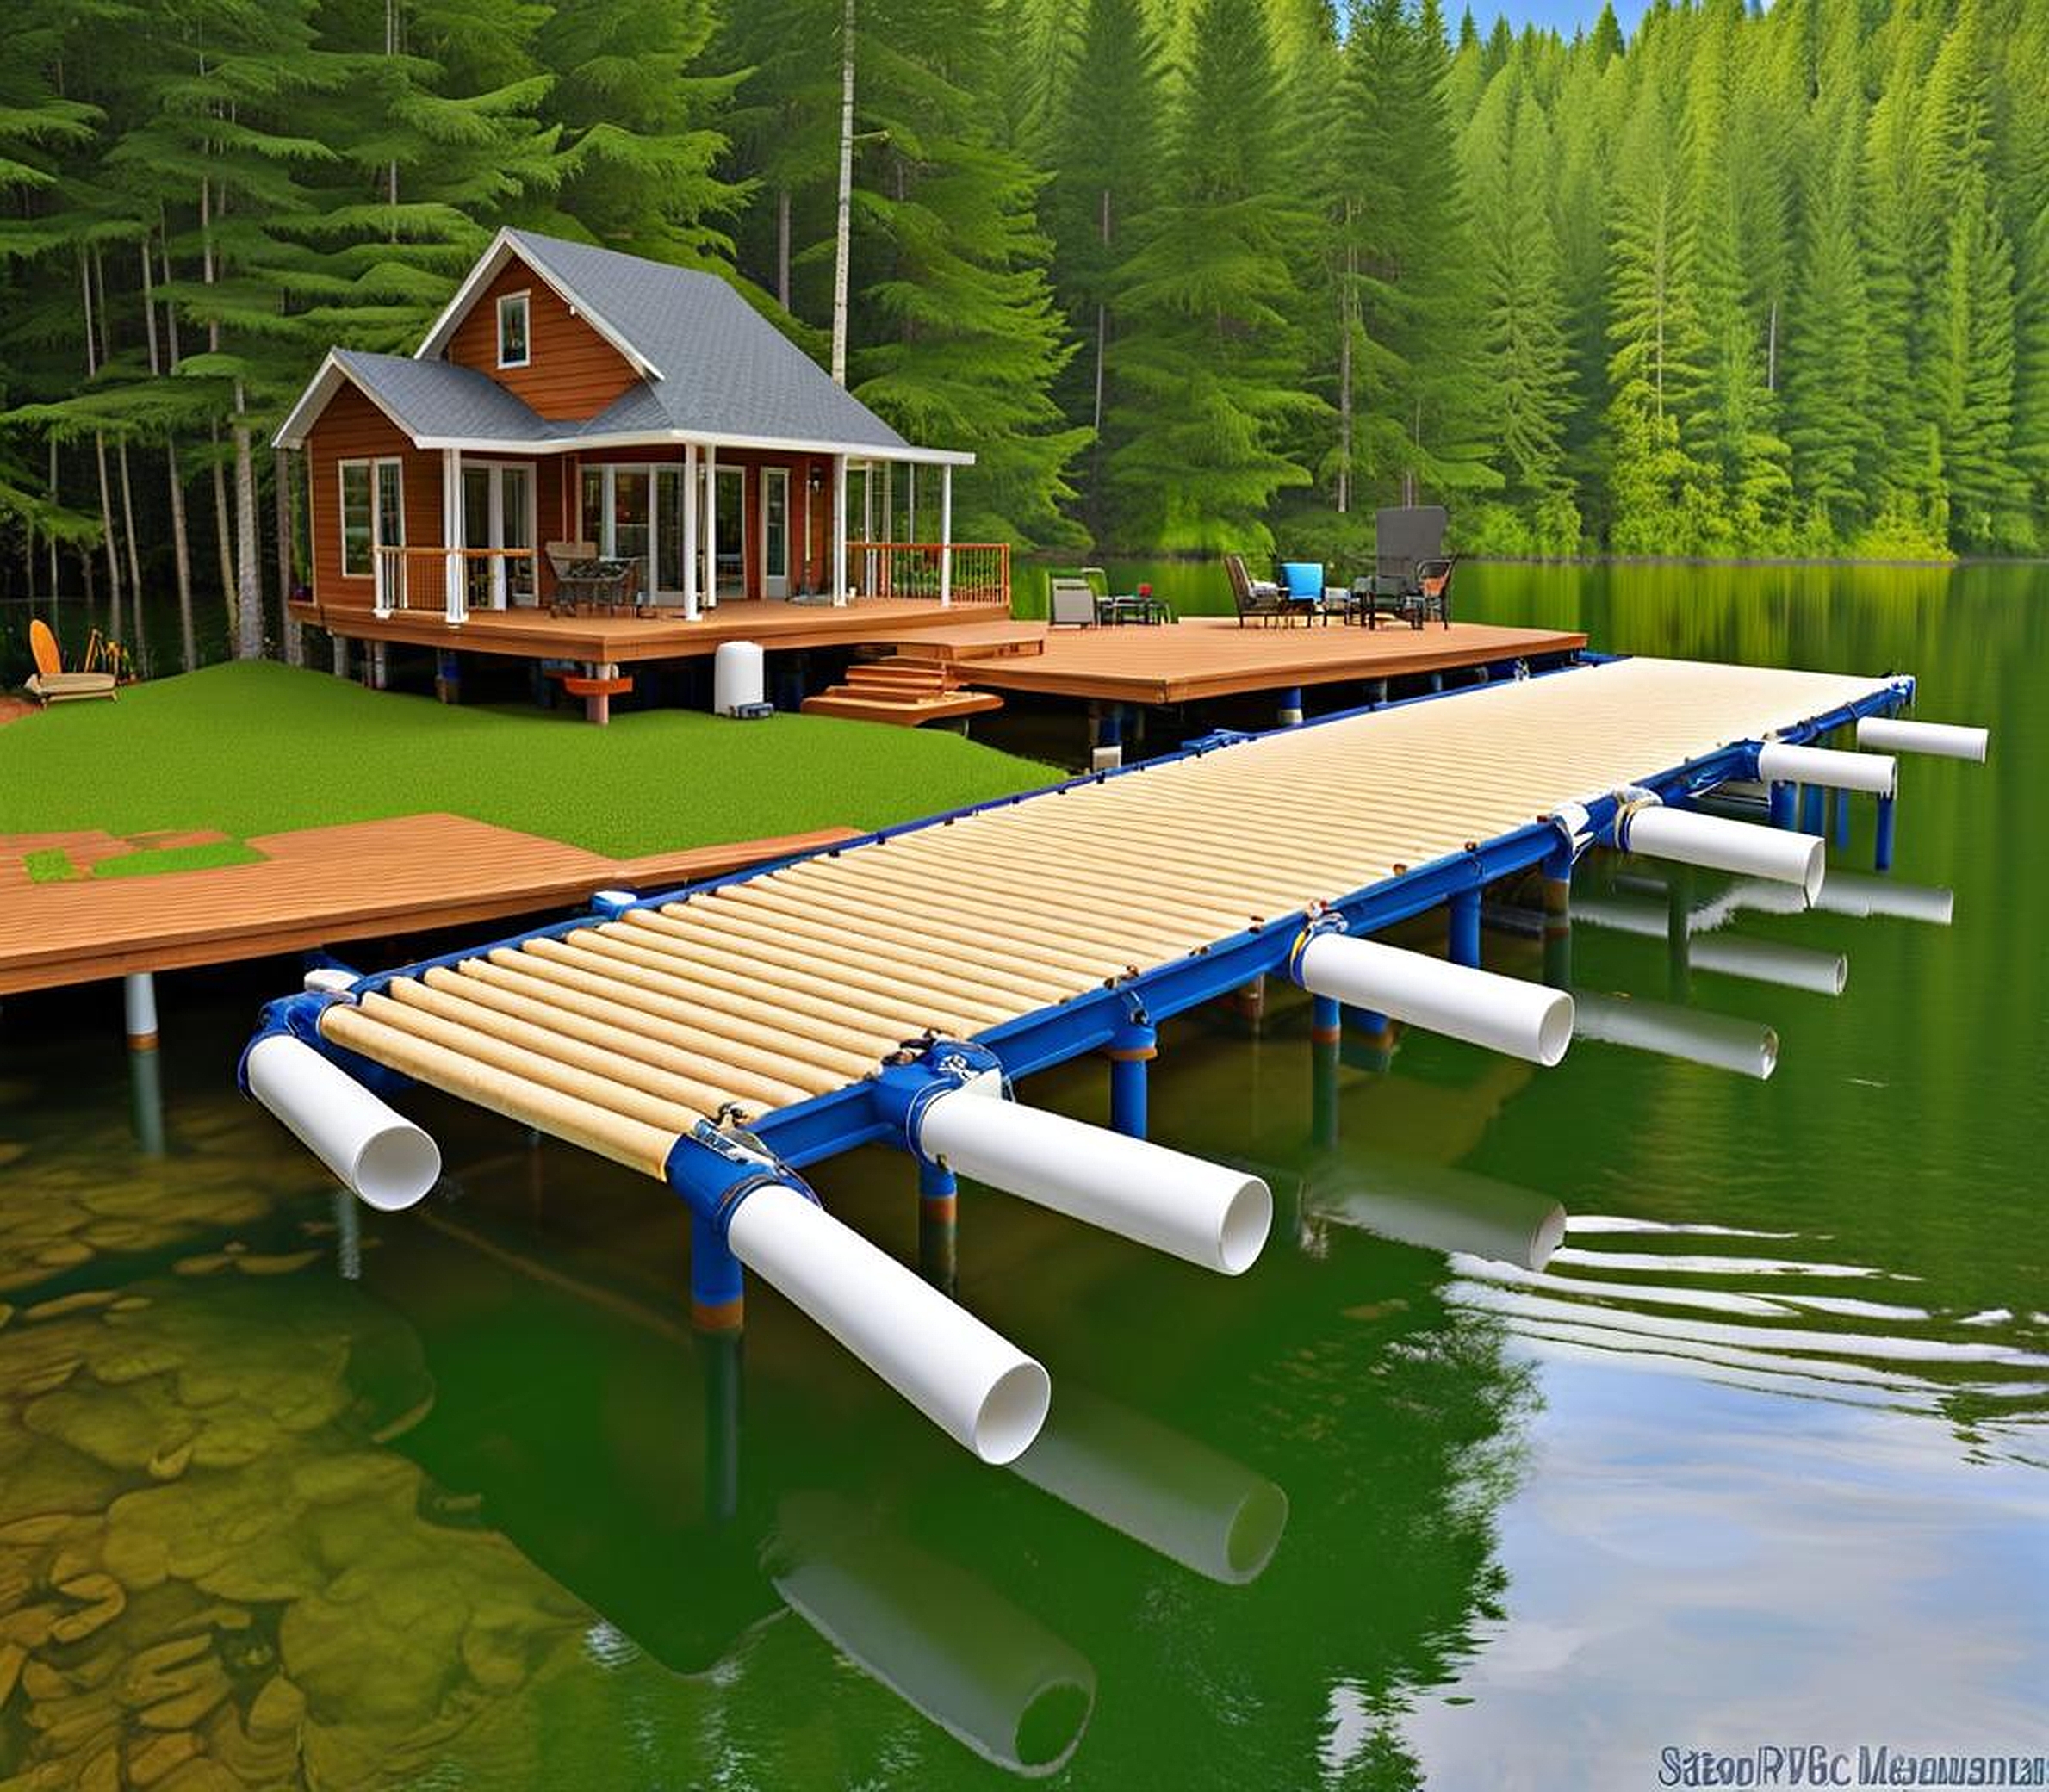
When it comes to floating dock installation with PVC, the materials used play a crucial role in the dock’s performance and longevity. PVC pipe, the cornerstone of this construction method, offers excellent buoyancy and resistance to corrosion. It’s lightweight yet sturdy, making it ideal for DIY projects. The PVC pipe dock design typically incorporates the following materials:
- PVC pipes (4-inch diameter is common for most applications)
- PVC fittings (T-joints, elbows, and caps)
- PVC primer and cement
- Pressure-treated lumber for decking
- Stainless steel screws and fasteners
- Foam flotation (optional for additional buoyancy)
The beauty of PVC pipe dock building lies in its simplicity and cost-effectiveness. Compared to traditional dock materials like aluminum or wood, PVC is significantly less expensive. This cost advantage doesn’t come at the expense of durability, though. PVC is resistant to rot, insects, and UV radiation, ensuring your floating dock will stand the test of time with proper maintenance.
Another compelling reason to consider a DIY PVC floating dock is its customizability. You can easily tailor the size and shape of your dock to fit your specific needs and space constraints. Whether you’re looking to create a small fishing platform or a larger recreational area, the versatility of PVC pipe allows for endless design possibilities.
Planning Your PVC Floating Dock Project
Before diving into the construction phase, proper planning is essential for a successful PVC floating dock project. This stage involves several key considerations that will influence your dock’s design, functionality, and compliance with local regulations.
First and foremost, determine the purpose of your dock. Will it primarily serve as a swimming platform, a boat tie-up, or a fishing spot? Your intended use will guide decisions on size, shape, and additional features. For instance, a dock meant for boat access might require a larger surface area and stronger reinforcement than one designed solely for sunbathing.
Next, assess your waterfront area. Consider factors such as water depth, bottom conditions, and typical wave action. These elements will impact your floating dock PVC specifications, including the number and size of flotation pipes needed. In areas with rocky bottoms or strong currents, you might need to incorporate additional stabilizing features into your design.
When it comes to sizing your dock, bigger isn’t always better. While it’s tempting to maximize your water real estate, remember that larger docks require more materials and may be more challenging to manage. A good rule of thumb is to design your dock to be just large enough to comfortably accommodate your intended activities.
An often overlooked aspect of planning is researching local regulations. Many areas have specific rules governing dock construction, including size limitations, setback requirements, and environmental considerations. Before proceeding with your build, check with your local zoning office or waterway management authority to ensure your plans comply with all applicable regulations.
Once you’ve outlined your basic design, it’s time to calculate materials. This step is crucial for estimating your floating dock PVC cost and ensuring you have everything on hand before starting construction. Here’s a basic formula to help you determine the amount of PVC pipe needed:
| Dock Size (ft2) | PVC Pipe Length (ft) |
|---|---|
| Up to 64 | 96-128 |
| 65-100 | 160-200 |
| 101-150 | 240-300 |
Remember to factor in additional materials like decking boards, fasteners, and PVC fittings. It’s always wise to purchase slightly more than your calculations suggest to account for any mistakes or unforeseen needs during construction.
Step-by-Step Guide to Building a PVC Floating Dock
Now that we’ve laid the groundwork, let’s dive into the nitty-gritty of PVC pipe dock construction. This step-by-step guide will walk you through the process of building your own floating dock, from assembling the frame to adding the final touches.
Step 1: Prepare Your Materials
Begin by gathering all your materials and tools. You’ll need PVC pipes, fittings, primer, cement, decking boards, screws, and tools like a saw, drill, and measuring tape. Lay everything out in a clean, dry workspace.
Step 2: Cut and Assemble the PVC Frame
Using your predetermined measurements, cut the PVC pipes to length. Remember to account for the depth of the fittings when calculating your cuts. Once all pieces are cut, dry-fit your frame to ensure everything aligns correctly. This is your chance to make any necessary adjustments before permanent assembly.
When you’re satisfied with the fit, it’s time to cement the pieces together. Apply PVC primer to both the pipe and fitting surfaces, then quickly follow with PVC cement. Push the pieces together firmly and hold for about 30 seconds to ensure a strong bond. Work systematically around your frame, allowing each joint to set before moving on to the next.
Step 3: Add Flotation
The PVC pipes themselves provide significant buoyancy, but for added stability and weight capacity, you might choose to incorporate additional flotation. Foam billets or pool noodles can be inserted into the PVC pipes before sealing the ends. This step is optional but can be beneficial for larger docks or those intended to support heavier loads.
Step 4: Seal the Pipes
Once your frame is assembled and any internal flotation is added, it’s time to seal the pipes. Apply PVC caps to all open ends of the pipes, using the same priming and cementing process as before. Ensure a watertight seal to maintain the buoyancy of your dock.
Step 5: Attach Decking Supports
To create a stable surface for your decking, you’ll need to attach supports across your PVC frame. These can be made from pressure-treated lumber or additional PVC pipes, depending on your design preferences. Secure these supports to your frame using stainless steel fasteners or PVC-compatible adhesive.
Step 6: Install Decking
With your supports in place, you can now add the decking. Cut your decking boards to fit flush across the frame, leaving small gaps between boards for drainage. Secure each board to the supports using stainless steel screws, ensuring they’re countersunk to prevent snagging or tripping hazards.
Step 7: Add Finishing Touches
Consider adding features like cleats for tying up boats, ladders for easy water access, or bumpers to protect the dock and watercraft. These additions can greatly enhance the functionality and safety of your floating dock.
Step 8: Test and Launch
Before launching your dock, perform a final inspection to ensure all components are secure and sealed. When you’re ready, gently place your dock in the water. It should float level and stable. If you notice any imbalances, you may need to adjust your flotation or weight distribution.
By following these steps, you’ll have successfully completed your DIY PVC floating dock project. Remember, the key to a successful build lies in careful planning, precise execution, and attention to detail throughout the process.
Congratulations on building your PVC floating dock! To ensure its longevity and safe use, proper maintenance and safety considerations are crucial. Let’s explore some key aspects of keeping your dock in top condition year after year.
Regular Inspections:
Implement a routine inspection schedule, ideally checking your dock thoroughly at least twice a year. Look for signs of wear, loose fittings, or damage to the PVC pipes or decking. Pay special attention to the waterline area, as this is where most wear occurs. Early detection of issues can prevent more significant problems down the line.
Cleaning:
Keep your dock clean to prevent the buildup of algae, mold, or mildew, which can make the surface slippery and potentially damage the materials over time. A simple solution of mild soap and water, along with a soft brush, is usually sufficient for regular cleaning. For tougher stains, you might need a specialized PVC cleaner, but always test it on a small, inconspicuous area first.
UV Protection:
While PVC is naturally resistant to UV radiation, prolonged exposure can lead to fading and brittleness over time. Consider applying a UV-resistant coating to your dock every few years to enhance its protection against sun damage. This is particularly important if your dock is in a location with intense sunlight.
Winter Storage:
If you live in an area with harsh winters, it’s advisable to remove your floating dock from the water during the off-season. Store it in a dry, covered area to protect it from ice damage and extreme weather conditions. If removal isn’t feasible, consider using de-icers around the dock to prevent ice formation.
Safety Features:
Enhance the safety of your dock by adding non-slip surfaces to the decking. This can be in the form of textured paint or adhesive strips. Install handrails if your dock is used frequently by children or elderly individuals. Additionally, consider attaching reflective markers or solar-powered lights to improve visibility during low-light conditions.
Load Management:
Be mindful of the weight capacity of your dock. While PVC floating docks are sturdy, they do have limits. Avoid overloading your dock with too many people or heavy equipment. If you find that your current dock isn’t meeting your capacity needs, consider expanding it or reinforcing it with additional flotation.
Anchor System:
Ensure your dock’s anchor system is secure and functioning properly. Regularly check mooring lines, chains, or poles for signs of wear or damage. In areas with significant water level fluctuations, you might need to adjust your anchoring system seasonally.
Environmental Considerations:
Be aware of the environmental impact of your dock. Avoid using harmful chemicals for cleaning or maintenance that could leach into the water. If you notice any pieces of your dock breaking off, remove them promptly to prevent pollution and potential harm to aquatic life.
By adhering to these maintenance and safety guidelines, you’ll not only extend the life of your PVC floating dock but also ensure it remains a safe and enjoyable addition to your waterfront property. Remember, a well-maintained dock is a lasting dock, providing years of reliable service and water-based fun.
Building a floating dock with PVC pipe is an achievable and rewarding DIY project. With careful planning, proper construction techniques, and regular maintenance, your PVC floating dock will serve as a durable and versatile addition to your waterfront property. Whether you’re using it for leisure, fishing, or boat access, the satisfaction of creating your own custom dock will enhance your enjoyment of the water for years to come. So roll up your sleeves, gather your materials, and get ready to transform your waterfront experience with your very own PVC floating dock!
