A cushion with ties is a good way to personalize your bedroom decor. This versatile addition transforms ordinary beds into cozy retreats, combining functionality with aesthetic appeal. By creating your own headboard cushion, you’ll have the freedom to choose materials, colors, and designs that perfectly complement your space. Let’s dive into the world of DIY headboard cushions and explore how you can enhance your bedroom’s ambiance with this practical and stylish project.
Understanding Headboard Cushions with Ties
Headboard cushions with ties have gained popularity for their versatility and comfort. These cushions serve as an alternative to traditional wooden or metal headboards, offering a softer, more customizable option for bedroom decor. The primary purpose of a headboard cushion is to provide a comfortable backrest for reading or watching TV in bed, while also adding a decorative element to the room.
The use of ties for attachment is a key feature of these cushions. Headboard cushion ties allow for easy installation and removal, making them a practical choice for those who like to change their bedroom’s look frequently. These ties can be made from various materials, such as fabric strips, ribbons, or even leather straps, depending on the desired aesthetic.
There are several types of headboard cushions with ties to choose from:
- Removable headboard pillows: These are individual cushions that can be easily attached and detached from the bed frame.
- Adjustable headboard cushions: These allow you to modify the height or angle of the cushion for optimal comfort.
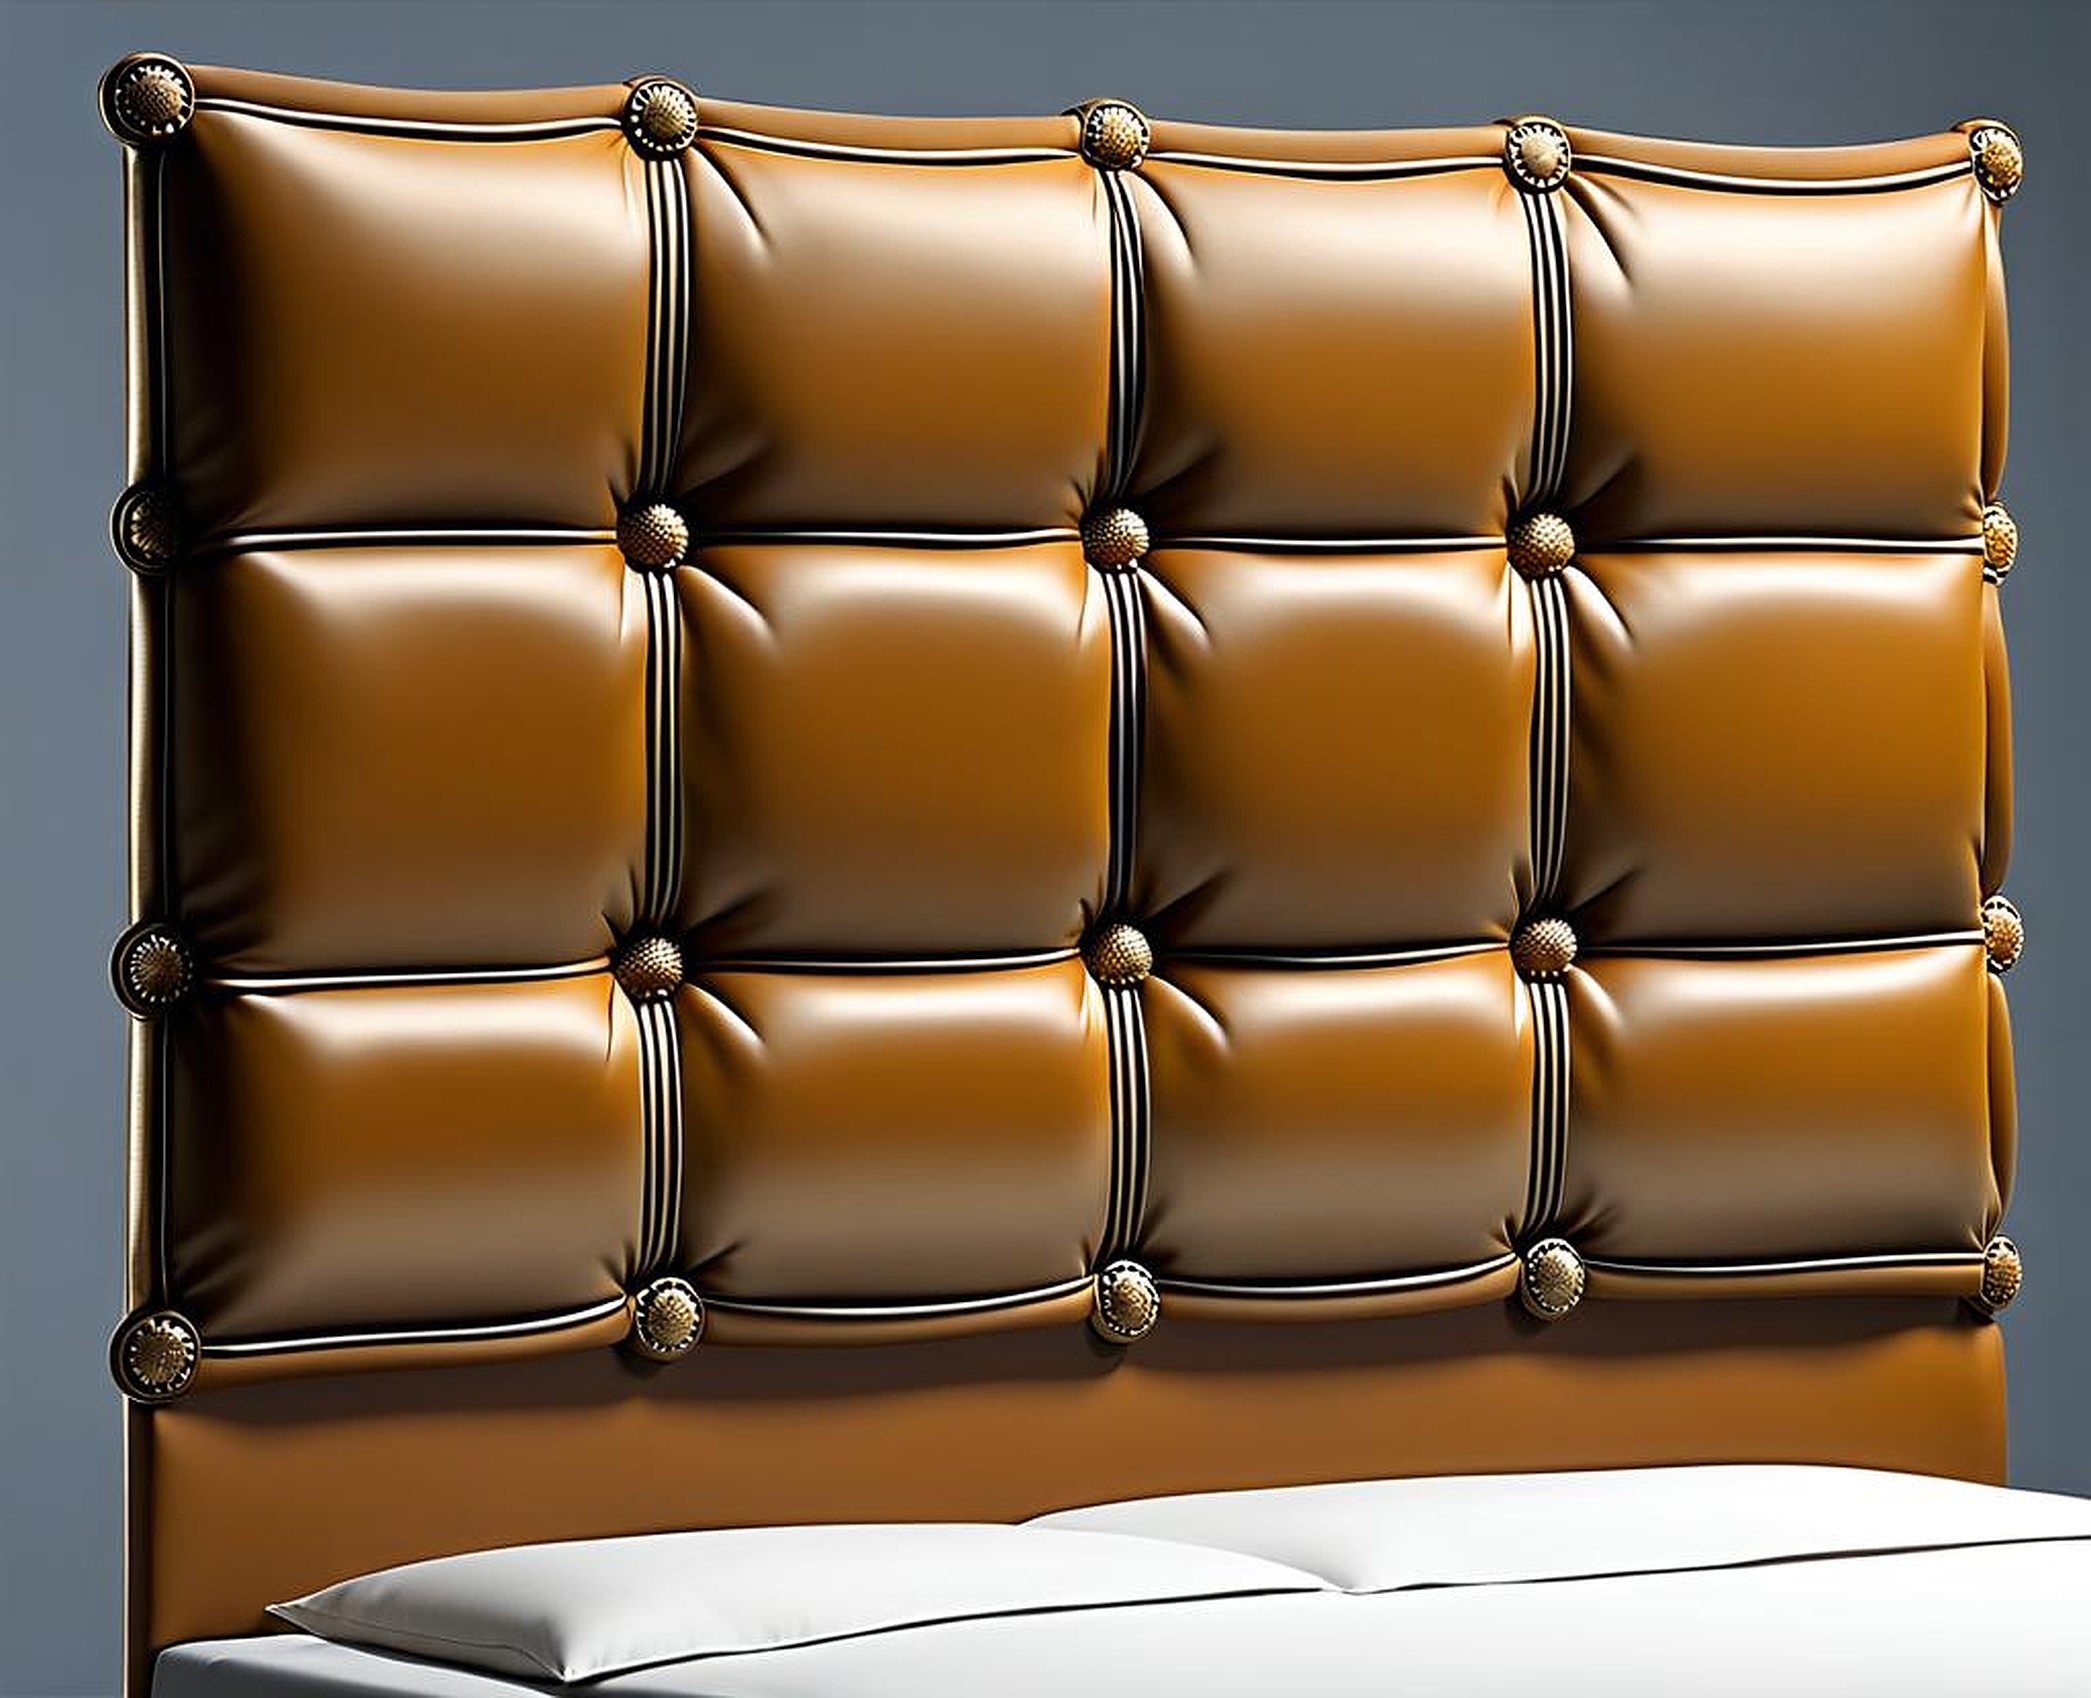
- Tufted headboard cushions: These feature a classic, luxurious look with deep button tufting for added elegance.
When it comes to materials, the options are vast. Popular choices include:
- Linen headboard cushions: These offer a light, breathable option with a casual, relaxed look.
- Upholstered headboard ties: These provide a more structured appearance and can be made with various fabrics to match your decor.
- Designer headboard ties: For those looking for unique patterns or high-end materials to make a statement.
The benefits of using headboard cushions with ties are numerous. They provide a soft barrier between you and the wall, reducing noise and improving insulation. Additionally, they’re often more affordable than traditional headboards and offer greater flexibility in terms of design and placement. For renters or those who frequently redecorate, these cushions are an ideal solution as they can be easily changed or moved without causing damage to walls.
DIY Guide: Creating Your Own Headboard Cushion with Ties
Embarking on the journey of creating your own headboard cushion with ties can be an exciting and rewarding experience. This DIY project allows you to tailor every aspect of your headboard to your specific needs and style preferences. Let’s break down the process into manageable steps to ensure your success.
First, measuring and planning your headboard cushion is crucial. You’ll need to determine the width of your bed and decide how high you want the cushion to extend. A good rule of thumb is to make the cushion slightly wider than your mattress and about 24-36 inches high, depending on your preference. Don’t forget to account for the thickness of the cushion, which typically ranges from 2-4 inches.
Selecting appropriate materials is the next vital step. You’ll need:
- Fabric: Choose a durable upholstery fabric that complements your bedroom decor.
- Foam: High-density foam provides the best support and longevity.
- Batting: This adds a layer of softness and smooths out the foam’s edges.
- Ties: Sturdy fabric strips or ribbons for attaching the cushion.
Now, let’s move on to the step-by-step instructions for cutting and assembling the cushion:
- Cut your foam to the desired size using an electric carving knife or a sharp utility knife.
- Wrap the foam in batting, securing it with spray adhesive if needed.
- Cut your fabric, allowing an extra 3-4 inches on all sides for wrapping and securing.
- Place the foam and batting on the wrong side of the fabric, centering it carefully.
- Fold the fabric over the foam, starting with the long sides, and secure with pins or staples.
- For the corners, create neat folds and secure them as well.
Adding ties to your headboard cushion is a crucial step that allows for easy attachment and removal. For a button tie headboard look, you can create fabric-covered buttons and attach them to the front of the cushion, with corresponding loops on the back for tying. Alternatively, for simpler headboard tie backs, sew sturdy fabric strips at regular intervals along the back of the cushion.
If you’re aiming for a tufted headboard cushion, you’ll need to plan your tufting pattern before assembling the cushion. Mark the tufting points on your foam, drill small holes through the foam at these points, and use upholstery needles and buttons to create the tufted effect as you assemble the cushion.
Attaching and Securing Your Headboard Cushion
Once you’ve created your beautiful headboard cushion, the next step is to attach and secure it properly. There are several methods you can use, depending on your preference and the design of your bed frame.
The most common method involves using headboard cushion ties. These are typically fabric strips or ribbons that you’ve sewn onto the back of your cushion during the creation process. To attach the cushion, you’ll need to tie these around the vertical bars or slats of your bed frame. If your bed doesn’t have suitable attachment points, you can install D-rings or hooks on the wall behind your bed to serve as anchor points for your ties.
For a more streamlined look, you might opt for a headboard tie back system. This involves creating a large pocket or sleeve across the back of your cushion, through which you can slide a wooden plank or metal bar. This bar can then be secured to your wall or bed frame, holding the cushion in place without visible ties.
An alternative attachment option is using headboard cushions with velcro. This method involves attaching one side of a heavy-duty velcro strip to your bed frame or wall, and the other side to the back of your cushion. This allows for easy removal and reattachment, which is particularly useful for cleaning or changing your bedding.
When it comes to proper placement of ties for optimal support, consider the following tips:
- Place ties at the top corners and center of the cushion for even distribution of weight.
- If your cushion is particularly tall or heavy, add additional ties along the sides and bottom for extra security.
- Ensure that ties are long enough to reach around your bed frame or to your wall anchors with ease.
To ensure a secure fit for various headboard styles, you may need to get creative. For instance, if you have a metal bed frame with no vertical bars, you could create a simple wooden frame that attaches to your bed and provides anchor points for your cushion ties. For upholstered headboard ties, you might need to use a combination of ties and velcro to achieve a seamless look.
One of the greatest advantages of creating your own headboard cushion with ties is the ability to customize it to your heart’s content. Let’s explore some design options and maintenance tips to keep your headboard looking fresh and stylish for years to come.
Headboard pillow covers offer an excellent way to change up your bedroom’s look without replacing the entire cushion. You can create removable covers in various fabrics and patterns, allowing you to switch between different styles seasonally or as your tastes change. When designing these covers, consider incorporating elements like piping, buttons, or contrasting fabrics to add visual interest.
For those who love a more dramatic look, creating a trough back headboard can add depth and sophistication to your bedroom. This style features a recessed center section, which can be accentuated with additional pillows or lighting. To achieve this look, you’ll need to create a frame with a recessed center before adding your cushioning and fabric.
Comfort headboard designs focus on maximizing relaxation and support. Consider incorporating features like:
- Memory foam inserts for extra cushioning
- Adjustable sections that can be positioned at different angles
- Built-in reading lights or USB charging ports for convenience
Maintaining your headboard cushion is crucial for its longevity. Here are some cleaning and care tips for different cushion materials:
- Linen headboard cushions: Spot clean with a mild detergent and water solution. For deeper cleaning, use a steam cleaner or have them professionally cleaned.
- Upholstered headboard ties: Vacuum regularly to remove dust and debris. Use fabric protector spray to guard against stains.
- Velvet or suede cushions: Use a soft brush to maintain the nap and remove surface dirt. Avoid water-based cleaning methods.
Over time, you may need to replace or update the ties on your headboard cushion. This is a simple process that involves removing the old ties and sewing on new ones. Choose durable materials like grosgrain ribbon or sturdy fabric strips to ensure longevity.
By following these customization and maintenance tips, you can keep your DIY headboard cushion with ties looking fresh and stylish for years to come. Remember, the beauty of a custom headboard lies in its ability to evolve with your tastes and needs, so don’t be afraid to experiment with new designs and materials as your style evolves.
